Steveh1's build
Hi all
Im starting a roadster/ satern mx5 build I have the book on order just waiting anxiously for it to arrive but in the mean time ive to do some prep work like cleaning the shed and painting the walls and the floors. Also ineed a heavier power supply in the shed to power the welder so that will keep me busy for a few weeks. Are the mx5 plans in the book or do i need to use saturn plans to complement this. Are the wishbone tubes a standard size pipe or is it easier to jus order them from ebay or the likes. Also any tips or advice frim the pros. Are there any builder in ireland Thanks Steve |
Hi and welcome to the mad house :) If going the book / saturn way then you need to use the book and the Saturn together along with the list of corrections.
Alternatively speak to Phil at talon motorsport as he uses a new diff case to mount as per the sierra build , it replaces the long diff arms, I hard mounted my diff with the long arms just replaced the rubber mounts with solid. Read any of the build threads and pick ideas , pitfalls etc from those, feel free to look over my build photos. Don't forget we have all made mistakes and had problems so don't be afraid to ask any questions no matter how small. Good luck, Gary |
Welcome to the house of fun, remember the only stupid question is the one you didn't ask, and be careful of who you trade with on ebay, there are a few not so good suppliers for the haynes on there, Rogue engineering being one, I speak from experience
Arfon |
i am building a mx5 based roadster at the minute, chassis about ready for paint, using talons flatpack and wishbones, have a look at my build on roadster builders
|
Welcome Steve...looking forward to watching your build evolve...ask away when stuck, we all can usually suggest a solution to almost any issue that may arise
|
Thanks for the warm welcomes
The idea has been a the back of my mind for the last 15 years since i got ron campions book. So no time like the present. Can anybody reccommended reputable e bay sellers. Also do people weld up the open ends of the square bar on the chassis |
Quote:
|
Hi and welcome!
Quote:
http://vouchtroadster.blogspot.se/20...-end-caps.html Not my idea, but I tried it and it is very easy and gives a very nice result. Good luck with your build :) |
Hi SteveH1 Welcome
I bought plastic square caps which knock into the frame tight you can remove and wax oil etc in the future and then replace/renew them etc. Regards Mick. |
Quote:
No doubt ill be back with loads of questions in the future but for the moment ill plug away with the cleaning and getting the place painted. |
Hi All
My book came today :) Just had a quick flick through but doesnt seen to be much about the chassis table Like how many legs did people put on there bench. And what height did people build their bench at. Thanks Stephen |
Hi I built my table about 900mm high and 4 legs make the top from the thickest sheet of ply you can get and still brace the underside to eliminate the chance of it sagging time spent bracing and getting it right will save massive headaches later
good luck |
Good luck mate!
|
Pick your wood carefully as getting a straight piece will save you time planing and truing. 1" thick MDF as a table top is my recommendation but don't get it wet. Also use lots of wood glue.
|
I'd be tempted to keep your eyes open for a steel tubular table or something similar and clamp the wood on top - alternatively make the top of the table only and mount it on steel trestles.
The reason for this is that once the chassis is made and tacked strongly together it is very useful to be able to get at it from all angles at a reasonable height. Here's my build table (and the project before my Roadster):   |
i went to a local salvage place dealing in office furniture, i bought three school tables like you would find at primary school, about 4'x2' , they have 25mm box section legs then i bolted 4x2 timber along both sides then sheeted with ply over the top. now i am further on i took out the middle table for working on the engine area and the front and rear is still supported on the other two tables
|
So i got my table built a few weeks ago and decided to put adjustable legs on it as the floor in my shed is rubbish
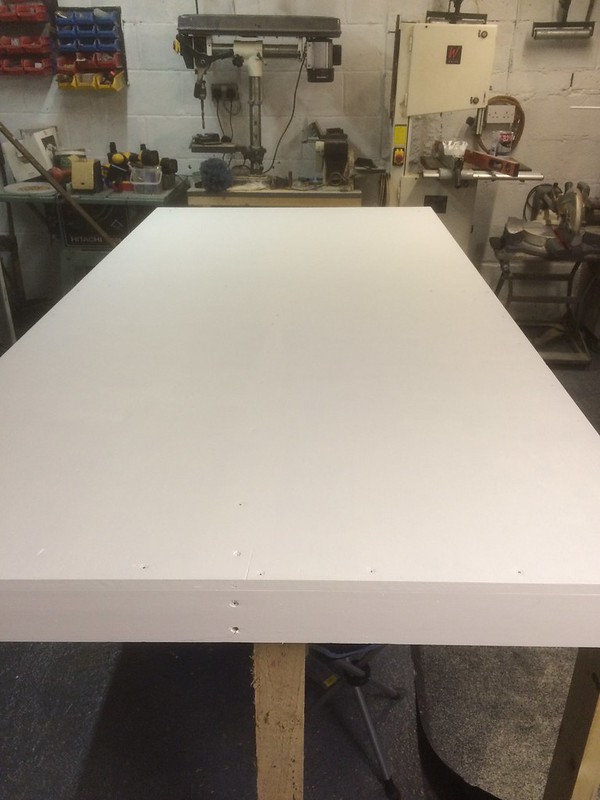 Untitled by stephen harborne, on Flickr Untitled by stephen harborne, on Flickr Untitled by stephen harborne, on Flickr Untitled by stephen harborne, on Flickr |
I got my welder during the week its a Swp redline 210
I got it as a package including gas and wire for 750 euro. i assembled it and it seemed a bit cheap like typical chinese stuff but to my surprise it welded really well 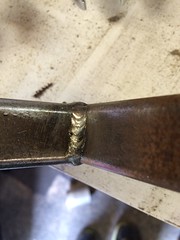 First welds by stephen harborne, on Flickr First welds by stephen harborne, on FlickrThe first welds 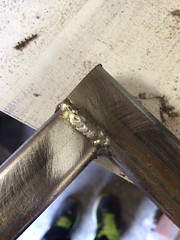 First welds by stephen harborne, on Flickr First welds by stephen harborne, on Flickr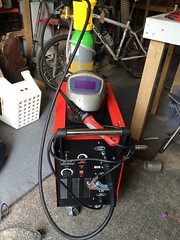 Welder by stephen harborne, on Flickr Welder by stephen harborne, on FlickrThe welder |
So i havnt got my steel yet i will be ordering it tomorrow
But i had some 3 inch angle iron so i started to make a bench for my vice 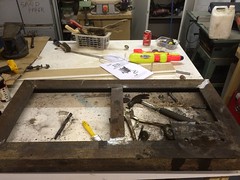 Vice and bench by stephen harborne, on Flickr Vice and bench by stephen harborne, on FlickrThen i stripped down the vice as its old and looked a bit worse for wear i then took a wire brush to it before 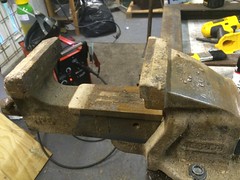 Vice and bench by stephen harborne, on Flickr Vice and bench by stephen harborne, on FlickrAfter  Vice and bench by stephen harborne, on Flickr Vice and bench by stephen harborne, on FlickrJust needs to be painters up now |
Way to go Steve ....as good as any of our kick off's.
|
Great to see another build starting. Good luck and keep posting.
|
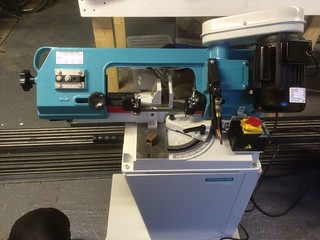
More toys
|
Quote:
There is no coolant system on it but was gonna use an oil can to help keep it lubed. |
Quote:
 |
Quote:
What coolant do you use Wouldmean i have to build a drip tray also. How many cuts would you get from a blade |
So im hoping to to start cutting the steel at the weekend and im using the saturn plans and i was just wondering if there are any adjustments i should make from people's experience
|
If it is the latest book it should have the updates in and they are on here if you are stuck.
Have fun .:eek: |
So i got around to finally starting my build
and after about an hour of messing around with the the saw i did the first cut 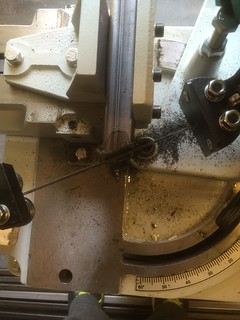 First cut by stephen harborne, on Flickr First cut by stephen harborne, on Flickr |
So while posting the above post the other night the baby stated crying so i didnt get around to finishing it
Any how i didn't just do i cut and leave it I cut all the bottom rails and the uprights and started tacking them together the only one being the problem was the 78 degree angle but after a bit of grinding it was grand 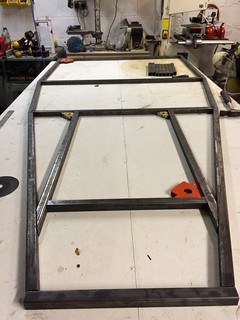 Chassis first pics by stephen harborne, on Flickr Chassis first pics by stephen harborne, on Flickr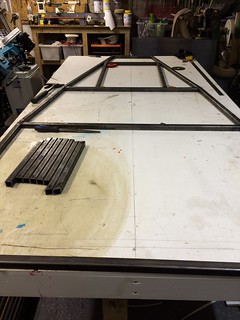 Chassis first pics by stephen harborne, on Flickr Chassis first pics by stephen harborne, on Flickr |
So its quiet in work at the moment so i managed to get the rest of the week off and i got a few hours in the shed this afternoon.
so i tackled the front frame first of all and thanks to the handy guides worked out perfectly first time 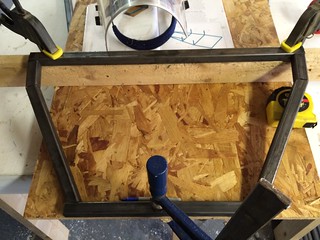 Untitled by stephen harborne, on Flickr Untitled by stephen harborne, on Flickr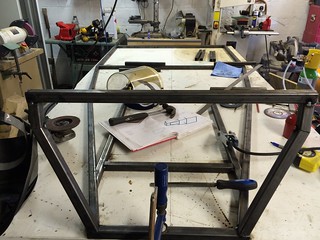 Untitled by stephen harborne, on Flickr Untitled by stephen harborne, on Flickr |
I think she knows when im posting she cried again but all good now
Anyway then i got some of the uprights and top rails tacked in place 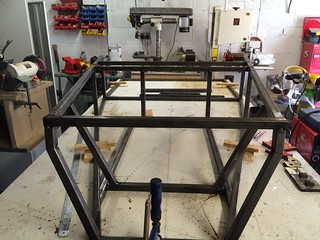 Untitled by stephen harborne, on Flickr Untitled by stephen harborne, on Flickr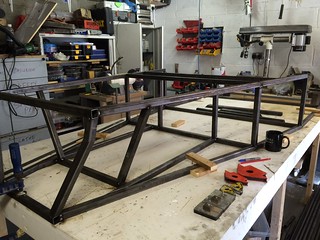 Untitled by stephen harborne, on Flickr Untitled by stephen harborne, on Flickr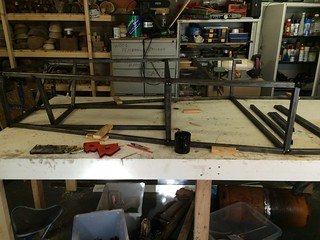 Untitled by stephen harborne, on Flickr Untitled by stephen harborne, on FlickrThen i got a few more rails cut And thats how it stands at the moment |
Nice workshop! Good start by the way.:)
|
Quote:
|
I started on the seat back today
 Untitled by stephen harborne, on Flickr Untitled by stephen harborne, on Flickr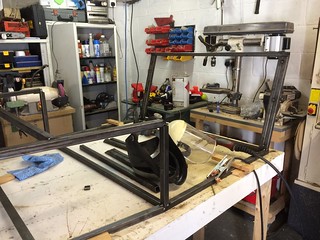 Untitled by stephen harborne, on Flickr Untitled by stephen harborne, on FlickrSo when should i start welding it up fully |
looking good, building the chassis is great, its the best bit i think,
as for welding, i did mine once everything was tacked, one think i would say is don't weld the front frame until you have got your front suspension brackets lined up on the jig, because on mine we had a gap behind the upper bracket so we had to slit the weld and tease the front frame leg out a little hope this makes sence and good look with your build |
Hi All.
Do people put the trans tunnel in before or after the rear suspension frame work Thanks Stephen |
I got some more of the side rails and seat back supports in place
 Untitled by stephen harborne, on Flickr Untitled by stephen harborne, on Flickr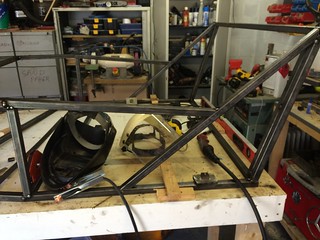 Untitled by stephen harborne, on Flickr Untitled by stephen harborne, on Flickr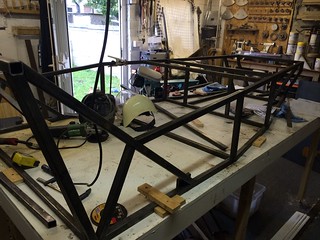 Untitled by stephen harborne, on Flickr Untitled by stephen harborne, on Flickr |
Also some of the diagonals
 Untitled by stephen harborne, on Flickr Untitled by stephen harborne, on Flickr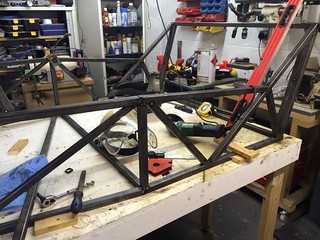 Untitled by stephen harborne, on Flickr Untitled by stephen harborne, on FlickrAnd my helpers 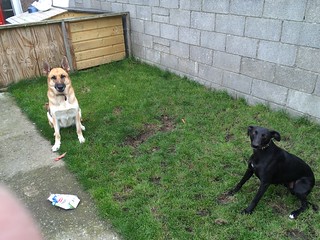 Untitled by stephen harborne, on Flickr Untitled by stephen harborne, on Flickr |
I think i did the tunnel before i moved it forwards on the table,
|
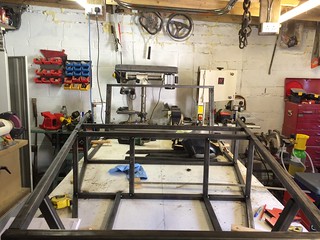
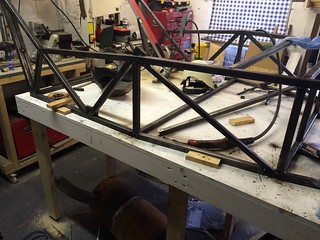
 Untitled by stephen harborne, on Flickr Untitled by stephen harborne, on Flickr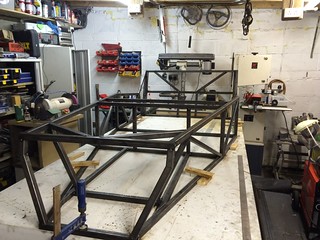 Untitled by stephen harborne, on Flickr Untitled by stephen harborne, on Flickr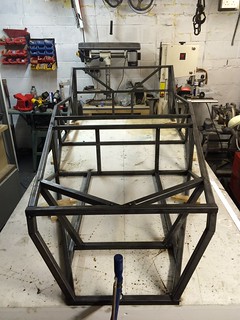 Untitled by stephen harborne, on Flickr Untitled by stephen harborne, on FlickrI got the rest of the diagonals and seat back finished |
| All times are GMT +1. The time now is 02:32 AM. |
Powered by vBulletin® Version 3.6.4
Copyright ©2000 - 2024, Jelsoft Enterprises Ltd.