Z20LET into a Haynes Roadster
Its time i posted up my build diary for fitting my Astra turbo engine into my Haynes Roadster, seems to be one of the next upgrades people might start doing.
Firstly it started out with a NA 2.0 16V Vauxhall Engine C20XE so the conversion is a little easier for me. The Z20LET is a 2.0 16V Turbo engine, very similar to the C20LET which is the Turbo verson of the C20XE. This all means that the existing bellhousing and engine mounts all fit straight on, although the passenger side mount needs modifying for the boost pipe to go through. Picked up a running engine and started stripping it all of bits i wont need anymore....  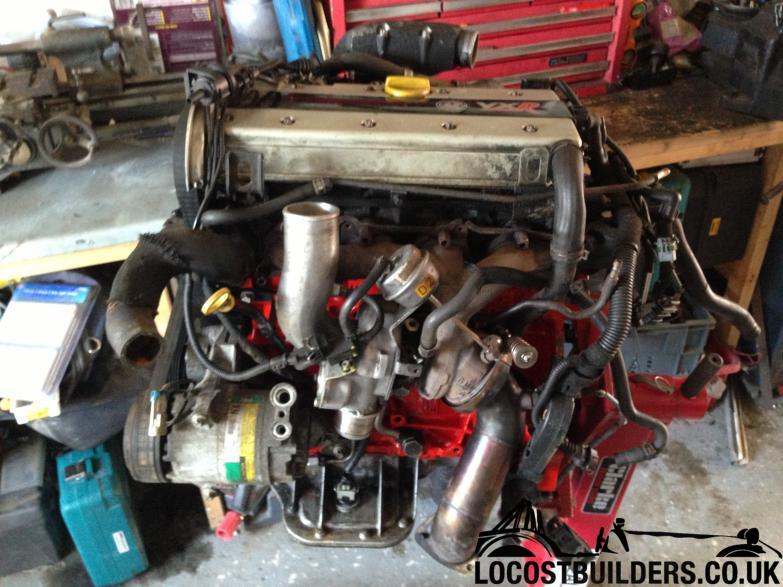 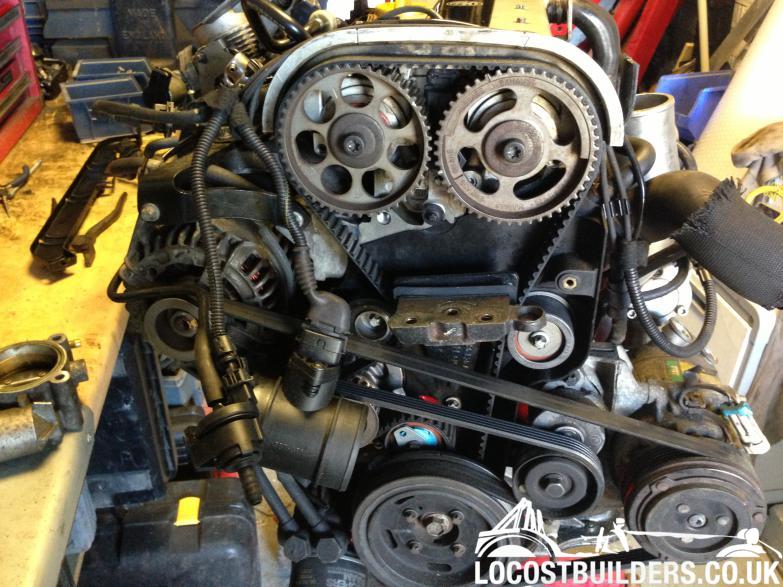 Its very busy this end and i dont like it ! 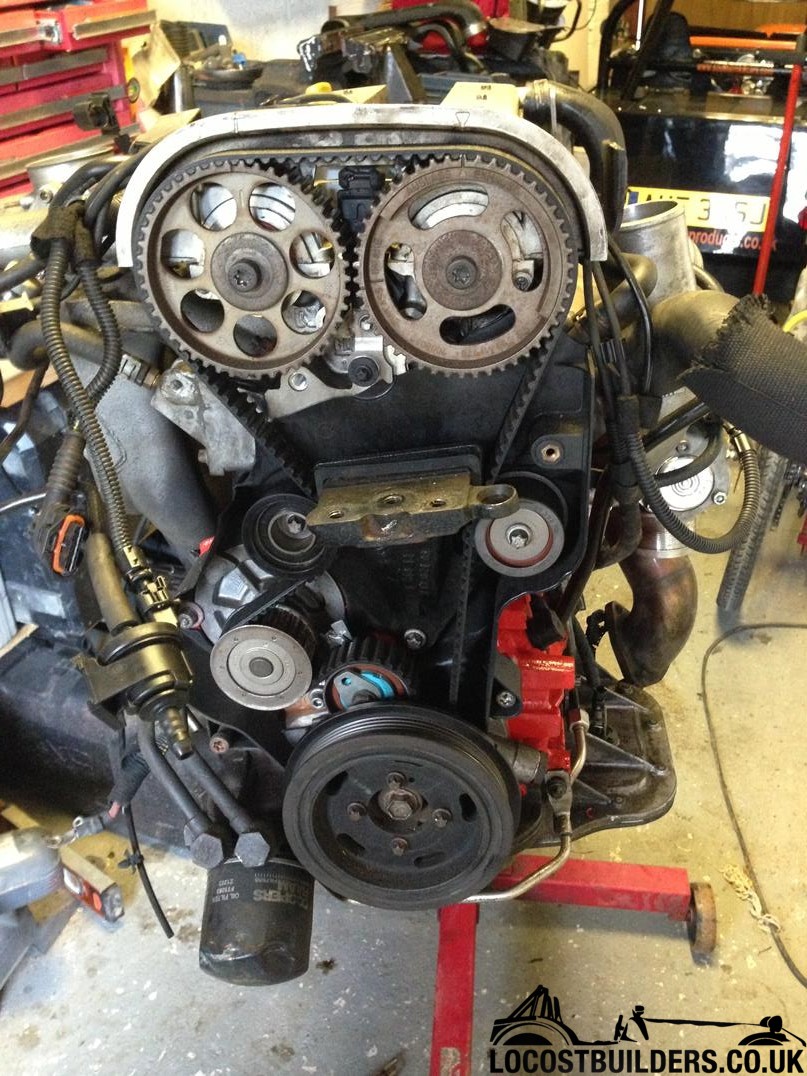 Thats better. |
Next Step..
Next i need to replace the throttle body, the TB on the Z20LET is fly-by-wire and i cant run that on MS2 (or cant be bothered to work out how)
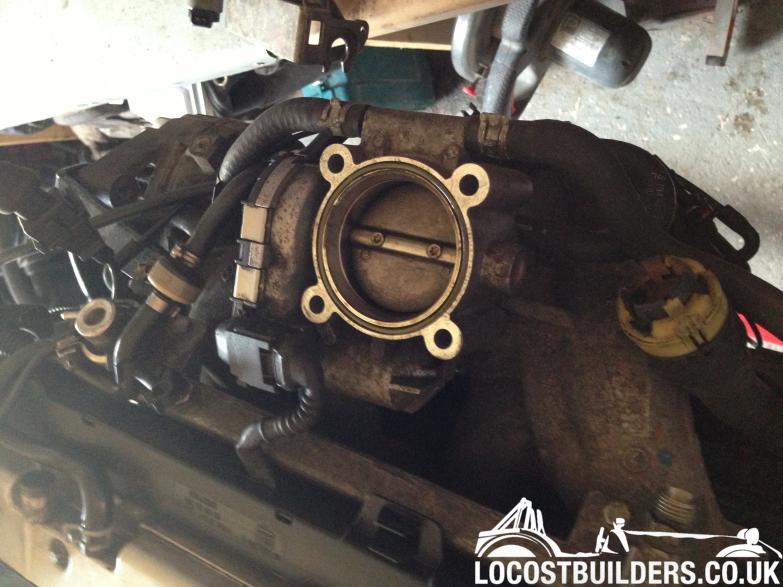 I've bought a throttle body of a X20XEV which is effectively a NA version of my engine (2.0L 16v from a vectra/astra etc) Its fits straight on and converts to cable throttle, its slightly larger which cant be a bad thing. 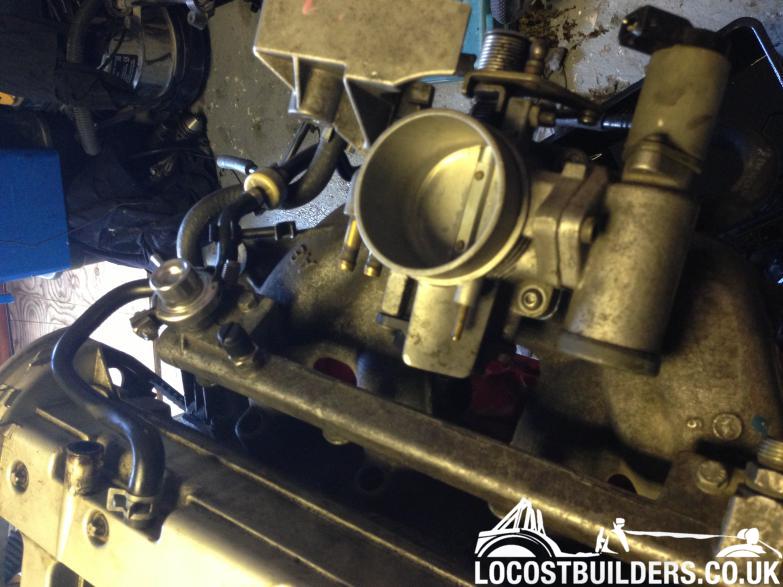 I actually ended up turning this round 180 degrees so it fits better. 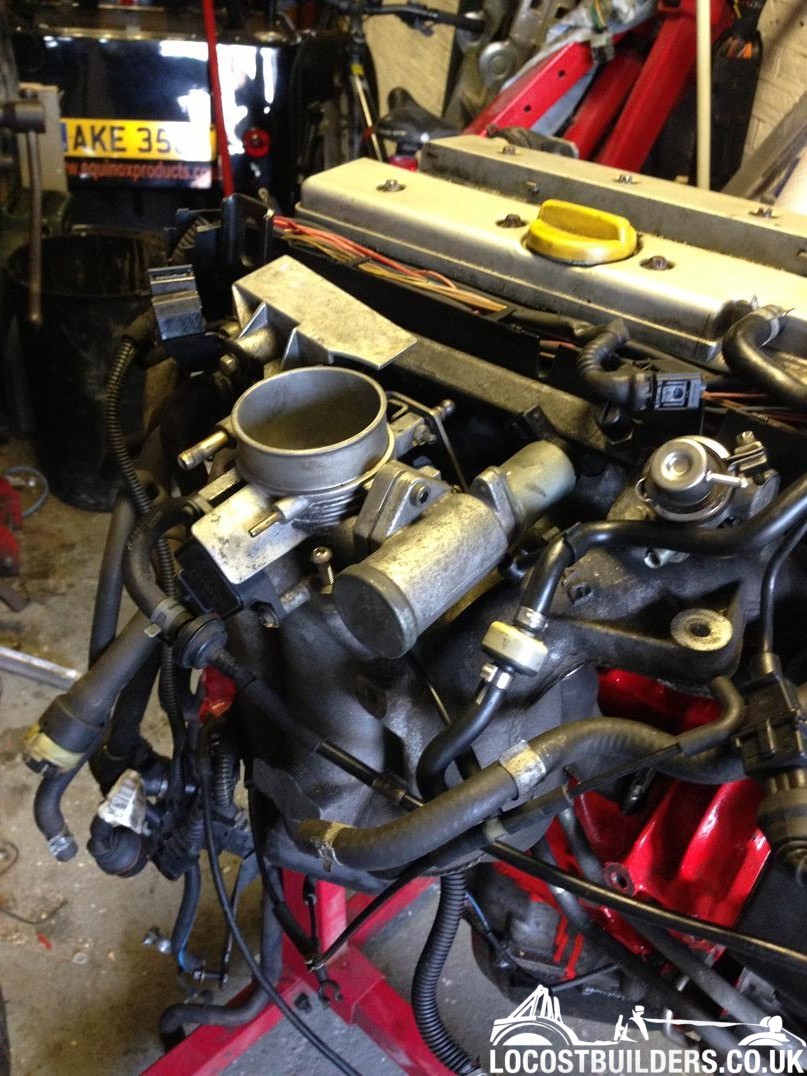 |
On Going...
Next is to remove the sump which is massive and isnt going to fit, also i removed the balance shafts that are mounted over the crank. These sap power and also add a massive weight to the bottom of the engine. Unfortunately they are oil feed from the crank bearing caps, so they need tapping and filling so the oil doesnt come out !
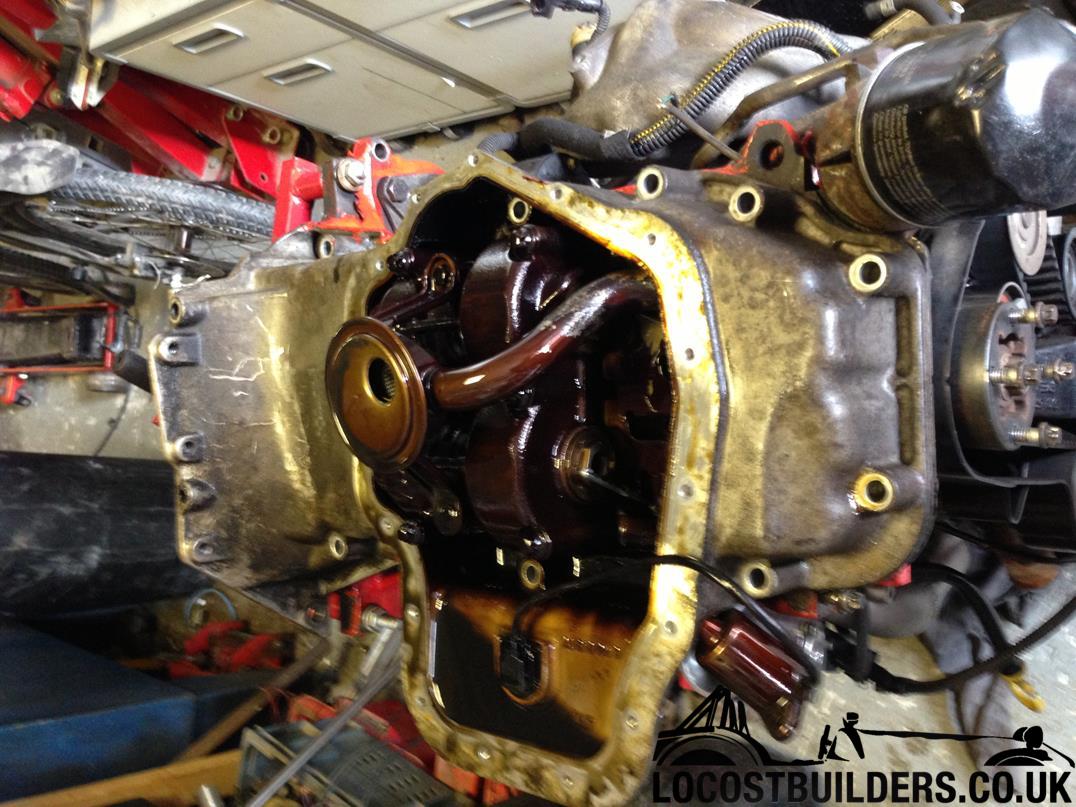 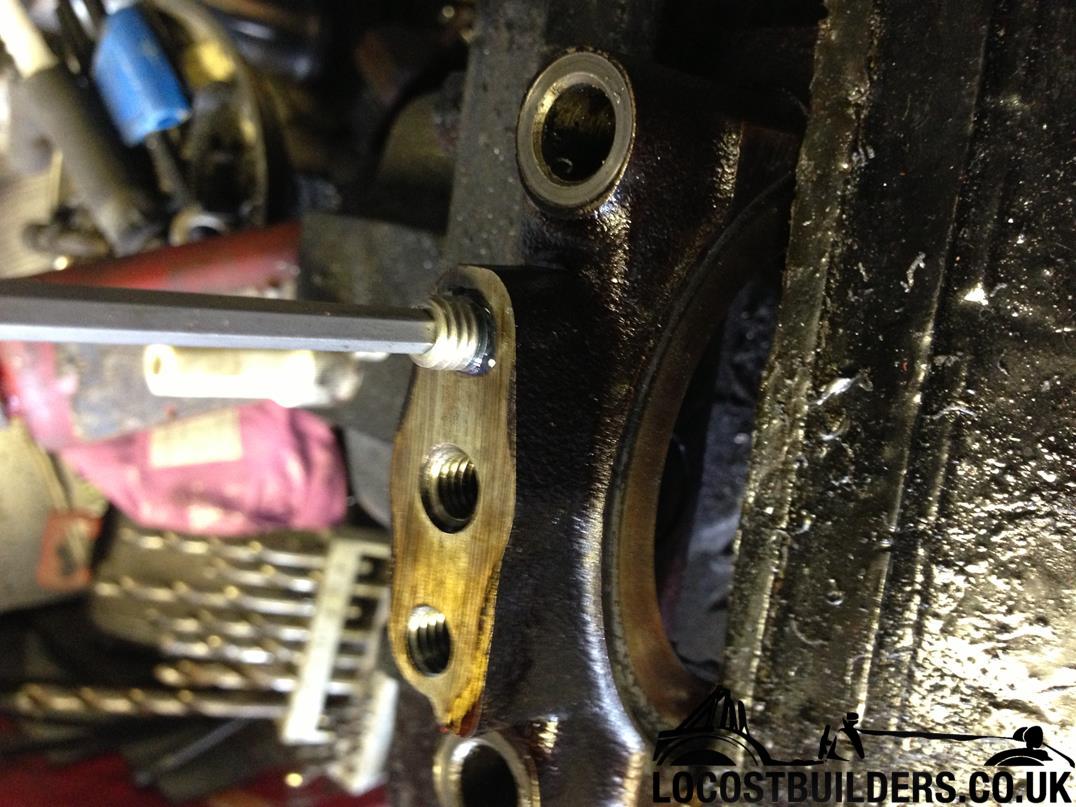 Tapped and grub screwed. 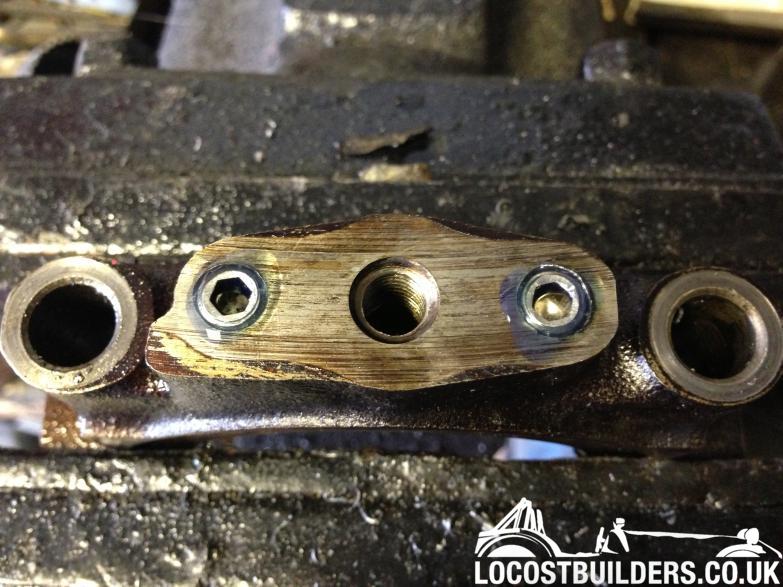 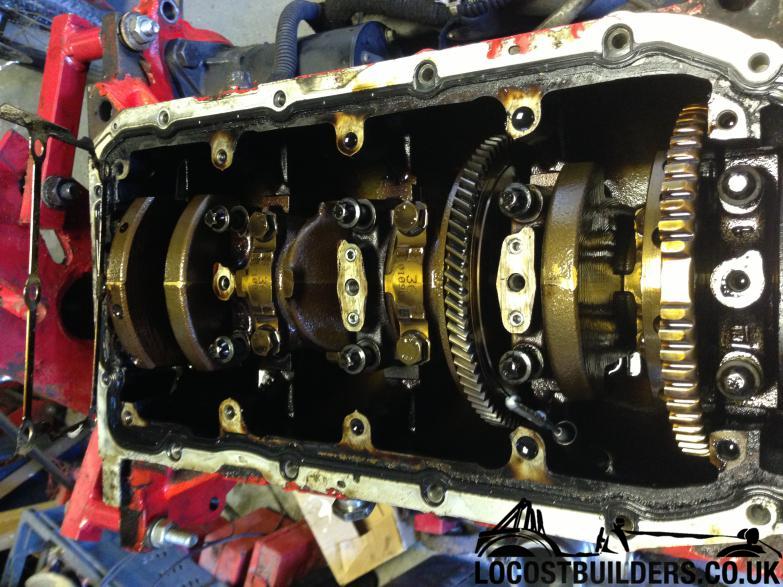 Caps back in. The downside of removing the balance shafts is they also act as crank girdle so you either need to find a X20XEV crank girdle that doesnt have balance shafts (early one maybe) or make your own. |
Yep, Theres More....
Friend of mine sent me this to play with as it didnt fit with his sump....
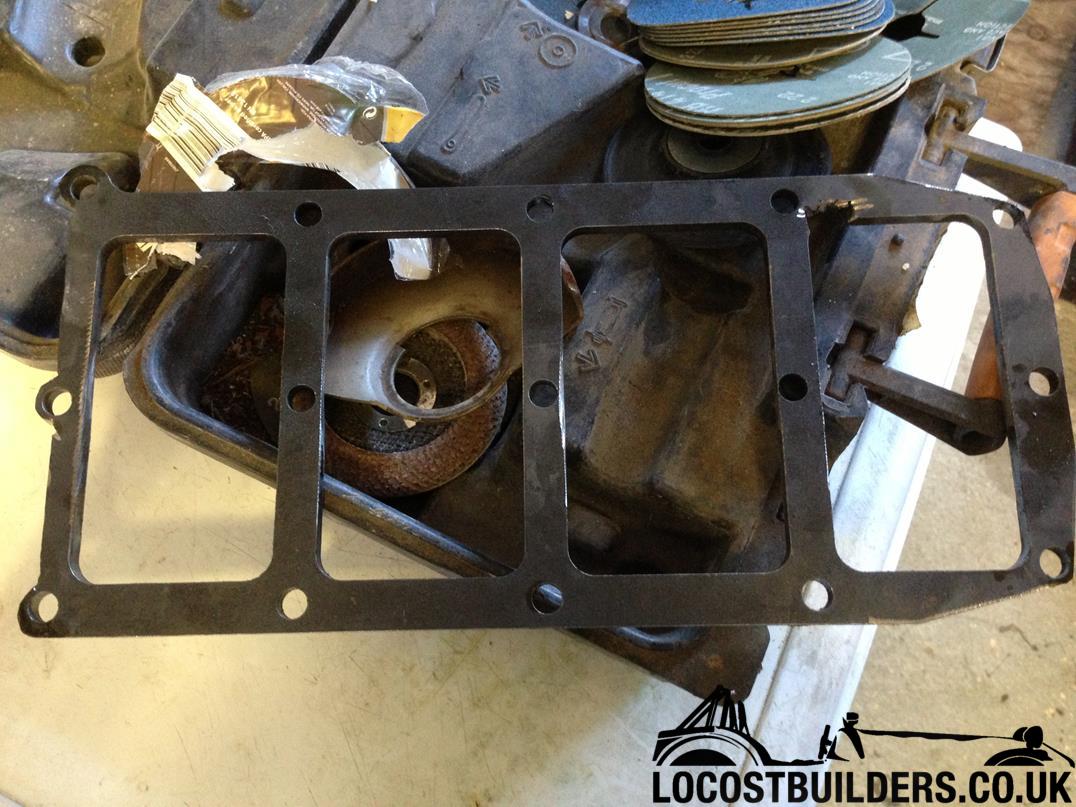 Unfortunately i ended up having to cut it up as it didnt fit with my sump either, but strips are better than nothing. 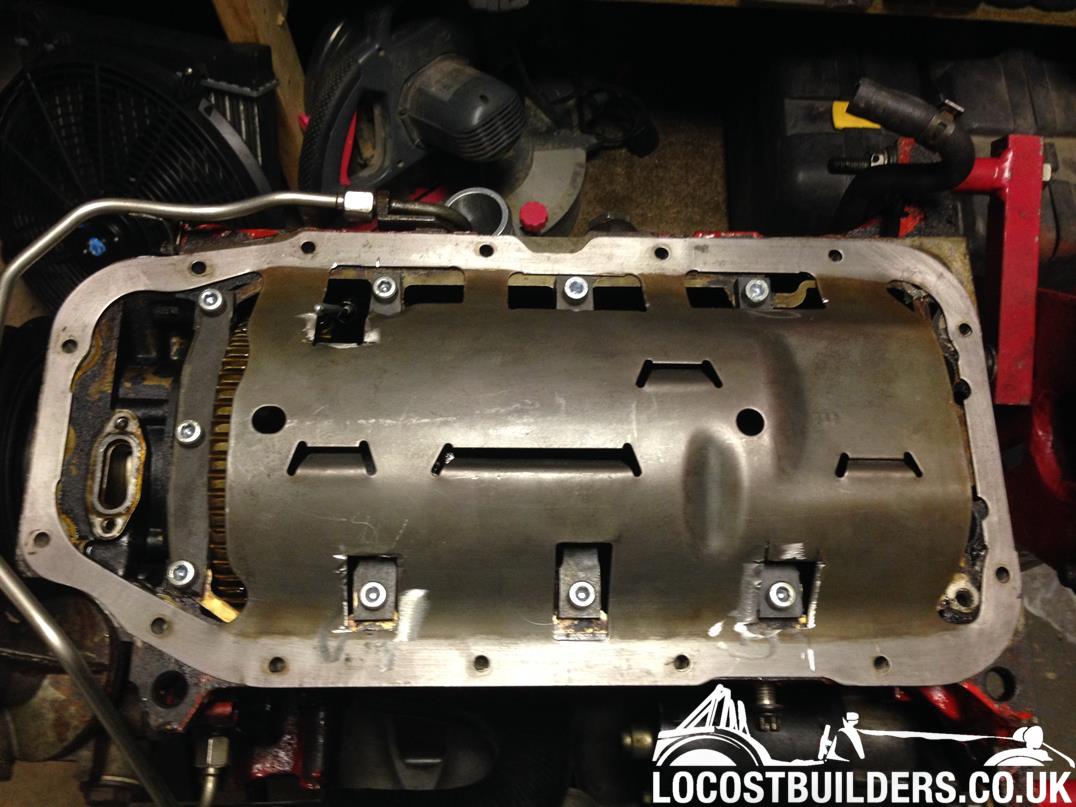 I used the XE windage tray just cutting holes where the girdle stuck through. I'm fitting a Caterham Alloy Sump from my XE engine, which just fits but ive had to modify the pickup pipe, using the head of the XE one with the oil pump end from the ZLET engine. Its a bit of a faff to sort and unfortunately i didnt take a picture, but just make sure its got no leaks! I also had to drill out the sump bolt holes because they are m8 instead of m6 like the XE, but easy enough to do. I then started checking over the turbo. It had been fitted with a VXR turbo and wastegate which is a popular power upgrade, pretty much a direct swap and good for about 300bhp. I had noticed the oil feed pipe was oily and one of the connections was at an angle.. 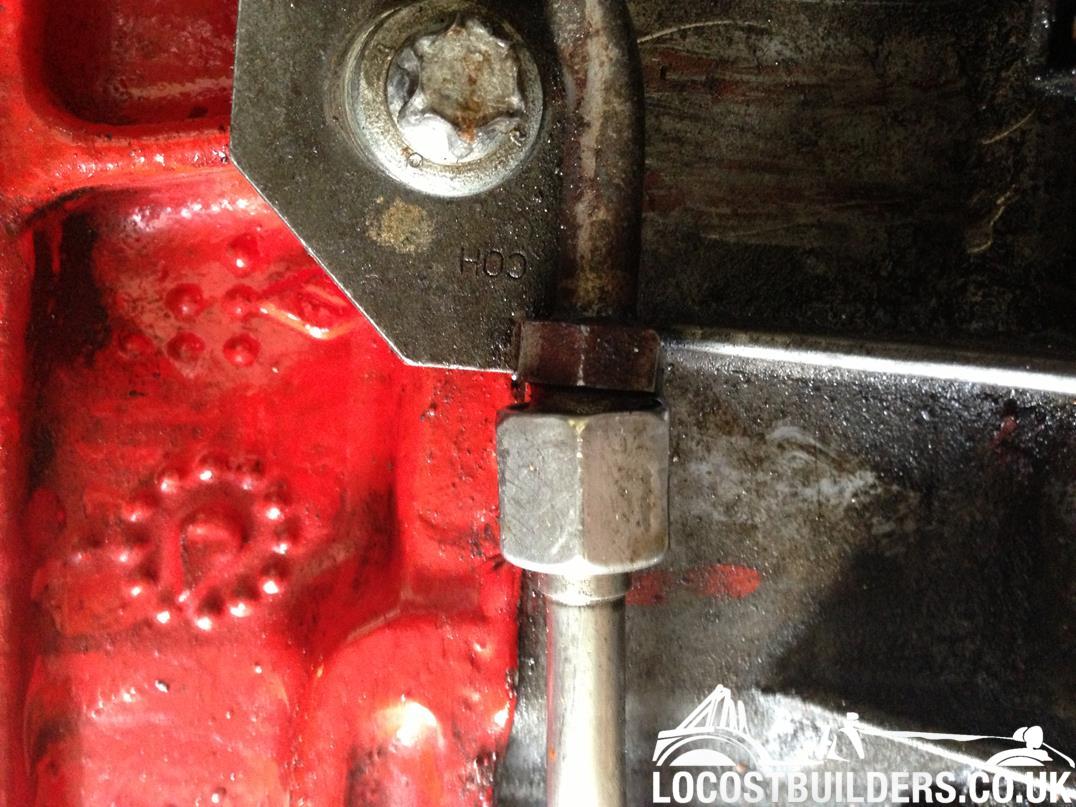 Dumb Arse!!! Took it apart and luckily i rescued it with a small file and a bit of patience.... 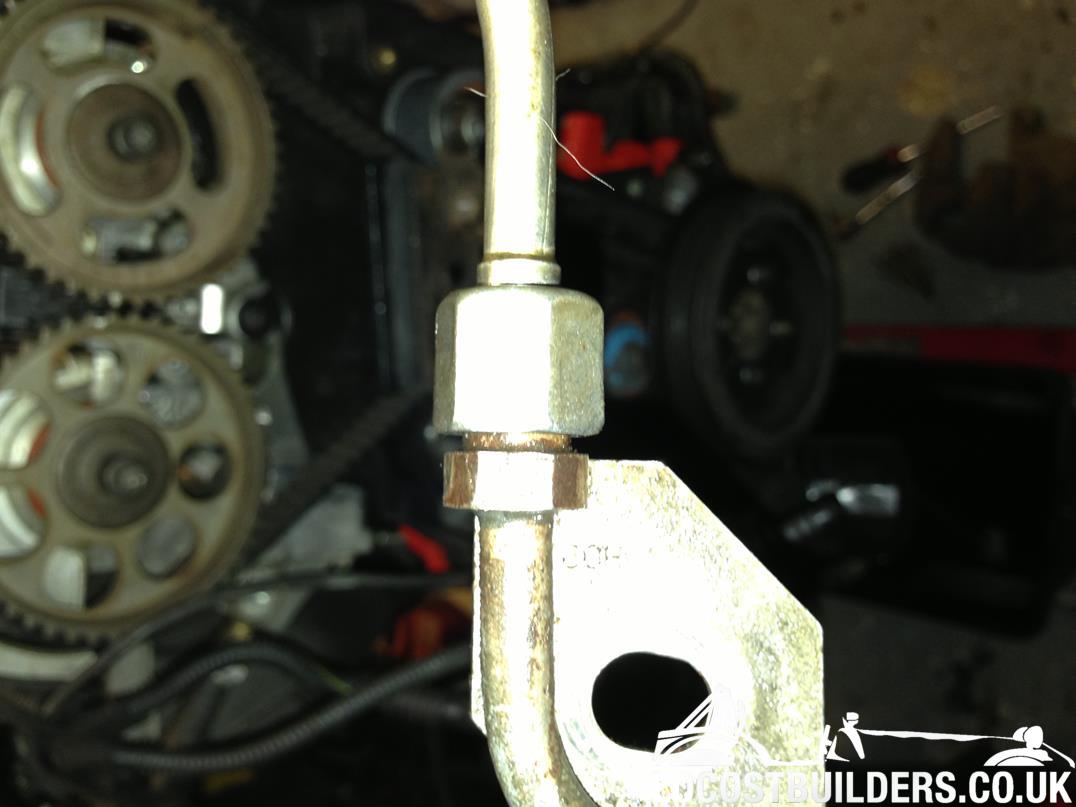 Better. |
Still Going.....
I took the exhaust manifold off to replace the gasket and found 2 stripped threads in the head and rusted studs/nuts
They'll all need replacing before the turbo manifold can go back on... BALLS. 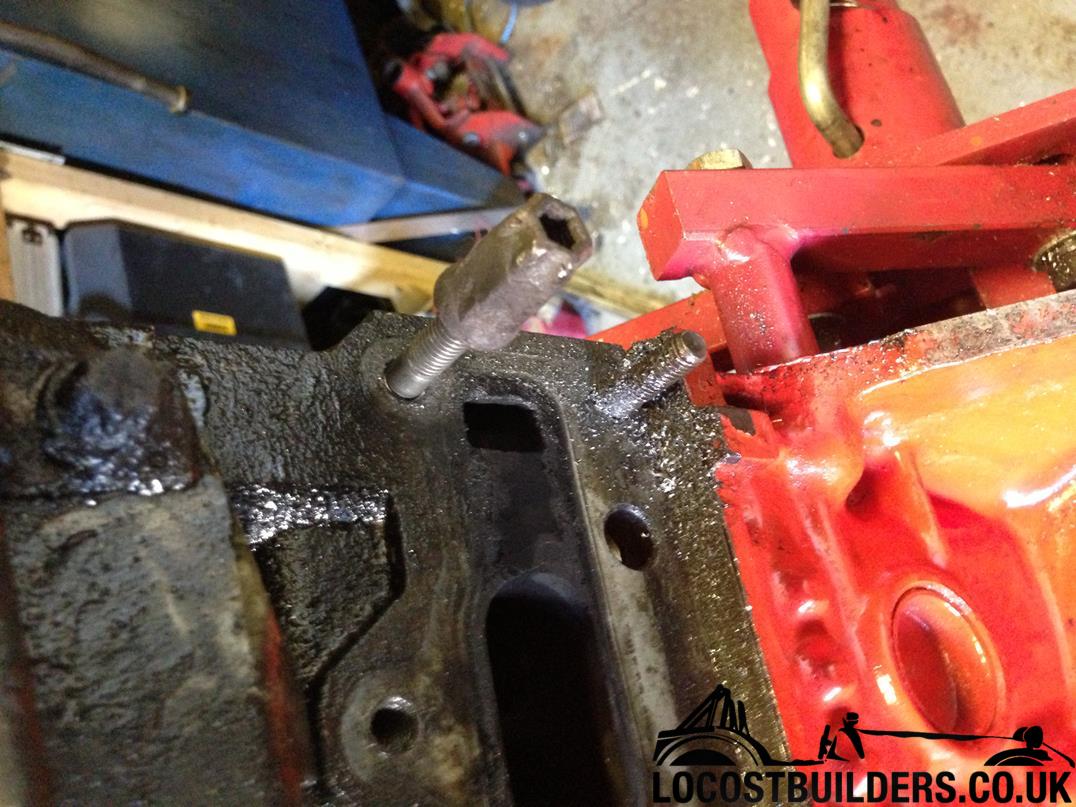 I helicoiled the 2 threads in the head and replaced all the studs. While the exhaust manifold was off i painted the block black to get rid of the Red as it didnt match which my cars colours. 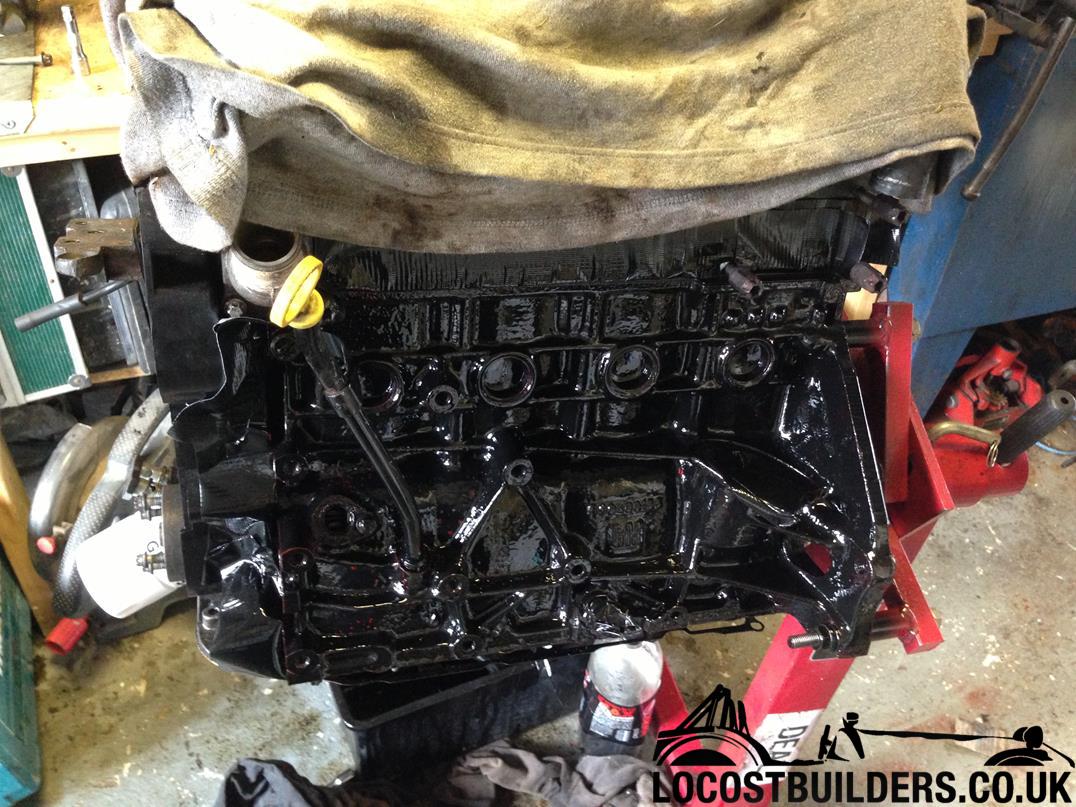 Also the turbo return pipe was held in with a bolt and self tapping screw and glue. WTF, how difficult would it of been to find another bolt for it. Again, luckily! i managed to remove the glue and cleaned up the bolt hole. Replaced the gaskets and bolted it all back up.  I also binned the dump valve bits and fitted a nice alloy recirculation valve, back to standard...ish. 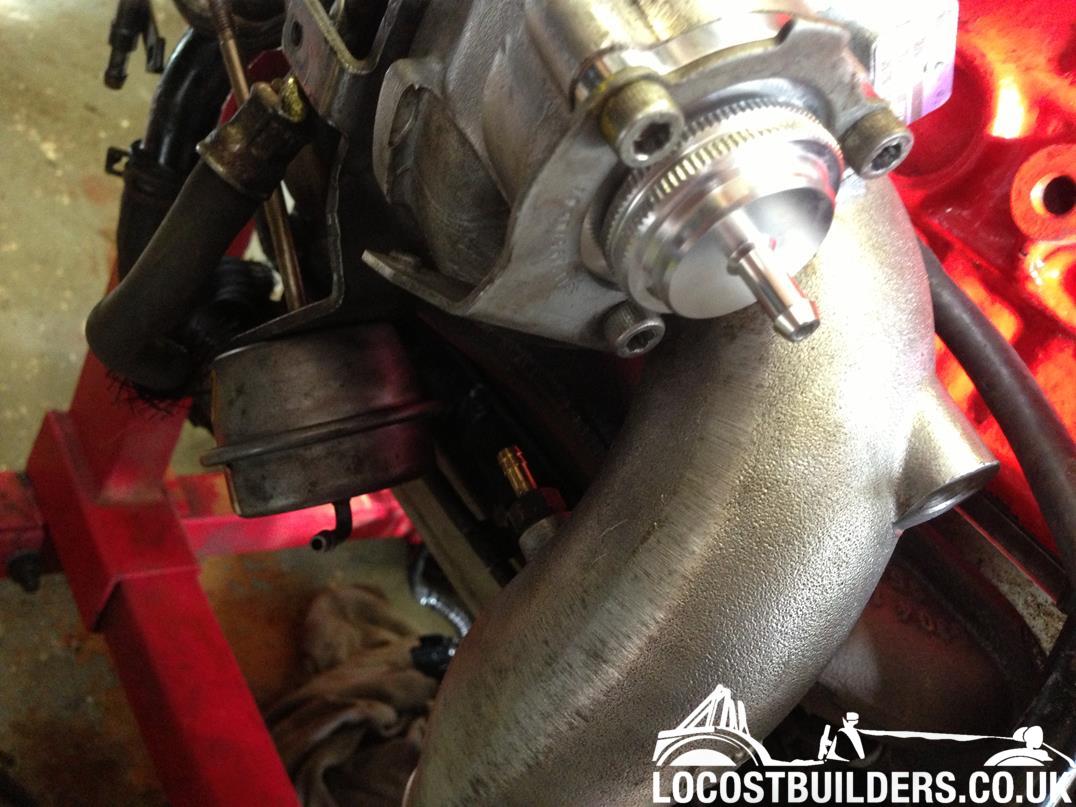 |
Wow, Still Going......
Moved back over to the inlet side and decided to check the injectors. As i thought standard, and not suitable for VXR turbo power.
I had some Rover 800 Turbo injectors lurking in the garage which are a direct swap, a lot more cc's. So i sent them off to Mr Injector to get them cleaned and check etc. 380cc i believe @ 3 bar 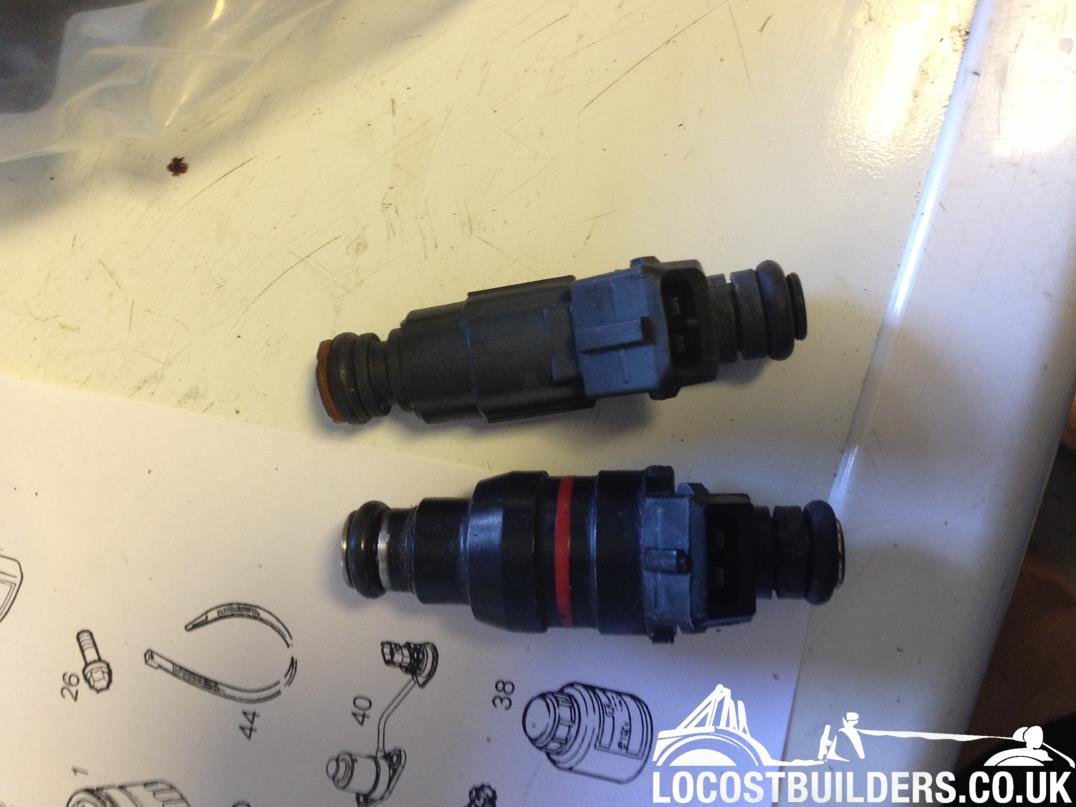 Refitted the rail. Done Got a bit of a painting bug from doing the engine block so decided to do the camcover. Rubbed down 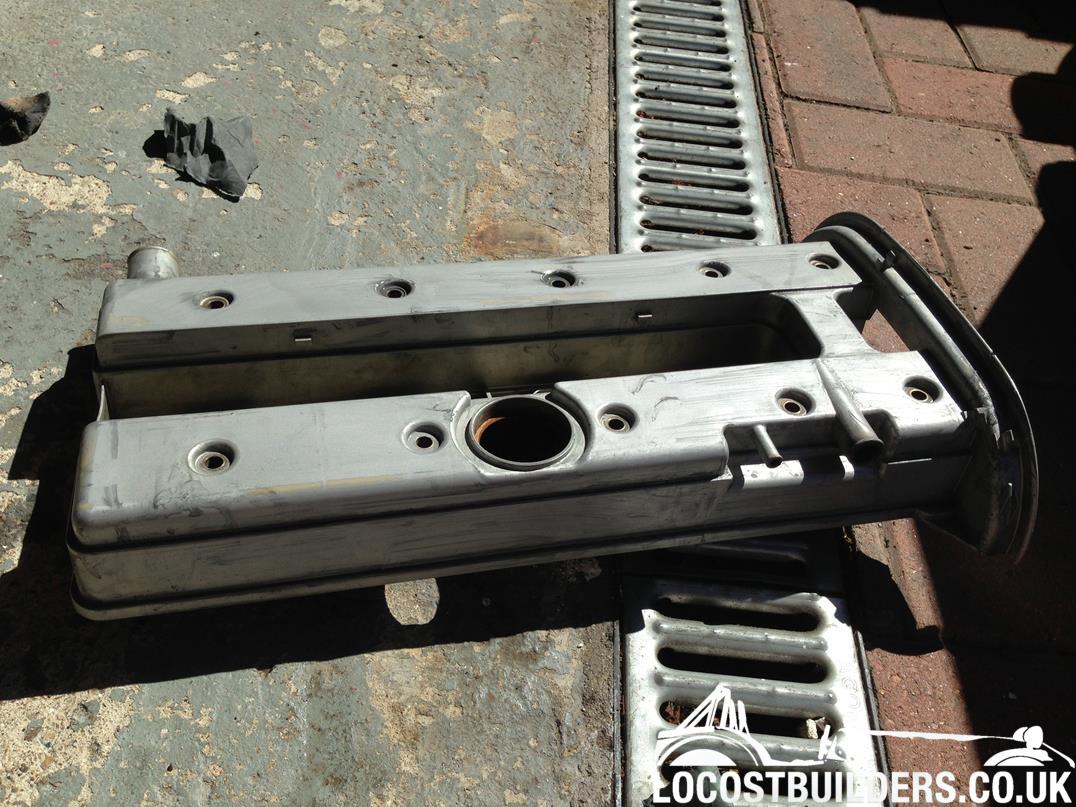 Primed with a etch primer 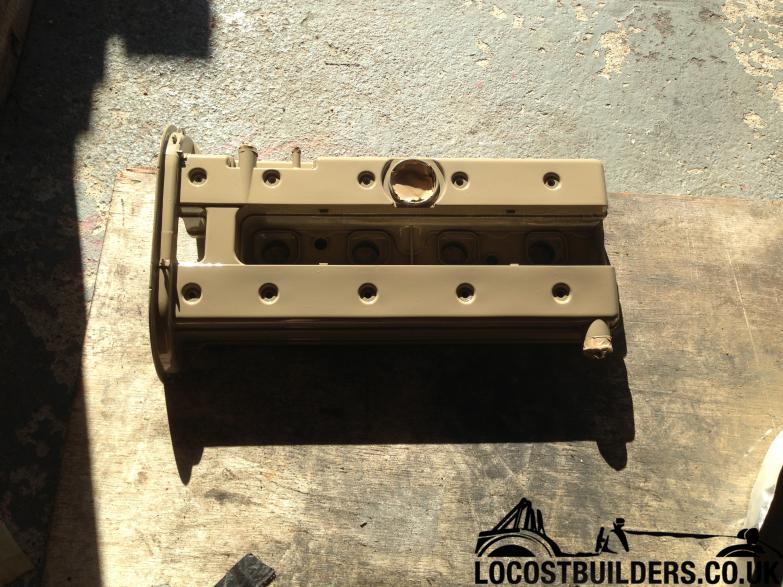 Undercoated white 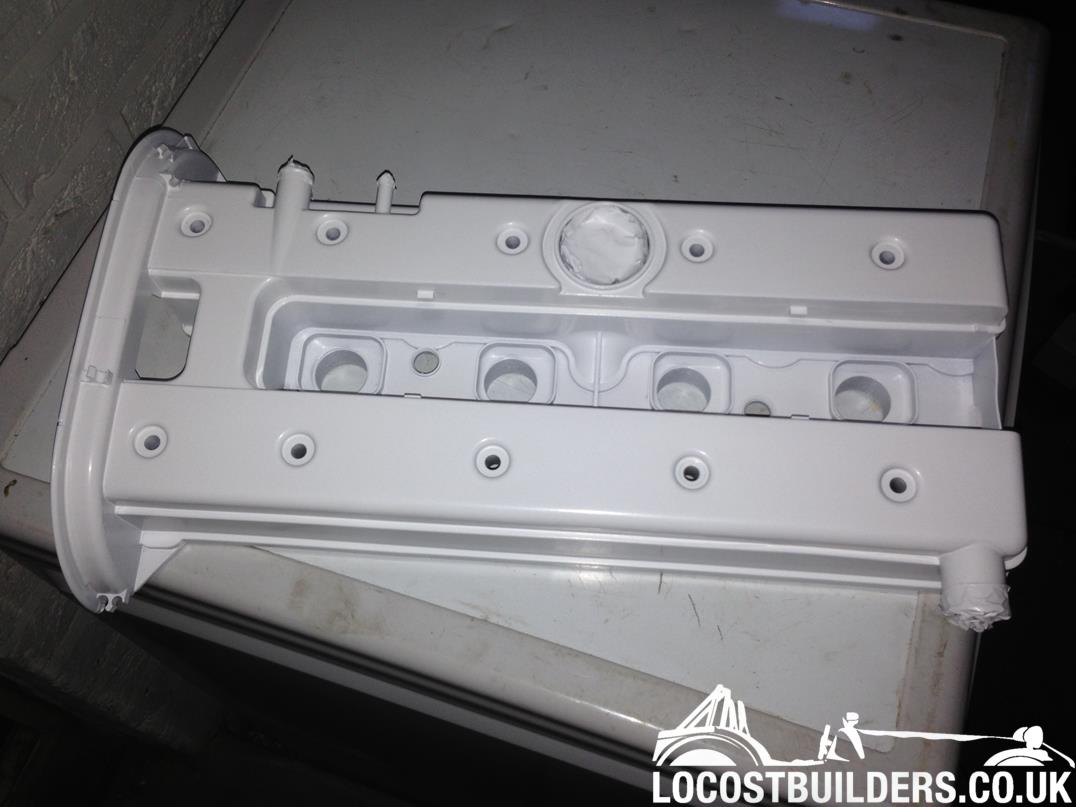 |
Going On.......
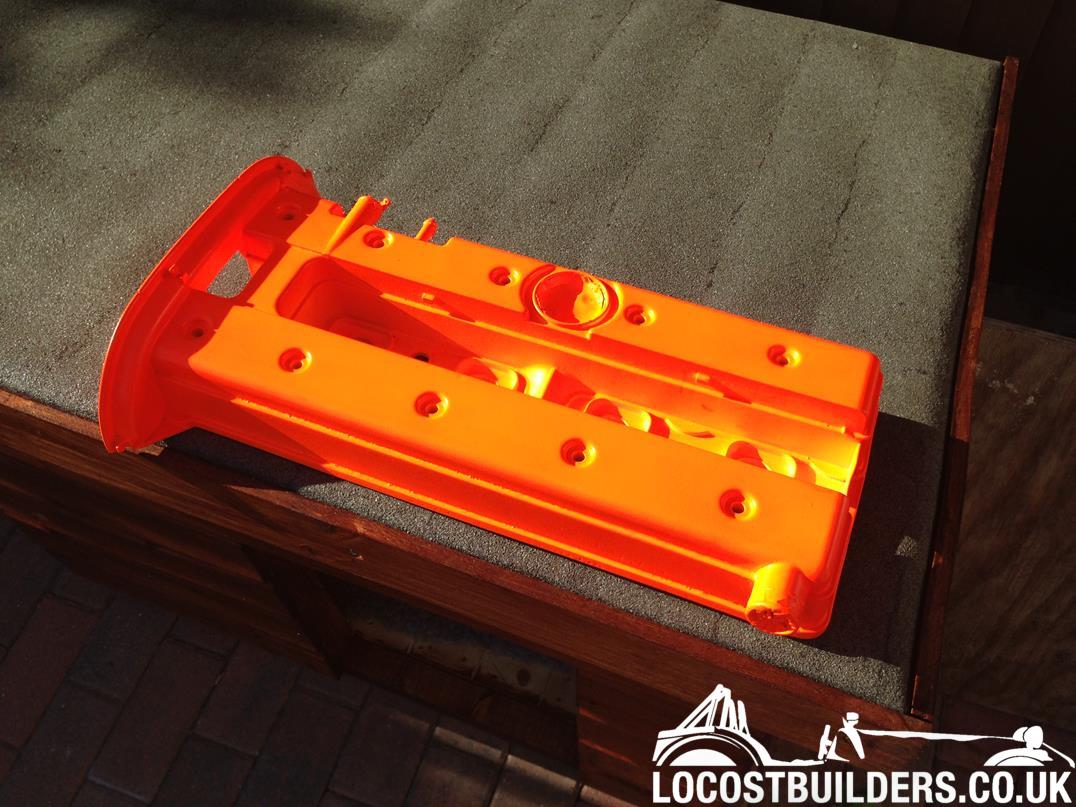
Top coated with DynaRod orange and then lacquered to make it oil/petrol/heat resistant.
 Didnt like the standard yellow oil cap, so rubbed that down and painted it black. 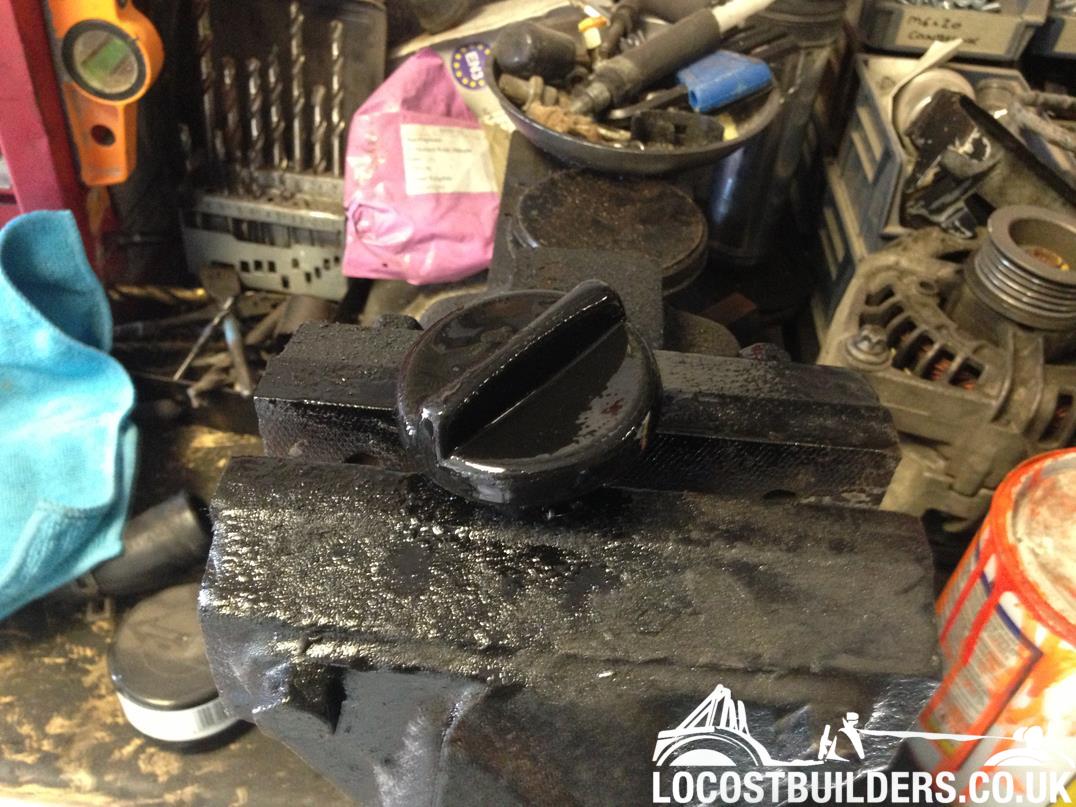 Also painted the bolts black too ;-) 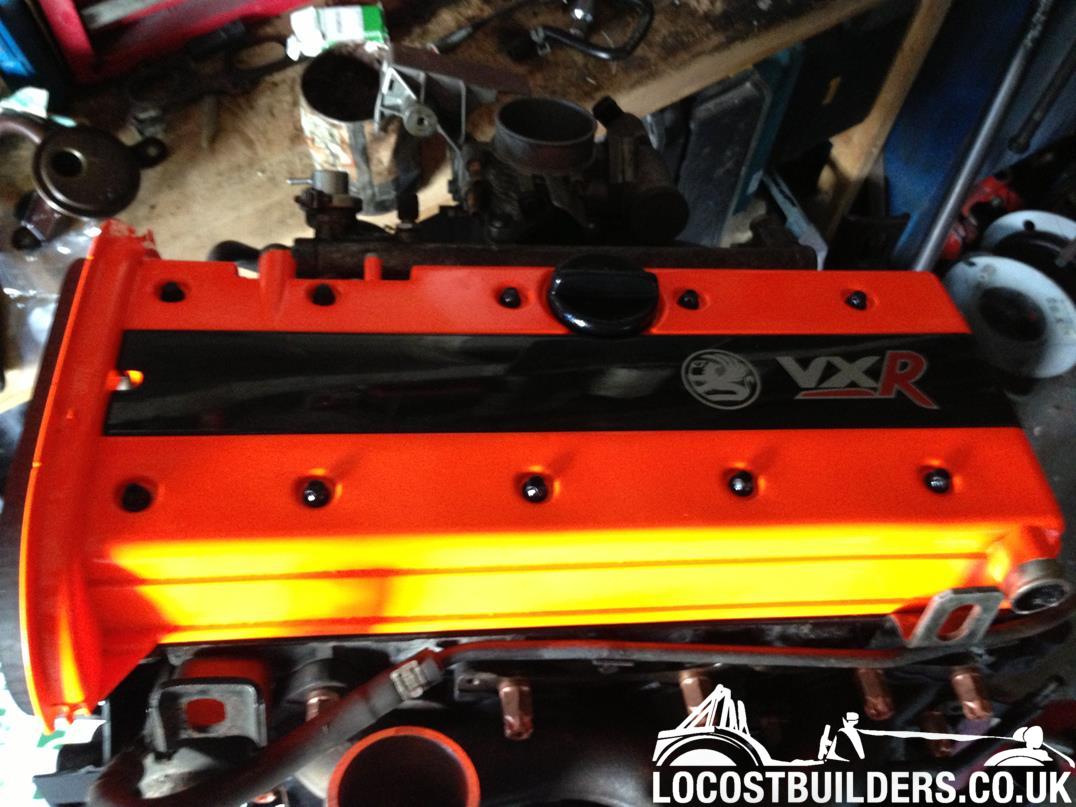 Fitted and finished with a Black VXR spark plug cover. |
Loosing The Will to Live?
Time to strip the old engine out of my car. Ive done this a couple of times so should be easy enough.
Fully assembled car including nosecone etc. 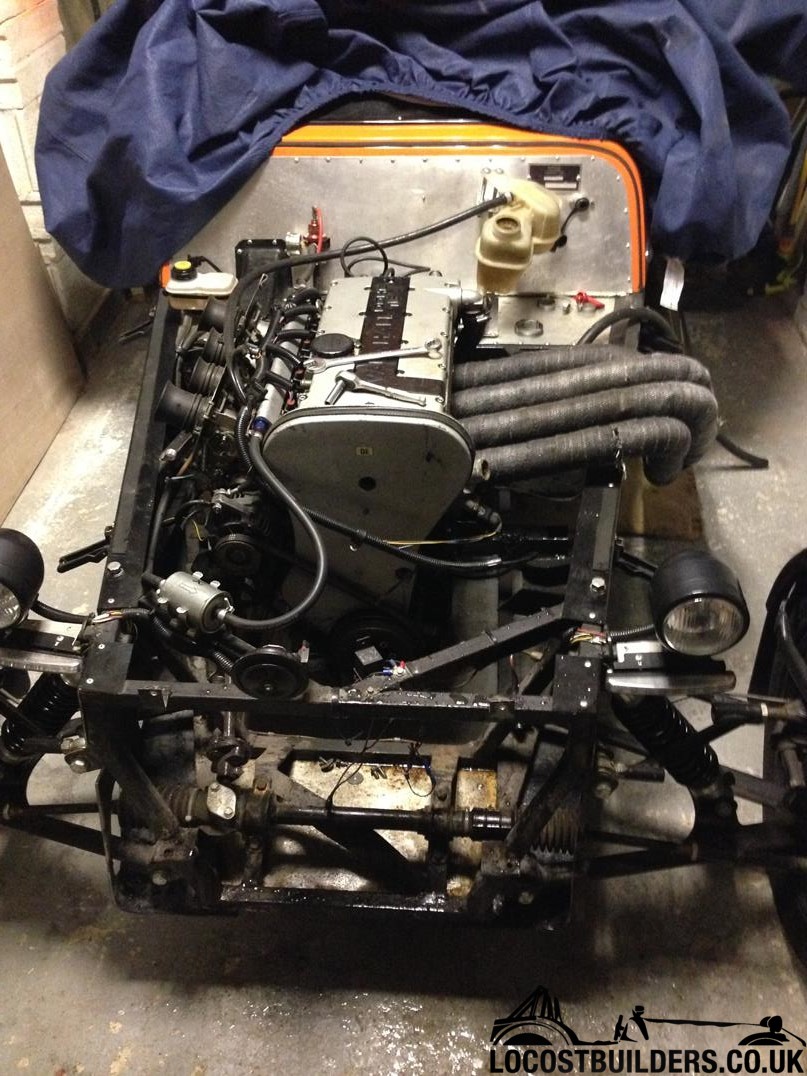 Ok no nosecone in this picture... To engine out on the bench in 1hr 15mins... not bad for an evening after work. 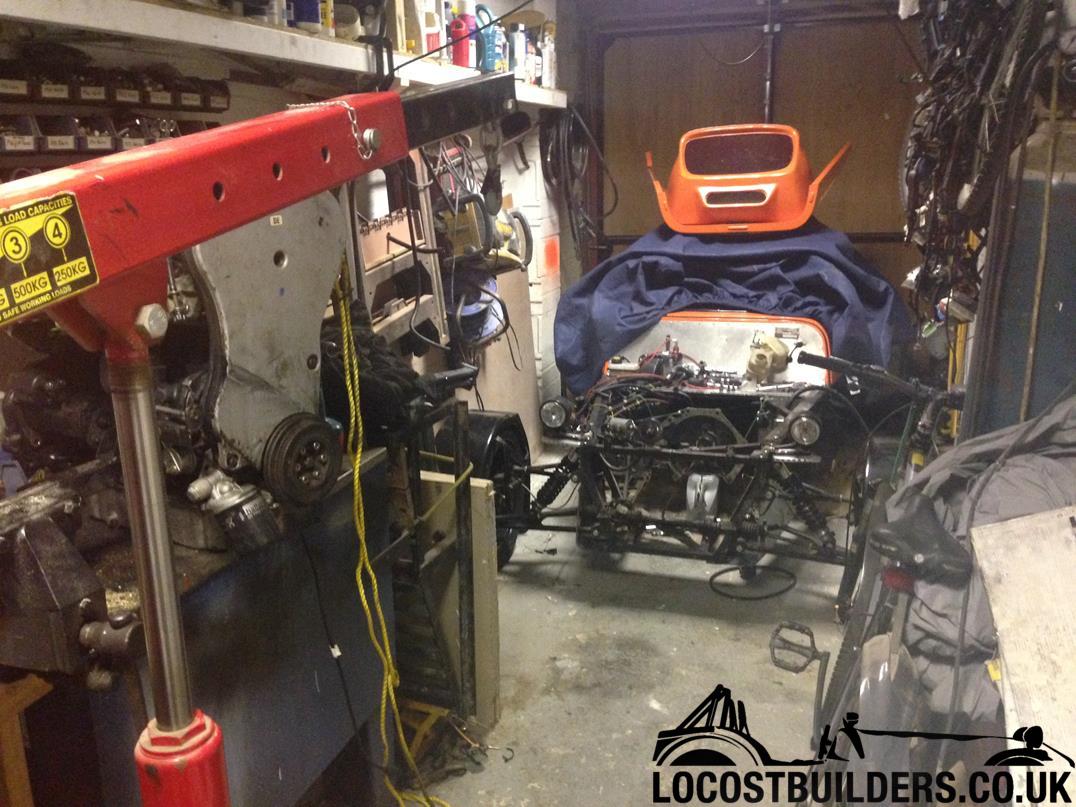 New engine hanging ready to go in. 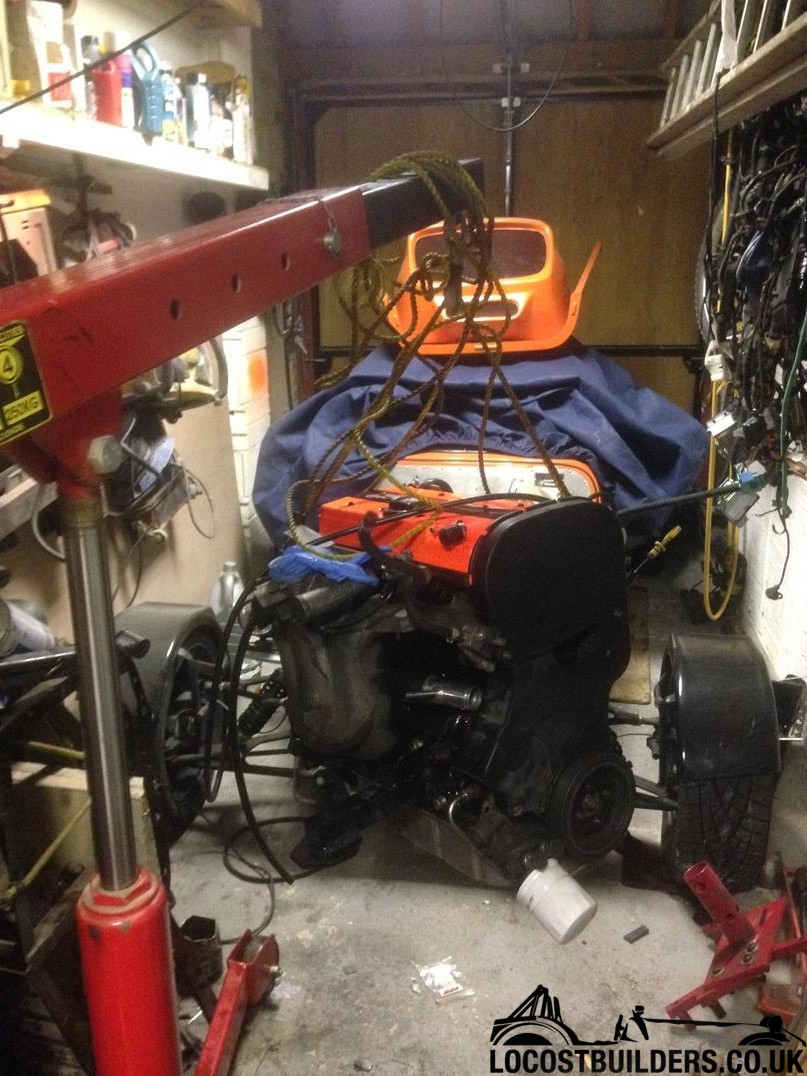 Engine in and bolted up to the gearbox. Driver side engine mount in and bolted up. Just need to modify the passenger mount to allow the bottom boost pipe to pass through it. 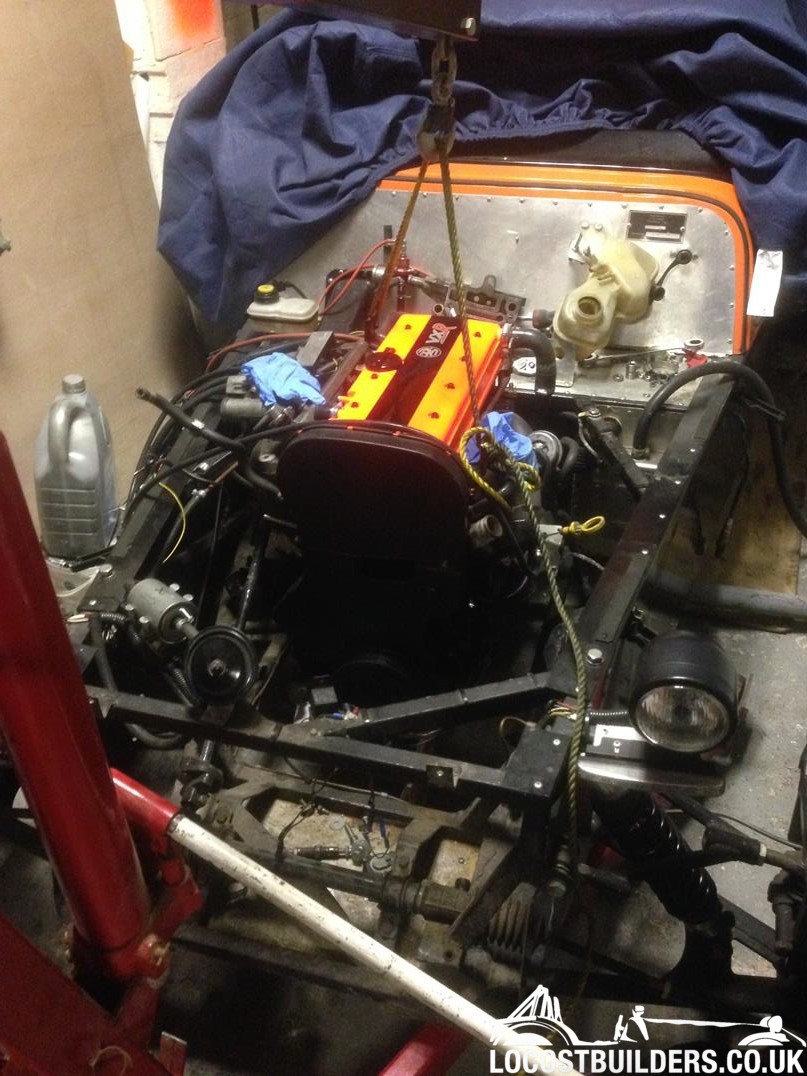 Forgot to say: the clutch is ford galaxy 2.8 friction and Vauxhall pressure plate. Using alloy bellhousing and type 9 box |
Given Up Now......?
Jumped forwards a bit to fitting the radiator and intercooler.
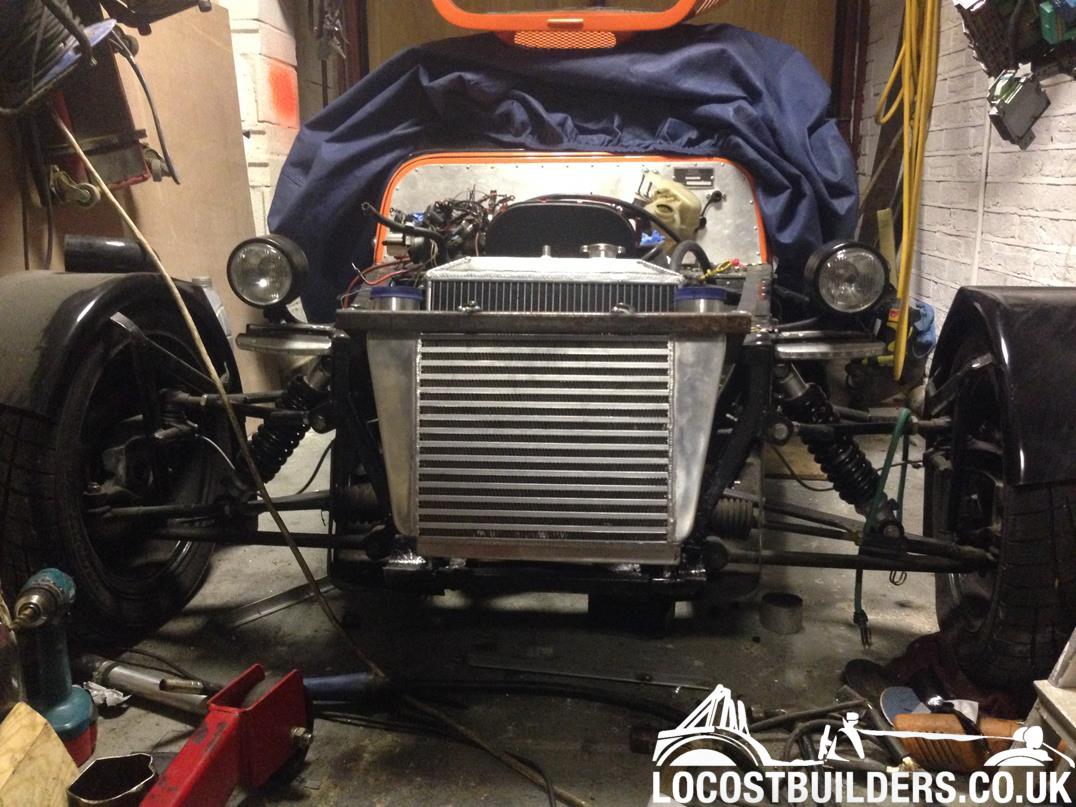 Next i made up some mountings for the fans, i couldnt get one big fan into the space behind the radiator so went for 2 smaller ones instead. 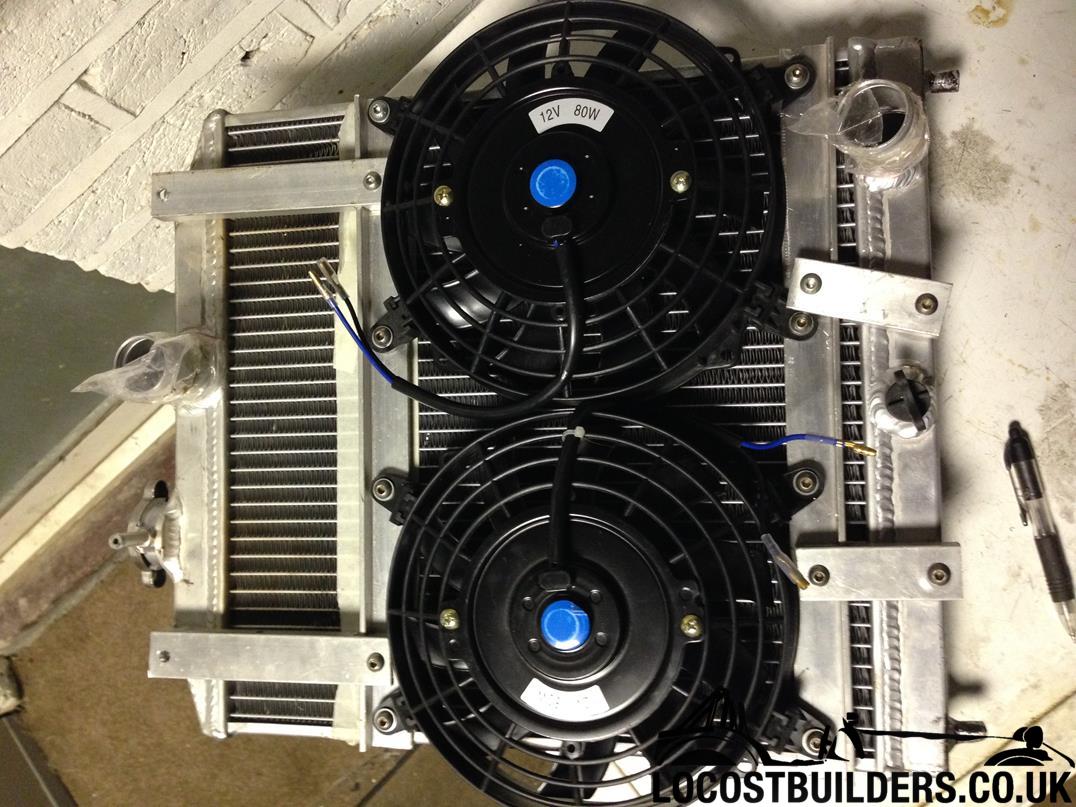 Radiator is a Honda Civic alloy racing one i bought off ebay and intercooler is a universal alloy one from ebay. Both cost about £75 each Needed to change the Inlet Temperature Sensor, but couldn't find one that bolted straight into the manifold, so i had to buy an adapter and tap that so the sensor could fit inside. 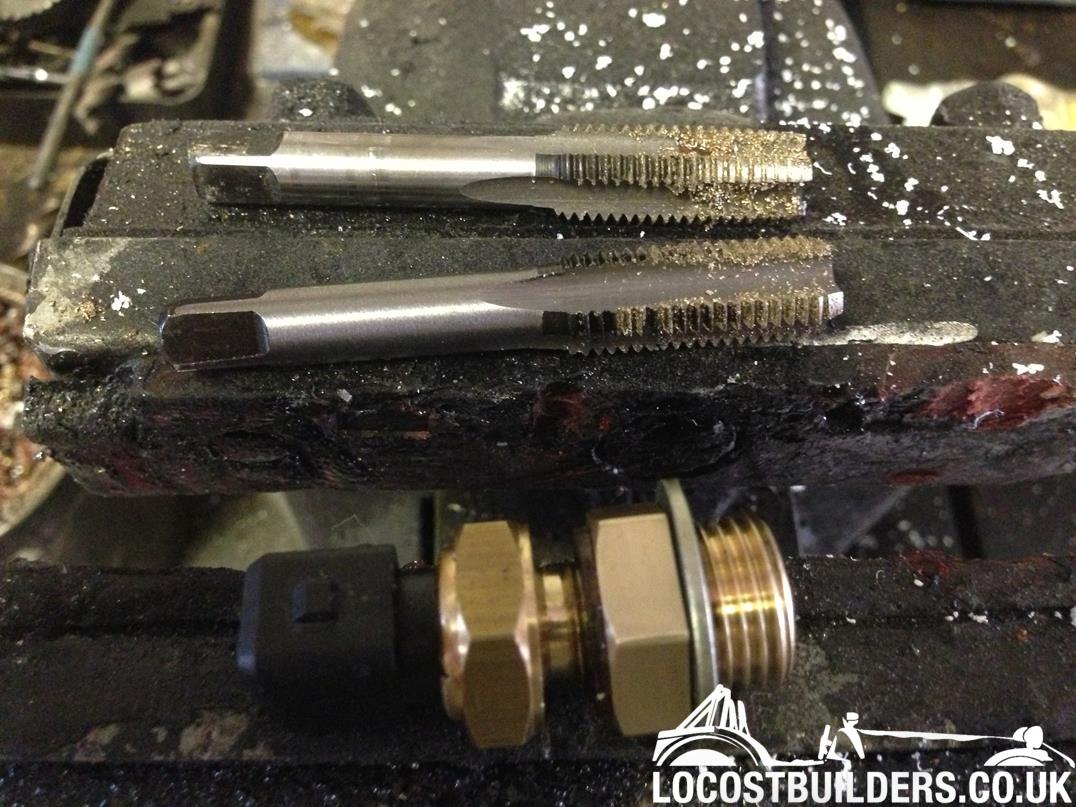 Went to refit the steering column extension, but it fouls slightly on the inlet manifold so i've had to put an extra joint in and rosejoint to support it. 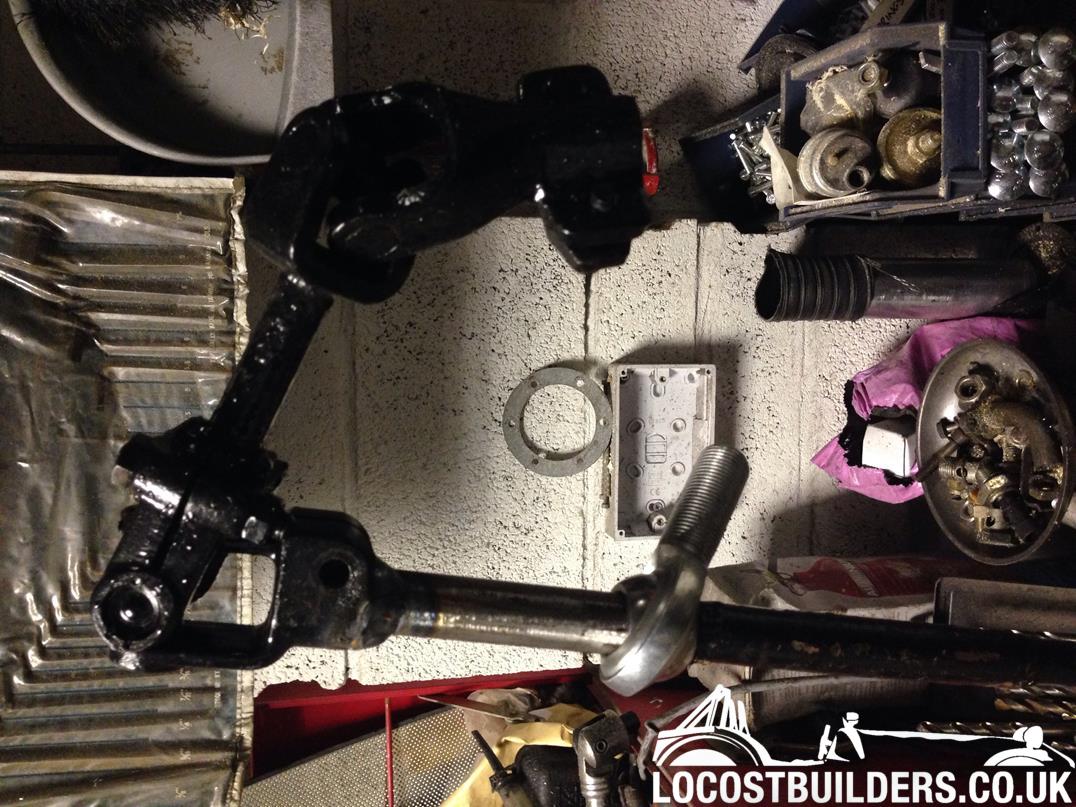 Still waiting on some nuts to fit it in place. |
Nearly There.....
Next up is the alternator bracket, its one i made for the XE engine so ive reused it and it bolts up in the same place just needed spacing off the engine slightly as it fouled on the cambelt cover.
The adjuster is made from 2 rosejoints, one right hand and one left hand thread with matching threaded bosses welded together with a nut between them. Picture speaks a thousand words... 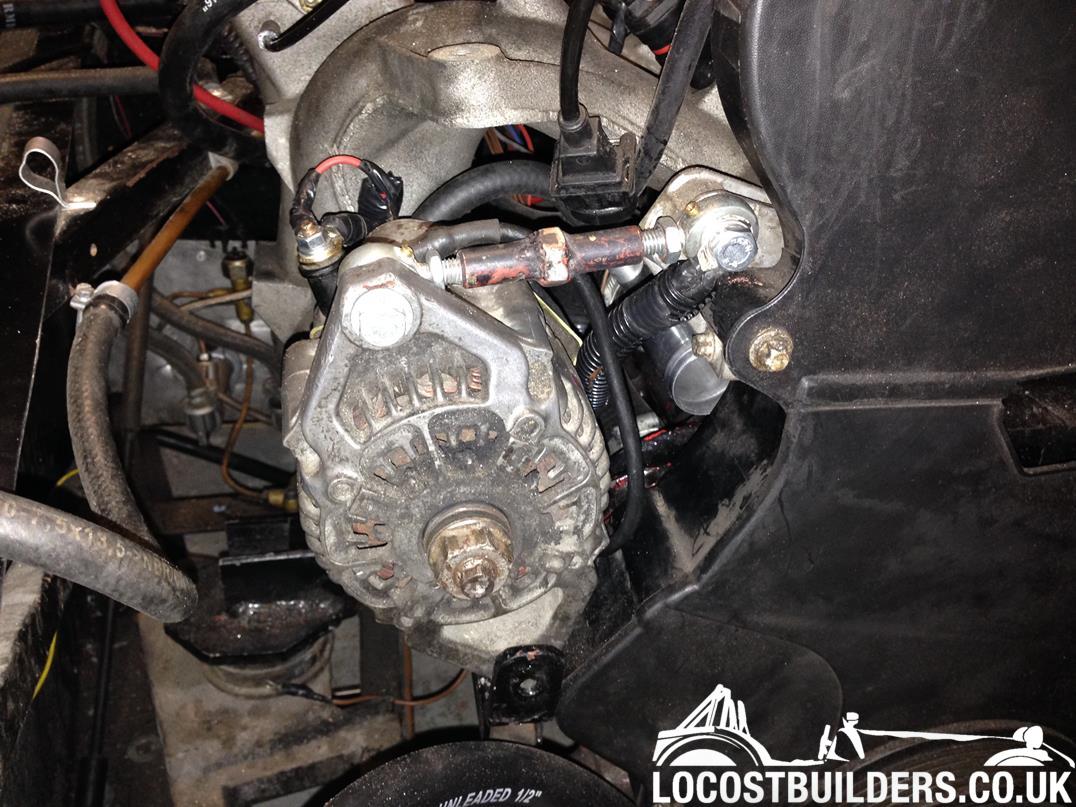 Next i managed to source a belt and new pulley for the alternator that matched the crank pulley. 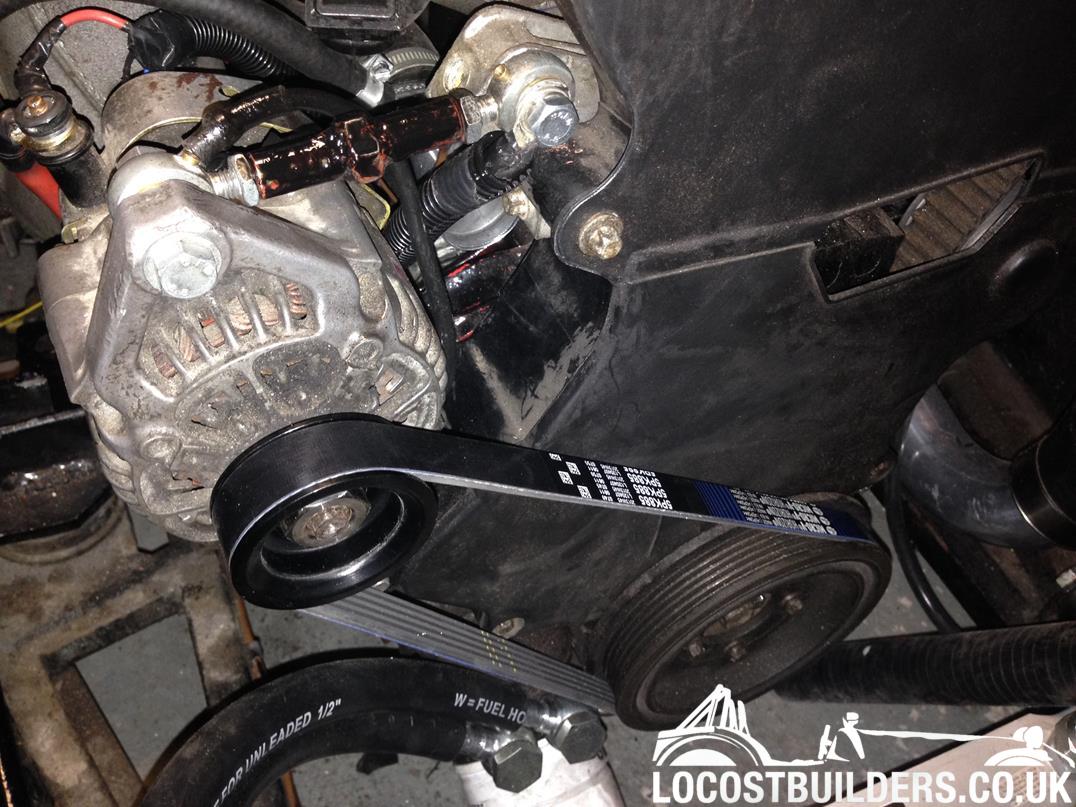 Bought some silicone hose and joiners just before xmas and so i started fitting it all. Got a big list of pipework and connectors that i still need to get, but its nearly there. \ 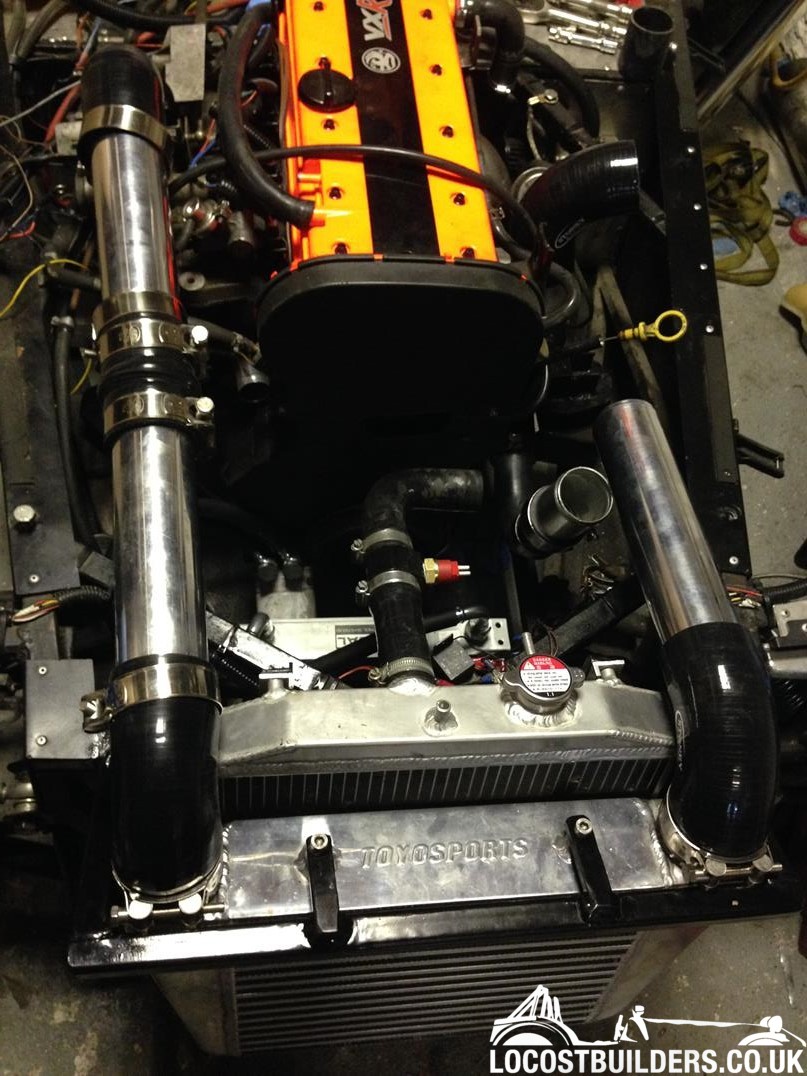 I've also started to tidy up the wiring and using all the OEM connectors i can find. 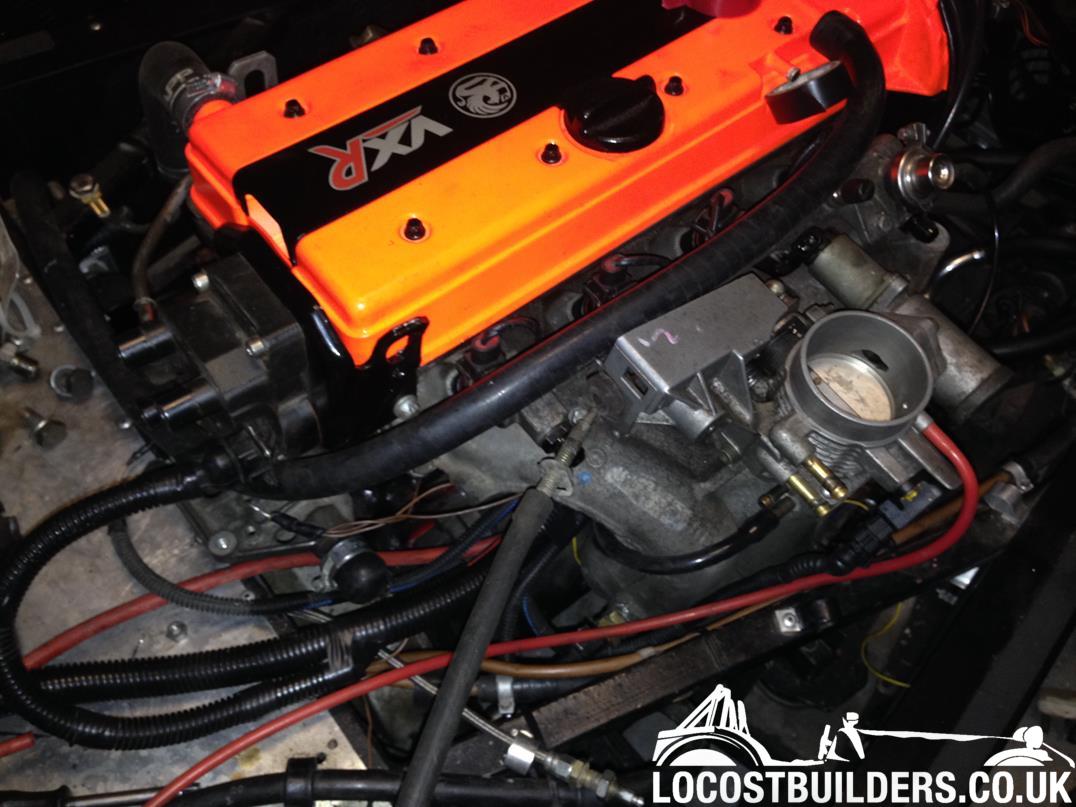 |
Thats all for now
Bought a T piece pipe for the coolant system off ebay, but i was less than impressed considering it was quite expensive.
 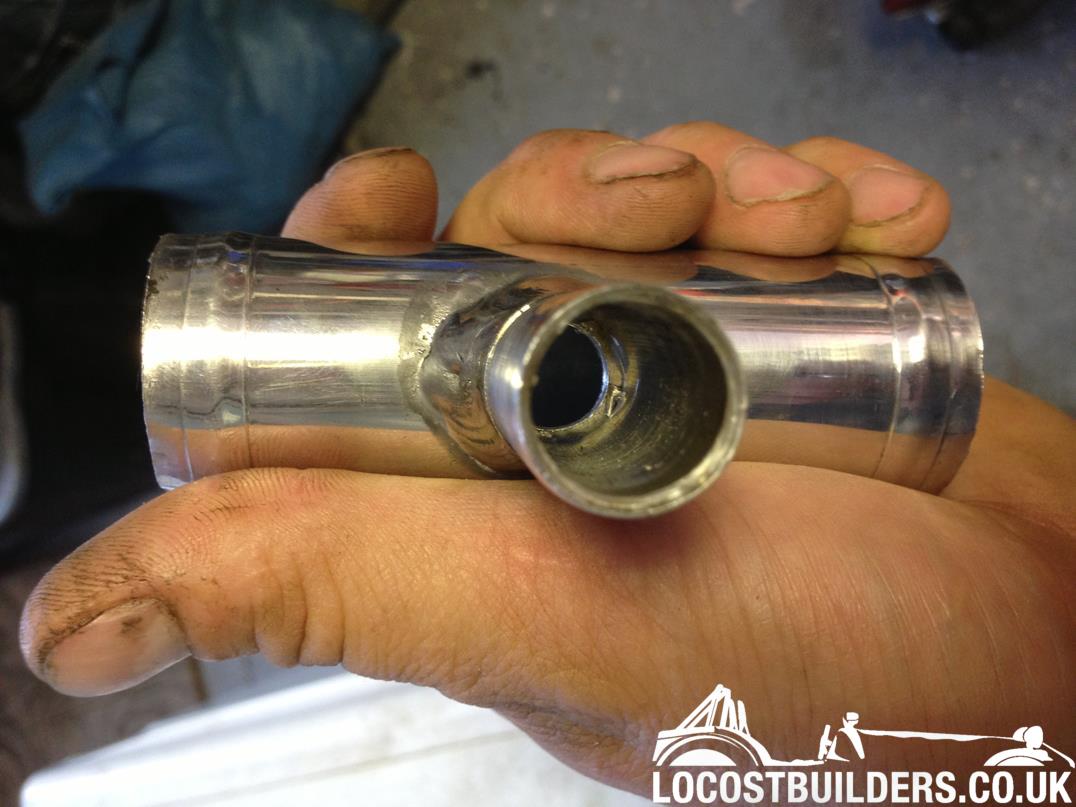 The pipe was all bent and the smaller pipe wasnt drilled out properly. Connected the laptop up last night and started updating the basic map info to match my engine and i want to test the fans work etc. |
Well done Ben ! That is one of my favourite engines, only 2nd to the honda vtec. That rocker cover looks kick ass ! Has anybody tested the boundaries of the haynes roadster chassis ? For example, how much power you can put through it before you get flexing or stress of the chassis ? How are you planning on keeping the front end down at speed Ben ? I have seen some Caterhams with tiny little fins on the nose cone, but they seem to be a little inadequate for the job. You continue to be one of the bench setters on this forum, I am watching your thread with great interest ! Well done. :cool:
|
Thanks Jason,
I think I'll be testing the limits of the gearbox before the chassis starts flexing. The cars going to be a bit of a handful so I'll keep the power between 250-300bhp just to stop the gearbox spitting it's innards out. I've got a place that can supply t5 gearbox's but I don't want to go down that route till I have no choice. I'm going to have the suspension setup at procomp once all the bits are fitted. The caterham canards will do very little for us as they are designed for the caterham and even then they were for aero around the wishbones. There's a few aero drawings on the equinox Facebook page that's quite interesting and they look at lift etc. |
Is it just me or is it starting to get silly, it's all well and good people putting these rather powerful engines in but do we have the ability to keep these highly powered, yet very light cars sunny side up.
don't get me wrong i admire people who take on the engineering challenges and over come them, good on you but these cars do have a limit as to what they can safely absorb in punishment without bitting back. Each time I see this improvements in power, bigger engines moreB.H.P. but I never see anyone uprating their brakes, it's easy to make them go its an art to stopping them in a straight line ah well rant over, good luck with the mods Arfon |
I know many cars with more power than I've got. I thought I was being conversative with my choice of engine lol
I didn't find my last engine had enough go in it, it was only 160bhp ;) Brakes, Tyres etc are already suitable for the power upgrade. :) |
Good luck with that, you're doing well.
Great engine, I had an astra coupe with that engine and was great. That problem with the exhaust manifold studs must be common as I also had that. Other than that I don't think I had any problems with it. |
Bit More of an Update......
Hopefully it'll be a fairly bullet proof engine !
Modified the Rally Design pedal box to take a Vauxhall accelerator cable, had to add a small box to space up the cable sleeve and bend the back of the pedal up so the cable pulls further.  Decided while i was waiting for funds for more parts i'd flared the side panels to get some of the heat out! 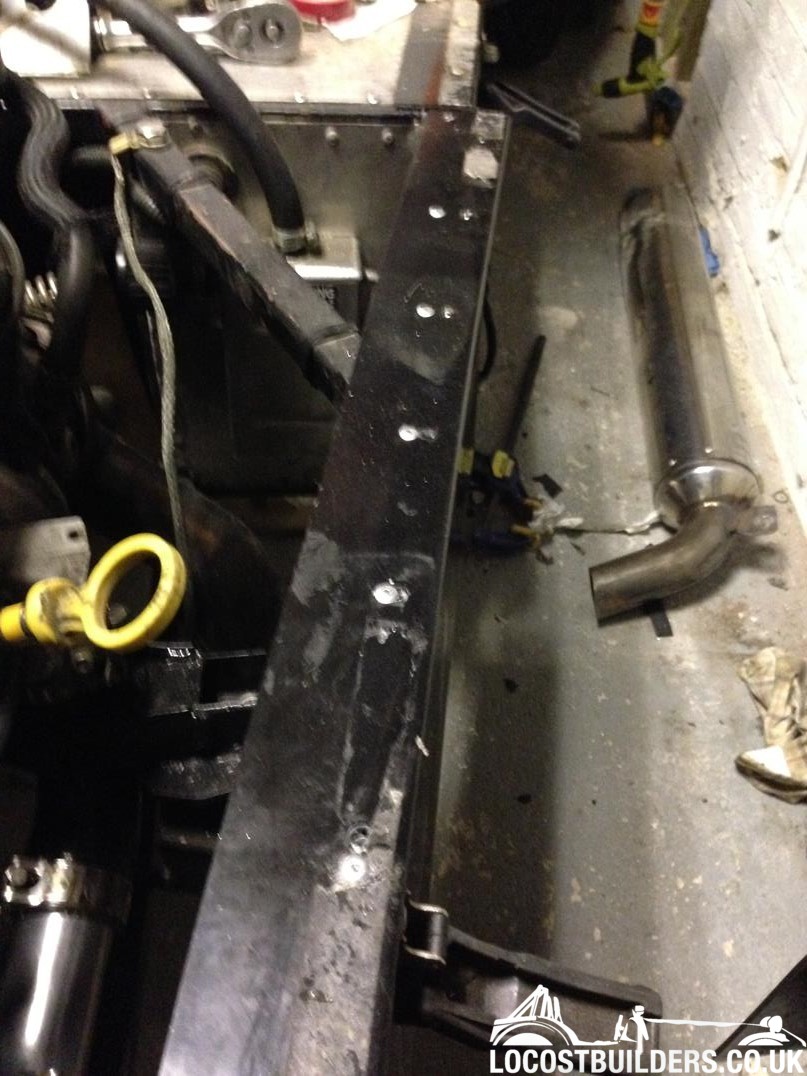   Not much left i can do currently |
If cooling becomes an issue, would there be space to lye the inter cooler flat across the top of the engine bay somewhere, & put a kia sedona style scoop & use their inter cooler set up, this freeing up the rad to get some fresh air. Just an idea, as this is the set up in my kia sedona 2.9 crdi. Might be an option ? If there is space of course. :D
|
I did try the intercooler above the radiator in front of the engine but I just couldn't get it fitted in that space :(
|
Widetrack Roadster time:eek:
|
It's already pretty wide :D
 |
I got the feeling Caterham were attempting to spread more of the car to hold the road .:eek:
|
Caterhams are pretty narrow so maybe
|
Another Update
Sorry about no activity recently, my parts came in dibs and drabs so I didn't bother taking a picture. Still missing some bits which is annoying.
Anyway, I had a go at making an exhaust for the car. Tacked it all together and hopefully I can get it tig up later this week. 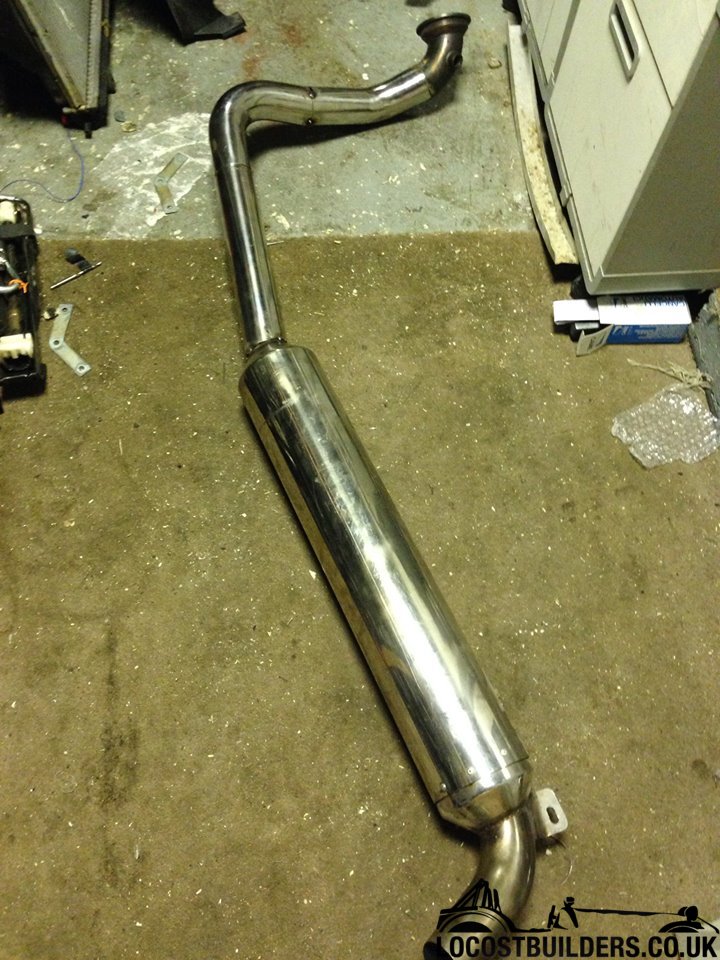 I also had to rejig the coolant lines off the back of the water pump because I found another pipe off the head, which is annoying as it means I cant fill it up with water till I get another t-piece. 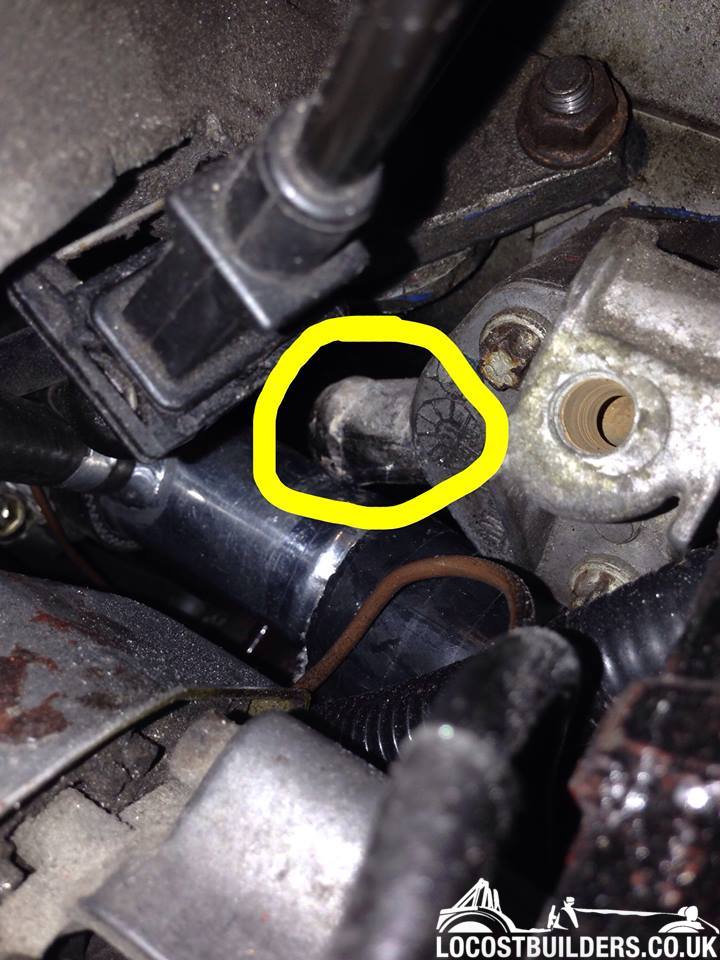 That's it for now, i'll hopefully have all the bits by the weekend (except the extra t piece) and I can finish most of the pipework :D |
Quote:
I asking because I'm still wondering how to make my exhaust. Last time (turbocharging BMW) I tacked exhaust with SS electrode and stick welder and than had it TIG welded by professionals... |
Just normal mig mate but I had to turn it down to stop it blowing holes
Taking it to a mate with a tig later in the week. |
Really impressed with this engine swap. Obviously know your way around this engine and it makes for a good read, seeing all the tweaks and changes (cosmetic and mechanical) to make it suitable for a kit car. AshG has a Saab turbo engine in his, so I expect the car goes just fine with a turbo in them. I'll be looking forward to seeing this run on the road.
|
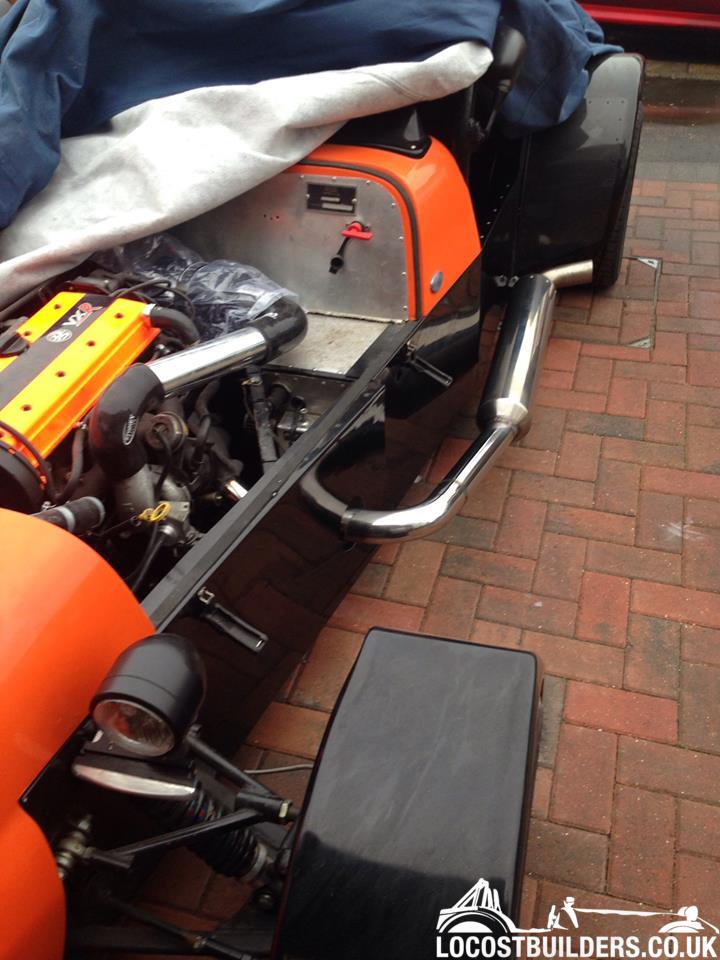
Got my mate to tig up the exhaust last week, so fitted it this weekend. Fitted perfect first time, right slap bang centre of the cut out in the side panel too. Really pleased how its turned out!
  I'm also struggling to find a place for my airfilter, where am I going to get fresh air from ? 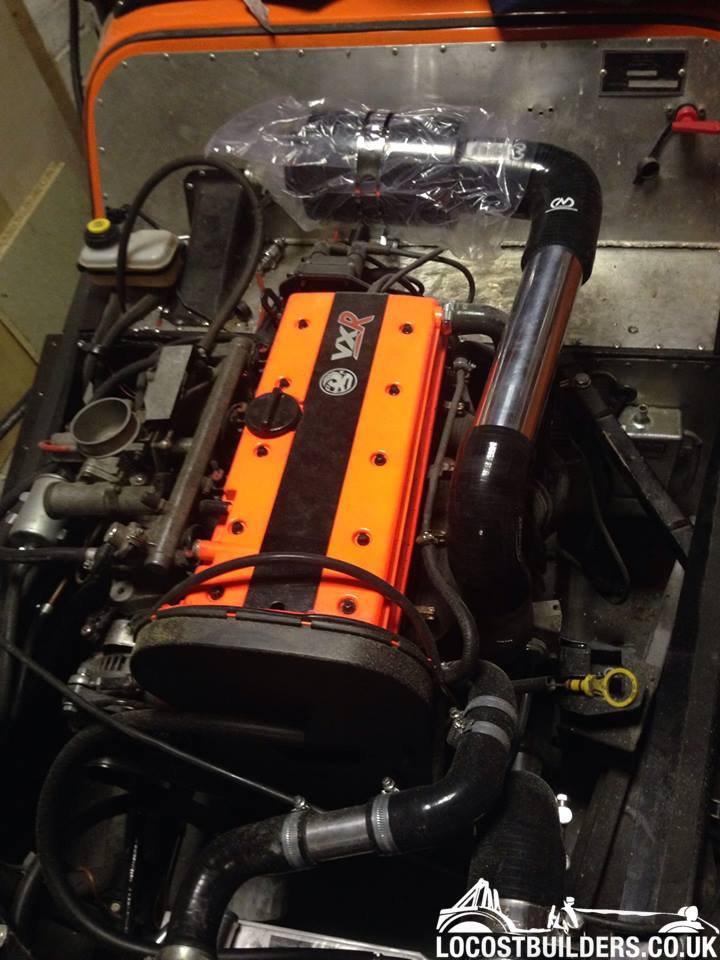 |
Hi Ben ....I know this seems obvious, but I will mention it anyway, you are going to need to fit some kind of "rolled" tip on the exhaust outlet for iva
good progress by the way, it's that time of year when you feel like getting stuck in again. |
No mate, its already road registered :D
|
Somebody will be needing an account with Michelin !:rolleyes: fair play Ben, cracking car. ;)
|
That'll be Toyo ;)
|
Dohhhhhh....feels like a right numpty
|
Hi, which pattern bell housing does that engine use? Is it the same as the r28 in the omega?
And could you post a pic and a measuerement of the ground clearance under the box please. I'm trying to fit a saab engine in my build, but with the height of the engine and size of the bell housing around the flywheel I'm going to struggle to keep iva visibility without the bell housing sticking out 4" from the bottom of the chassis. |
Quote:
 Yes it's standard GM bell housing pattern. R28 will fit, I have one in the garage :) |
Well, Huge update time !!
I filled the oil up, cranked it over for a bit till the light went out (with the coilpack and fuel pump unplugged). Next came the startup. The first actual start was witnessed by yellowcab via facetime... soz But this is the 2nd start up, not bad considering its still running the same map as the xe, I just upped the req_fuel. SO here it is : http://youtu.be/1Qoy9cHD1wQ Think a belt is too tight, but apart from that. No nasty sounds heard :D:D |
Well done that man
Arfon |
Thanks, even with 2" poking out the bottom like that and spoiling my nice smooth undertray the saab lump is too tall for a sensible seat height.
Guess I'll just have to add 100mm spacers under the seat for the iva and not build the full cage until afterwards. ;-) |
Wow, have you spoken the AshG?
He's got a Saab lump in his, which fits under the bodywork fine |
Few more bits done over the past couple of nights.
Boost Gauge, I was going to replace the oil pressure gauge to save drilling another hole but I might swap that for a oil temp gauge instead so I put the boost gauge where I could see it :D 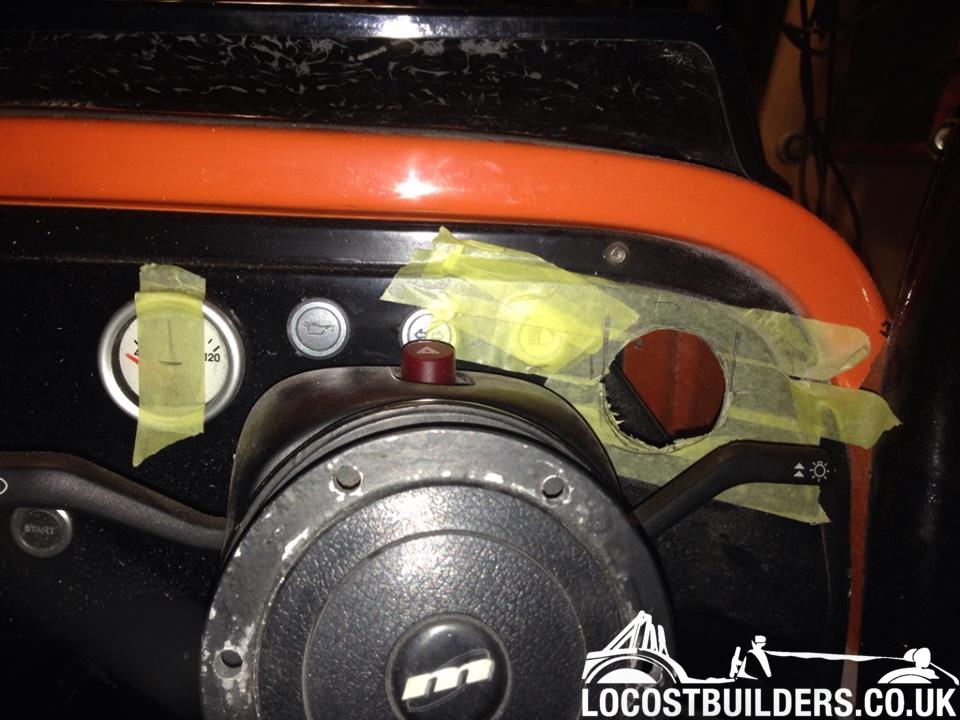 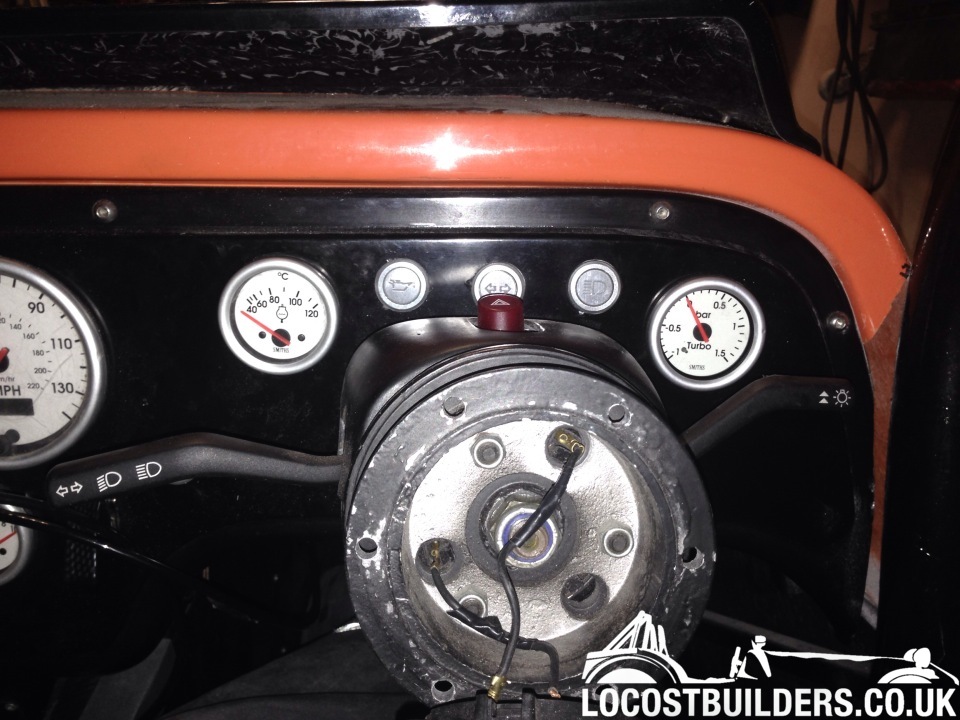 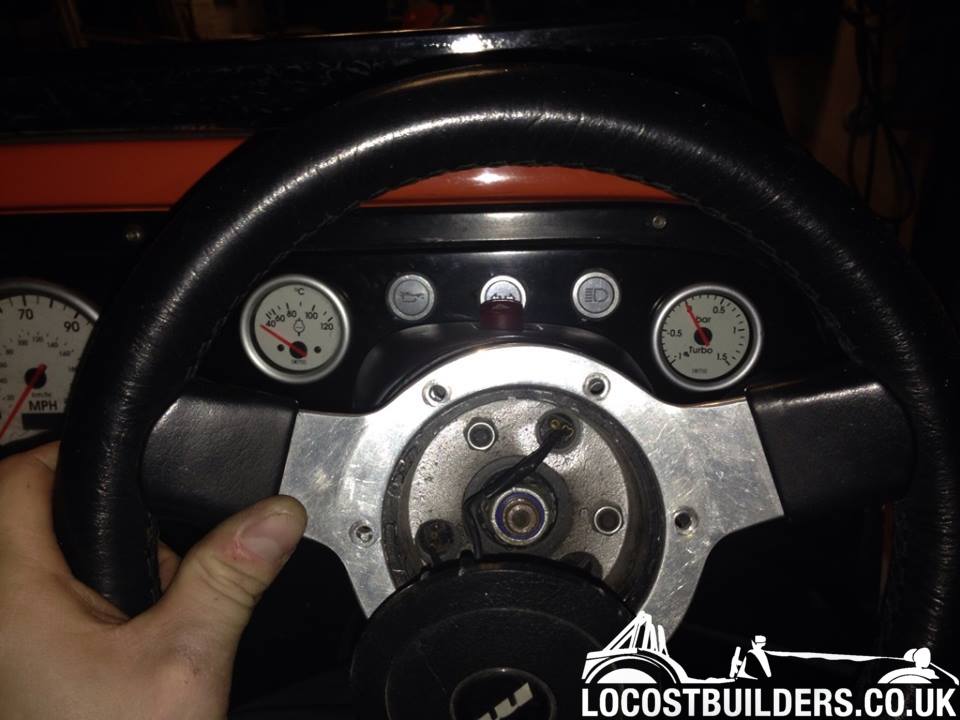 |
| All times are GMT +1. The time now is 08:18 AM. |
Powered by vBulletin® Version 3.6.4
Copyright ©2000 - 2024, Jelsoft Enterprises Ltd.