Zetec alloy sump
I thought I would start a new thread here as it may help others with their builds at some point.
My build will be making use of the 1.8 Escort Mk5 Zetec engine Very soon i'll be at the stage where I need to make a choice on the issue of the sump !! 1: Leave it as standard .... Going to give poor ground clearance unless the engine & box is rased a little. 2: Fit the 1.8 CVH steel sump .... As far as I know, it is a direct fit to the Zetec block ( Have one on my shelf ) 3: Alter the Zetec alloy sump .... I quite like the superior gasket arrangement. Here's a couple of photos of my Zetec sump bolted to the type 9 gearbox 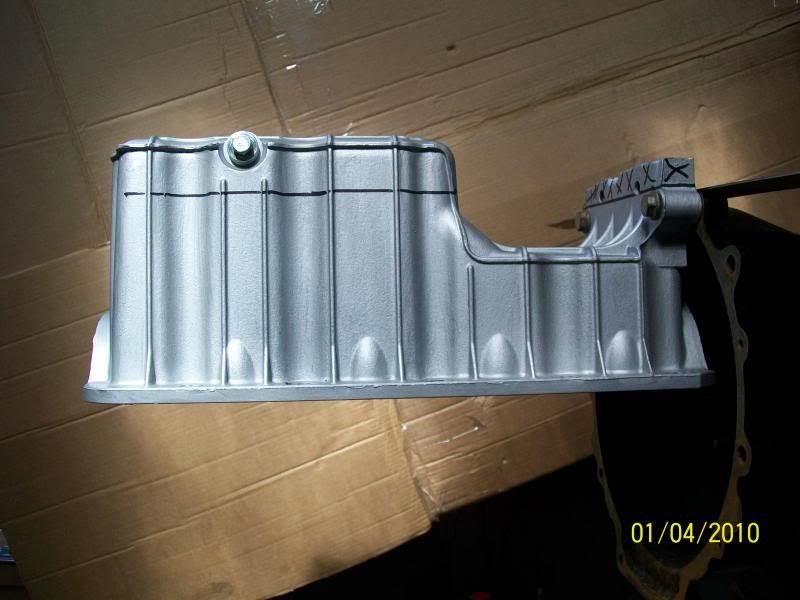 The hatched area on the sumps bell housing flange is surplus to requirements & may as well be cut off I have drawn a line on the sump pan to illustrate where the bottom of the sump should be in order to be level with the gearbox flange Needs aproximately 40mm removing from one side & about 20-25 mm removed from the other side . Here's another picture from the rear .... This sort of illustrates the relationship of sump & gearbox. 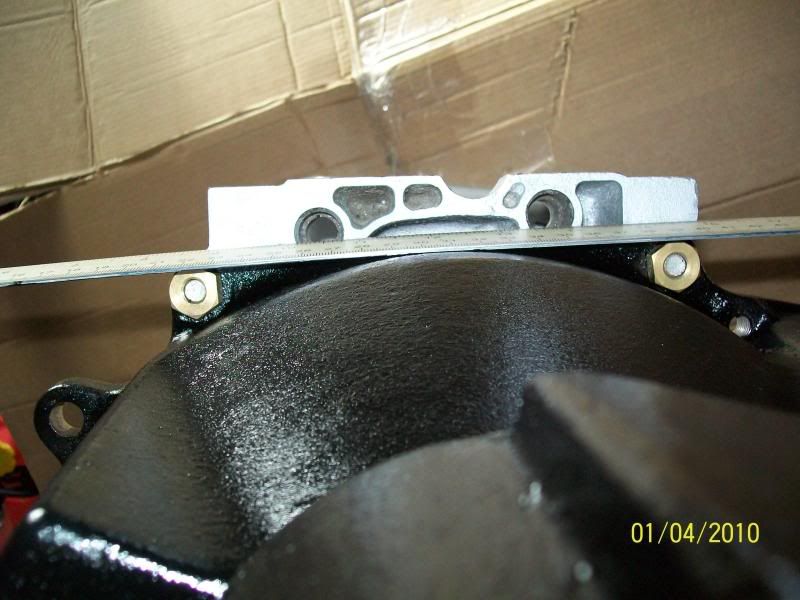 I don't know if I would take as much as 40mm from the pan ( much reduced oil capacity ) but 25-30mm wouldn't hurt !! Plenty of scope for extending the pan rearwards to allow for greater capacity though ;) Fortunately I have a small grit blaster, should be able to get the alloy nice & clean ready for TIG welding. What do you think chaps ? |
Hi Ronnie.
I went for No.3 on a 2lt sump, flat from front to back. On the 1.8 sump i would do the same and fill in the hump near the gearbox, drill a few holes in the front / top and it will increase the volume of oil. Alloy sump should cool the oil better. :) Using the cvh sump there are 2 holes to drill near the crank at each end. |
Thanks Mike :)
I removed the surplus flange earlier, with that gone it gave me a better idea of things. Certainly looks like a nice straight forward job .... I think the bottom of the pan will have a coming off party in the morning & like you say, extend the rear of the pan :cool: :) |
The ali on the sump is a curious exotic mix (that means I don't know) that unless you are very good with the tig can become porous.
I would use the steel pinto one:) Steve |
Cheers for the heads up Steve :cool:
There were certainly a fair few tiny air pockets visible in the lump I cut off earlier !! May drag the Tig out in the morning & try a few welds on the scrap piece ;) :) |
Ronnie, just be careful before you cut anything. I have altered a sump for my zetec, but they are not all the same. Yours looks like mine though, and I think you may find that although those holes you have bolted it to the bellhousing with line up now, they don`t when they are on the engine.
I may be wrong but mine didn`t. I took enough off so that it left about 6 inches of sidewall and hardly lost any capacity at all as most of it was thick bottom material that was removed. Cheers, Dennis. |
Hi ronnie, I've just finished my last job which was as a welder and have done some tig but not alot on ali but I'm willing to do it myself. What I want to know is how do you know what the ali make up of the sump is and then want type of ali rods do you use and want type of ali to use as the infill bit in the middle. Hope that is clear enough, hope you can help.
cheers tony |
I have almost completed the sump today :)
Taken a few mm from the alloy one .... Bolted it to the block to do the Tig welding .... Thanks for that tip mike, it soaked up the heat like a good un, would have had some distortion had I not. Steve your dead right .... As far as cast alloy goes, I have never seen a casting with quite so many air pockets !! Tig welds OK but trys the old patience a tad .... A tiny bit too much current & it's gone .... I guess about normal for this type of brittle casting ;) Tony The standard BOC 5356 alloy tig filler rod seems to take just fine :) I'll try to get some more photos posted tomorrow once I have it all done . |
All done !!
This morning I have managed to complete the sump alteration .... Assuming I don't change my mind & extend the rear end of it !!
Here's a few more pictures. This was after the initial first cuts, I know it would of looked neater if I followed the shape of the sump plug but just decided to keep it simple !! 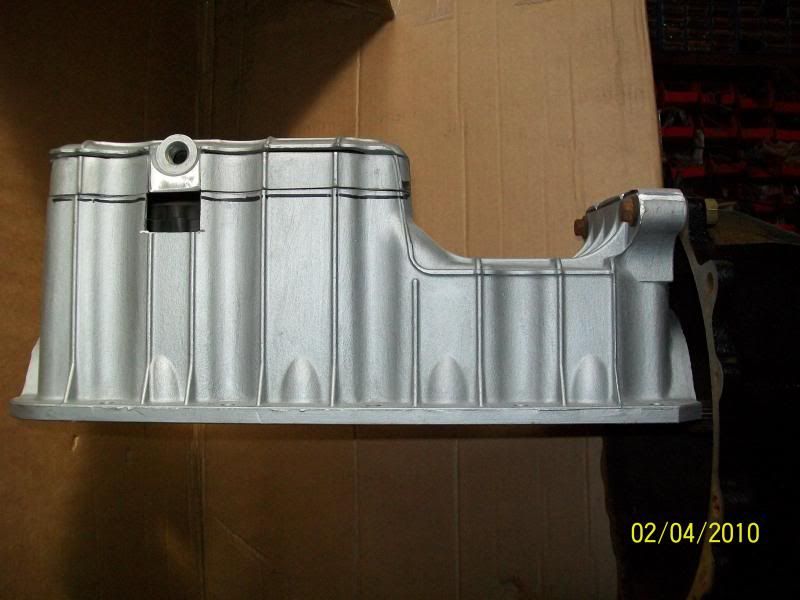 The next one shows the part saved for the sump base & the section of material that was removed. 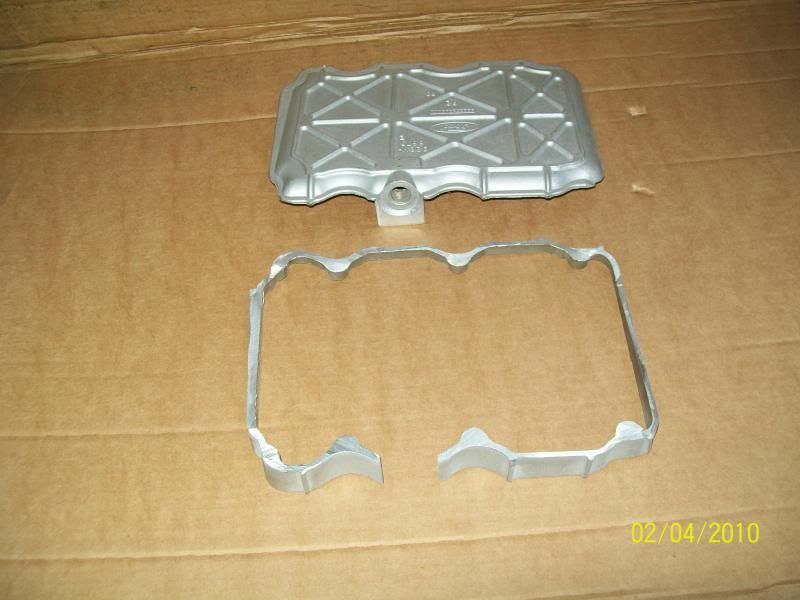 This one is an example of the completed weld seam .... Was not aiming for pretty, just a functional leak free join. 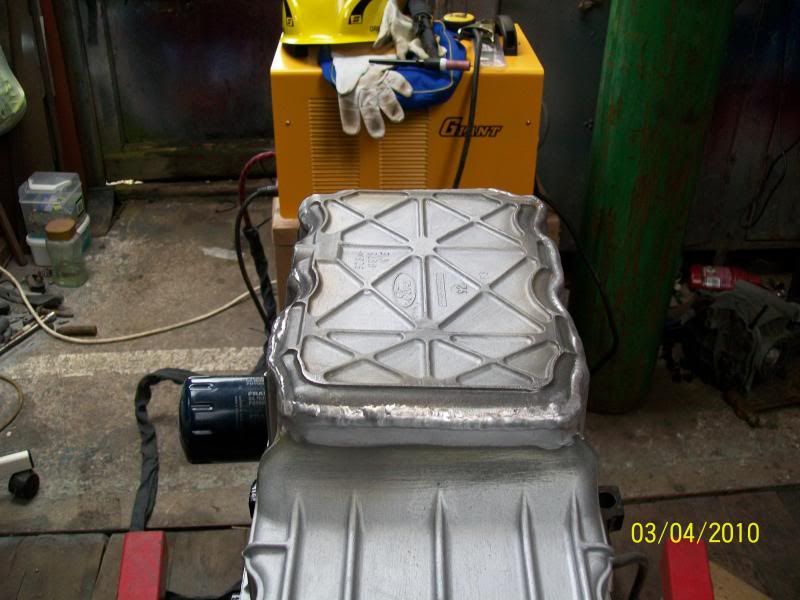 All in all, not such a bad job to do .... No real dramatic moments .... Well besides blowing a massive hole in one side of it !!?? Got a bit excited with the heat, if you know what I mean :D |
Nice job Ronnie, I might have to do something similar with the ally sump off the V6 but as I don't have TIG I'll have to learn to do it with oxy acetylene, should be fun:confused: . I could always take it to my mate to do but where's the challenge in that?
D. |
| All times are GMT +1. The time now is 06:15 AM. |
Powered by vBulletin® Version 3.6.4
Copyright ©2000 - 2025, Jelsoft Enterprises Ltd.