floor, rear panel and fuel tank
hi guys,
After thinking long and hard about selling the project or putting it to bed until finances get better, i have decided to sod it and carry on, even if it means a lean christmas! So this morning, bright and early i stripped all the running gear, wishbones etc from the chassis and cut the floor panes from 1.6mm steel sheet. I decided to rivet every two inches and strip weld from above every 8 inches, just for peace of mind and also to add a bit of stiffness to the chassis. I also spent a good hour or so checking every weld aswell as re welding a few joints. 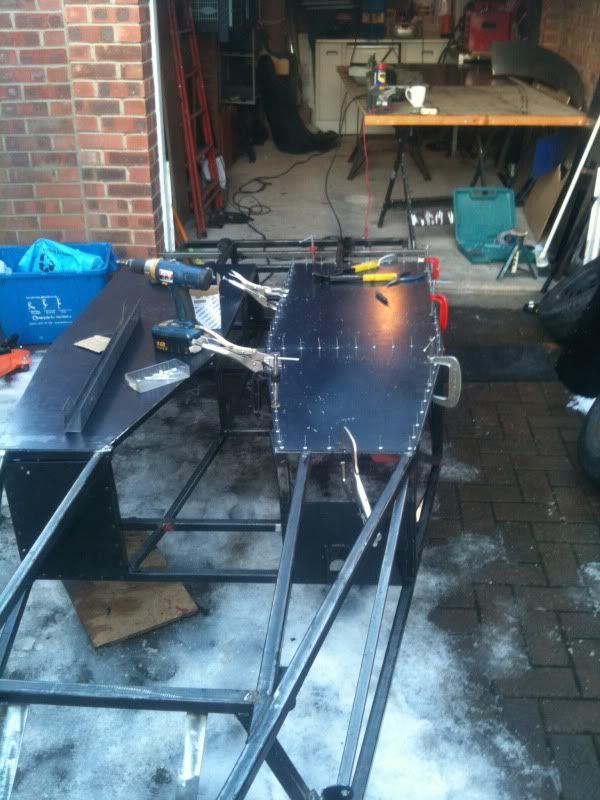 I then cut the seat back panel, also from 0.8mm steel (just to save a bit of money), i know it will add some weight but at least it will be strong. I wont rivet it in until everything else is back together. I then started on the fuel tank. Ive made it 500 by 200 by 200, nice and compact but still 20 litres. Ive made it this size because i cant decide where to put it, maybe you guys can help with that. Iv yet to put the baffles, end plate, outlet and filler neck on it. I filled it with water and left it for an hour or so and to my amazement there were no leaks so far! 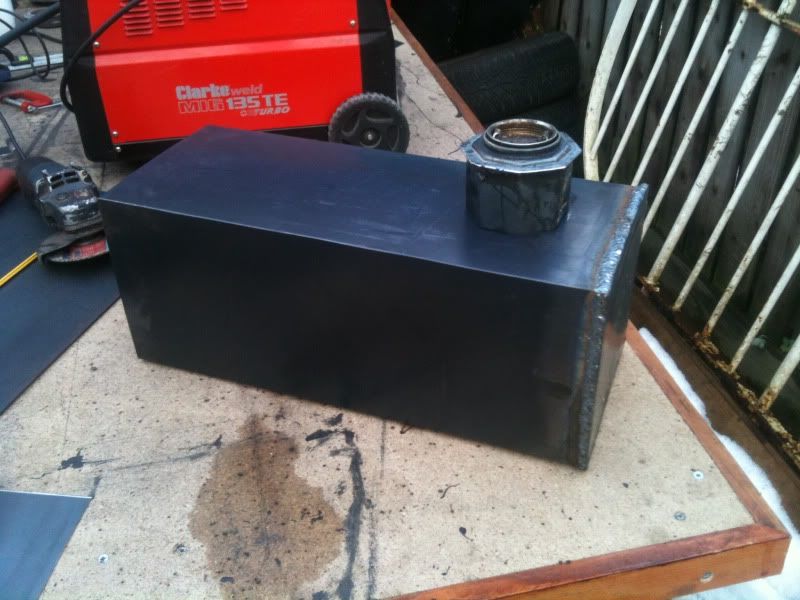 Also decided today that il put an old pinto in rather than the planned zetec. Aswell as cutting costs it will help me get through the iva. Speaking of which i received my chassis number yesterday so il get that stamped on in the next couple of days. So guys, where should the tank go? here? 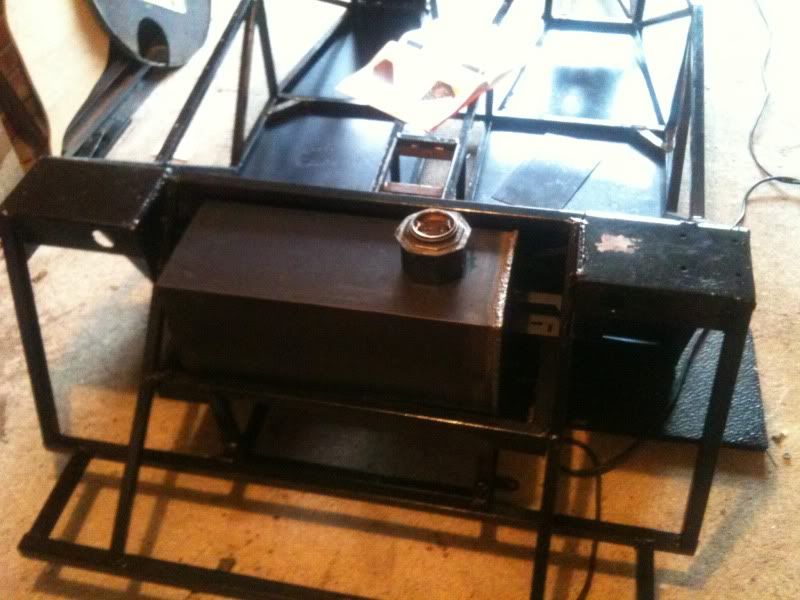 or here? 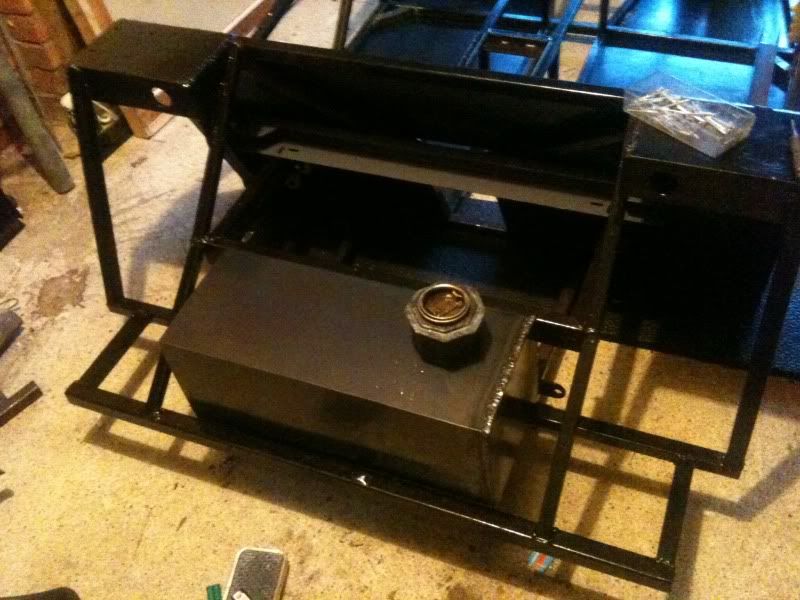 Regards, Nathan |
Nathan you might want to swap your water test for a petrol test, petrol seaps through very fine cracks in welds and water does not. If your worried about fire etc take the cap off pour all the fuel out and set the flumes alight and let it burn it's self out . Do this BEFORE you start welding! I've made 15-20 tanks this way for grass track cars.
|
thanks, thats a good idea. I was thinking of using my dads pressure testing gear on it, and leaving it pumped up with about 20psi for an hour or so to see if there are any leaks, but il try your method first.
|
The pressure test works but it does'nt show you where the leak is. When/if you find a leak grind a wedge out of the weld,turn the power up put a heavy tack in it's place.
|
Soapy water should help find the leaks during the pressure test.
|
Don't put to much pressure in:eek:
Ask Ash what happens:D |
Nice to hear that you are cracking on with your build, nice one mate
Chassis is looking great :) With regards your tank placement, I personally prefer the second photo of the tank, as when you come to fit your handbrake cables they run just above the diff & so there will be very little access if the tank was above the diff, just my twopence worth :D It might just be the angle of the photos but parts D11 look slightly odd, they seem "too near vertical", did you cut the upper angle to 66 degree,s? hope you don,t mind me saying that, its just if the angle is wrong it might cause a prob later on for the up/down movement of the wishbones( be a bit close etc). If its the photo angle i,ll crawl back under my stone :o Nice work mate, you,ve really made swift progress :cool: cheers andy |
Andy,
You are correct they do look abit steep, but im sure all measurments are correct, as there were no clearance issues when i had the wheels on, regarding up/down travel. I actually put rs14 on first but im sure d11's were cut to 66 degrees as i remember doing them with a hacksaw to get the angle. they may look abit steep due to the fact i made d11 rails out of 32mm box section to give the rear end abit more stregnth. Il get the protractor out in the morning and double check, so dont go crawling under your stone just yet:p regards nathan |
I,m just going by the diagram 4.15 on page 43 ;)
tho by making the D11,s out of a different sized boxed tube is what probably made me look twice/caught my eye , that & the angle of the photo :o I,m sure knowing you that its spot on :) ....must get a bigger stone to crawl under :D cheers andy |
Nice one nathan, good to hear that you are continueing witht he build, I was looking forward to seeing it the next time I am home. Keep up the good work and yes the tank is better is the second picture.
Regards John |
| All times are GMT +1. The time now is 07:59 PM. |
Powered by vBulletin® Version 3.6.4
Copyright ©2000 - 2025, Jelsoft Enterprises Ltd.