
|
|
|
|
#1
 3rd August 2011, 02:12 PM
|
|||
|
|||
|
Well after a hugely long time of research, indecision, having no where to physically build the thing, i've started the physical construction of the chassis. Took a two days off work and the weekend and have built from the front frame to just before the seat back. I'm hoping that the weekend will be free so i can get the seat back frame and transmission tunnel in place. Anyway, threads are boring without pictures, so here goes (if i can make it work)
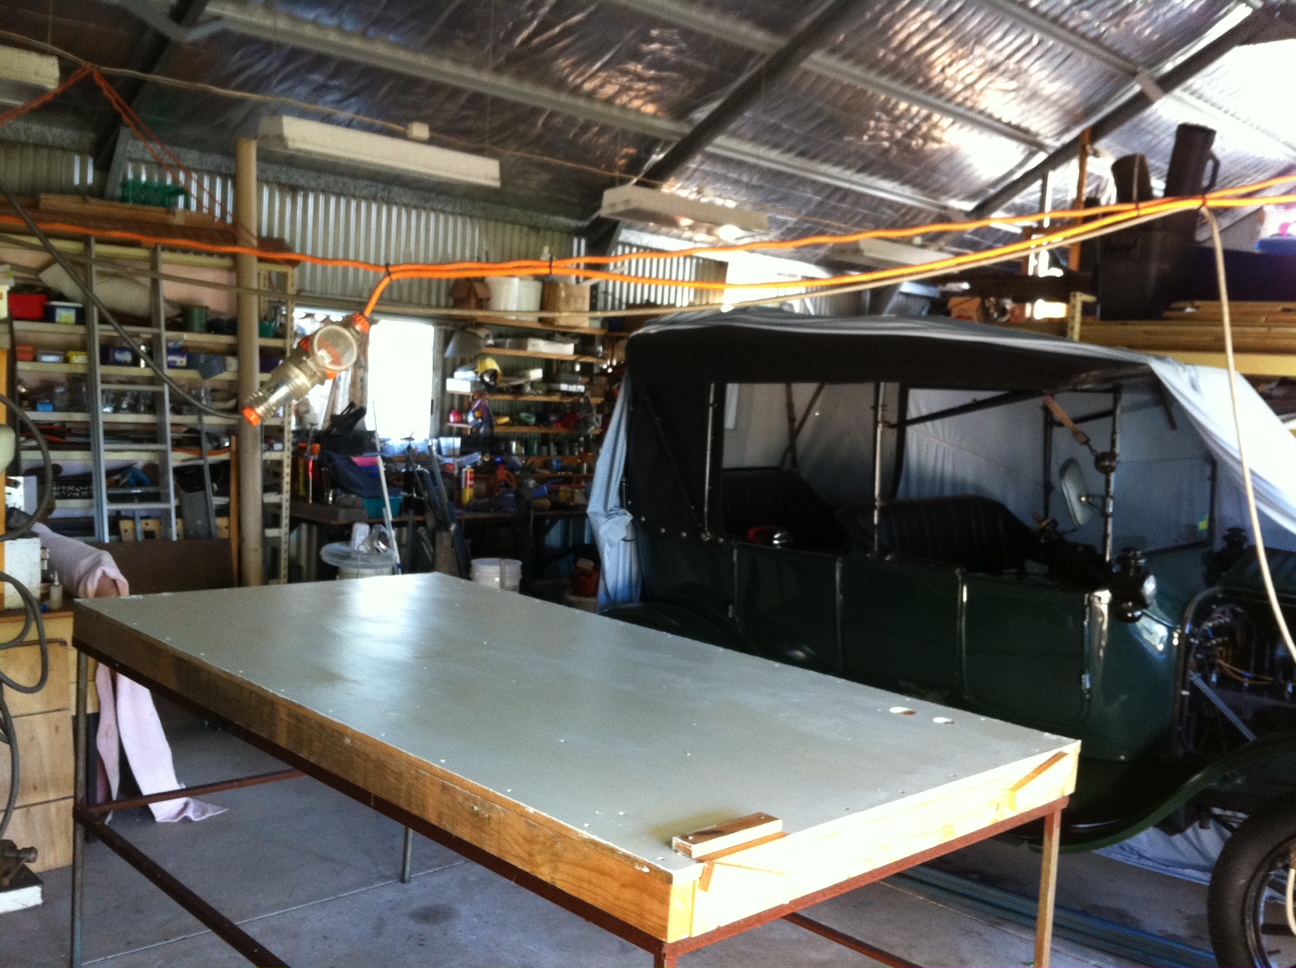 Build table ready to go. Dad's 1918 Model T in the background, so two cars being built at once, althought his is only missing the planetary gearset in the steering wheel. PS if anyone knows of some decent quality ones somewhere, drop me a line. 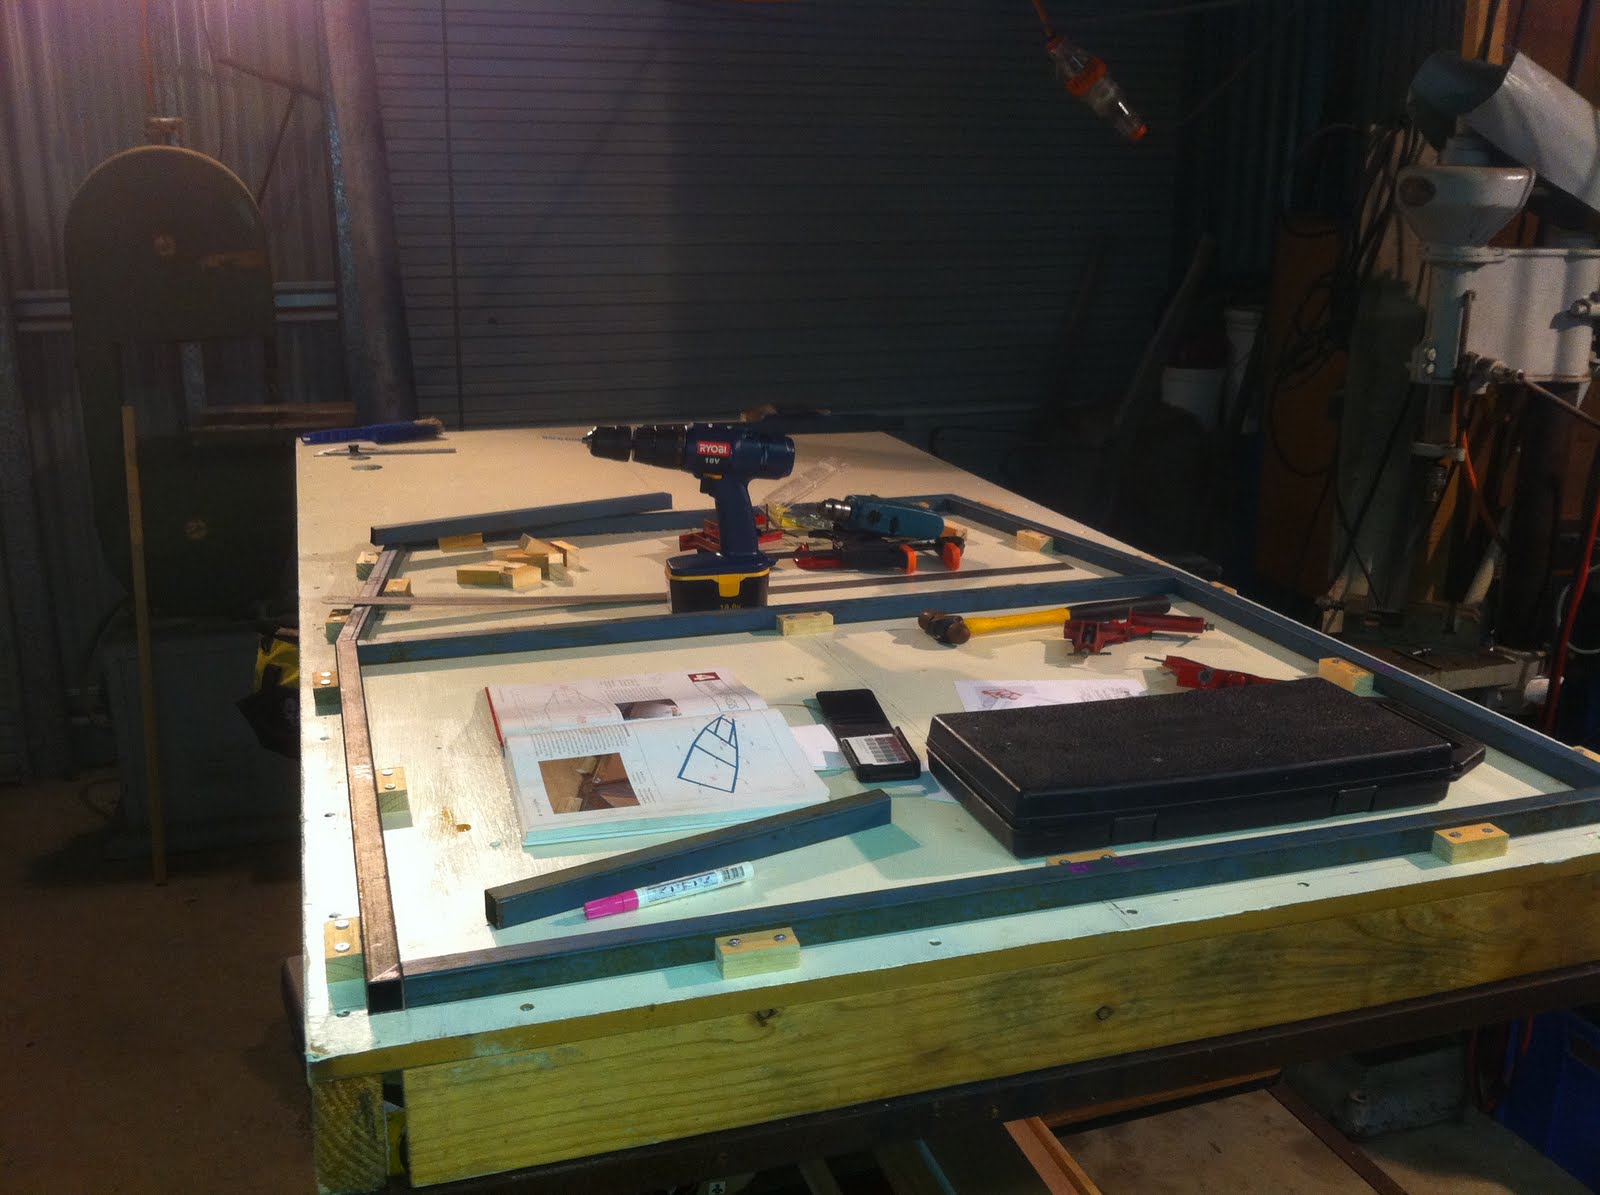 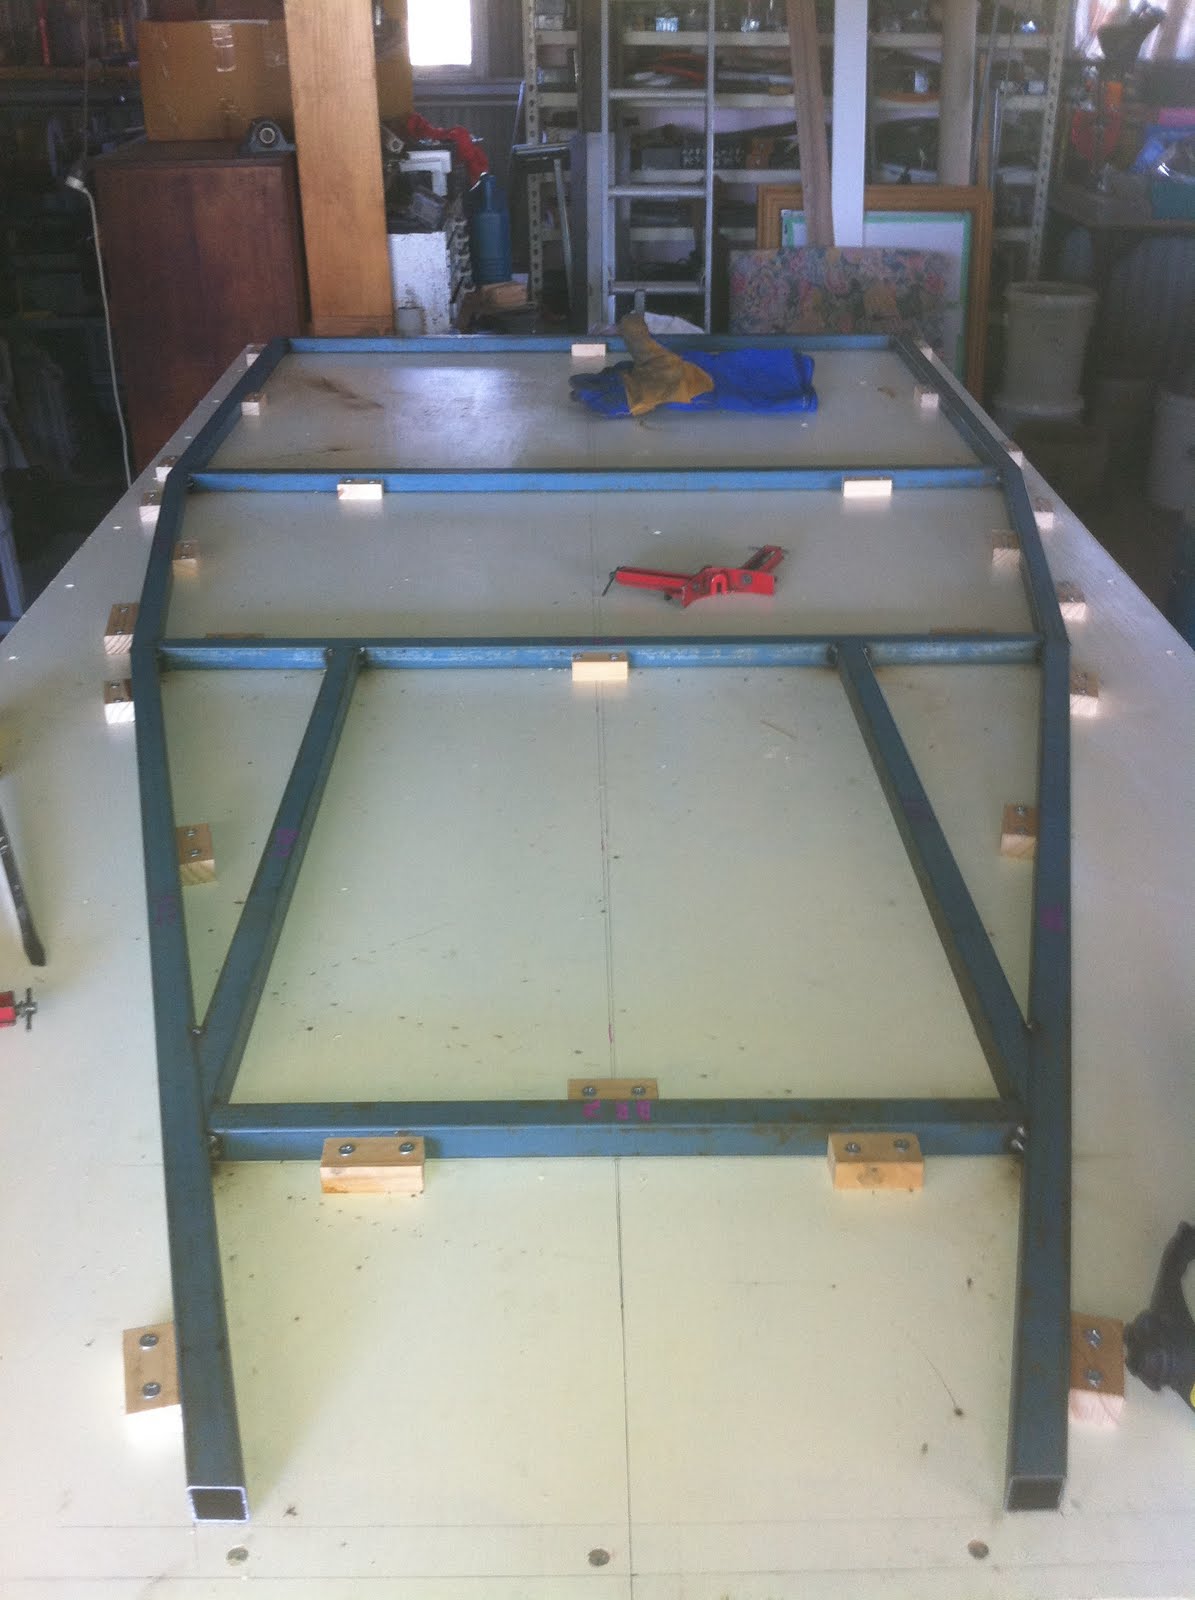 A mostly correct bottom frame. Made a mistake with the positioning of the engine support rails. All fixed now. 
|
|
#2
3rd August 2011, 02:13 PM
|
|||
|
|||
  The top long top rail sections when i put them on first time were only 0.5mm out of alignment. Reason is i didn't get the upright at the end perfectly at 90 degrees. A little bit of persuasion with a knockometer helped it out. Diagonal check measurements are withing 0.5mm, i'm fairly happy with that. That front frame was a bit of a bastard to get right. I had a few bodged attempts on it, but in the end it's spot on.  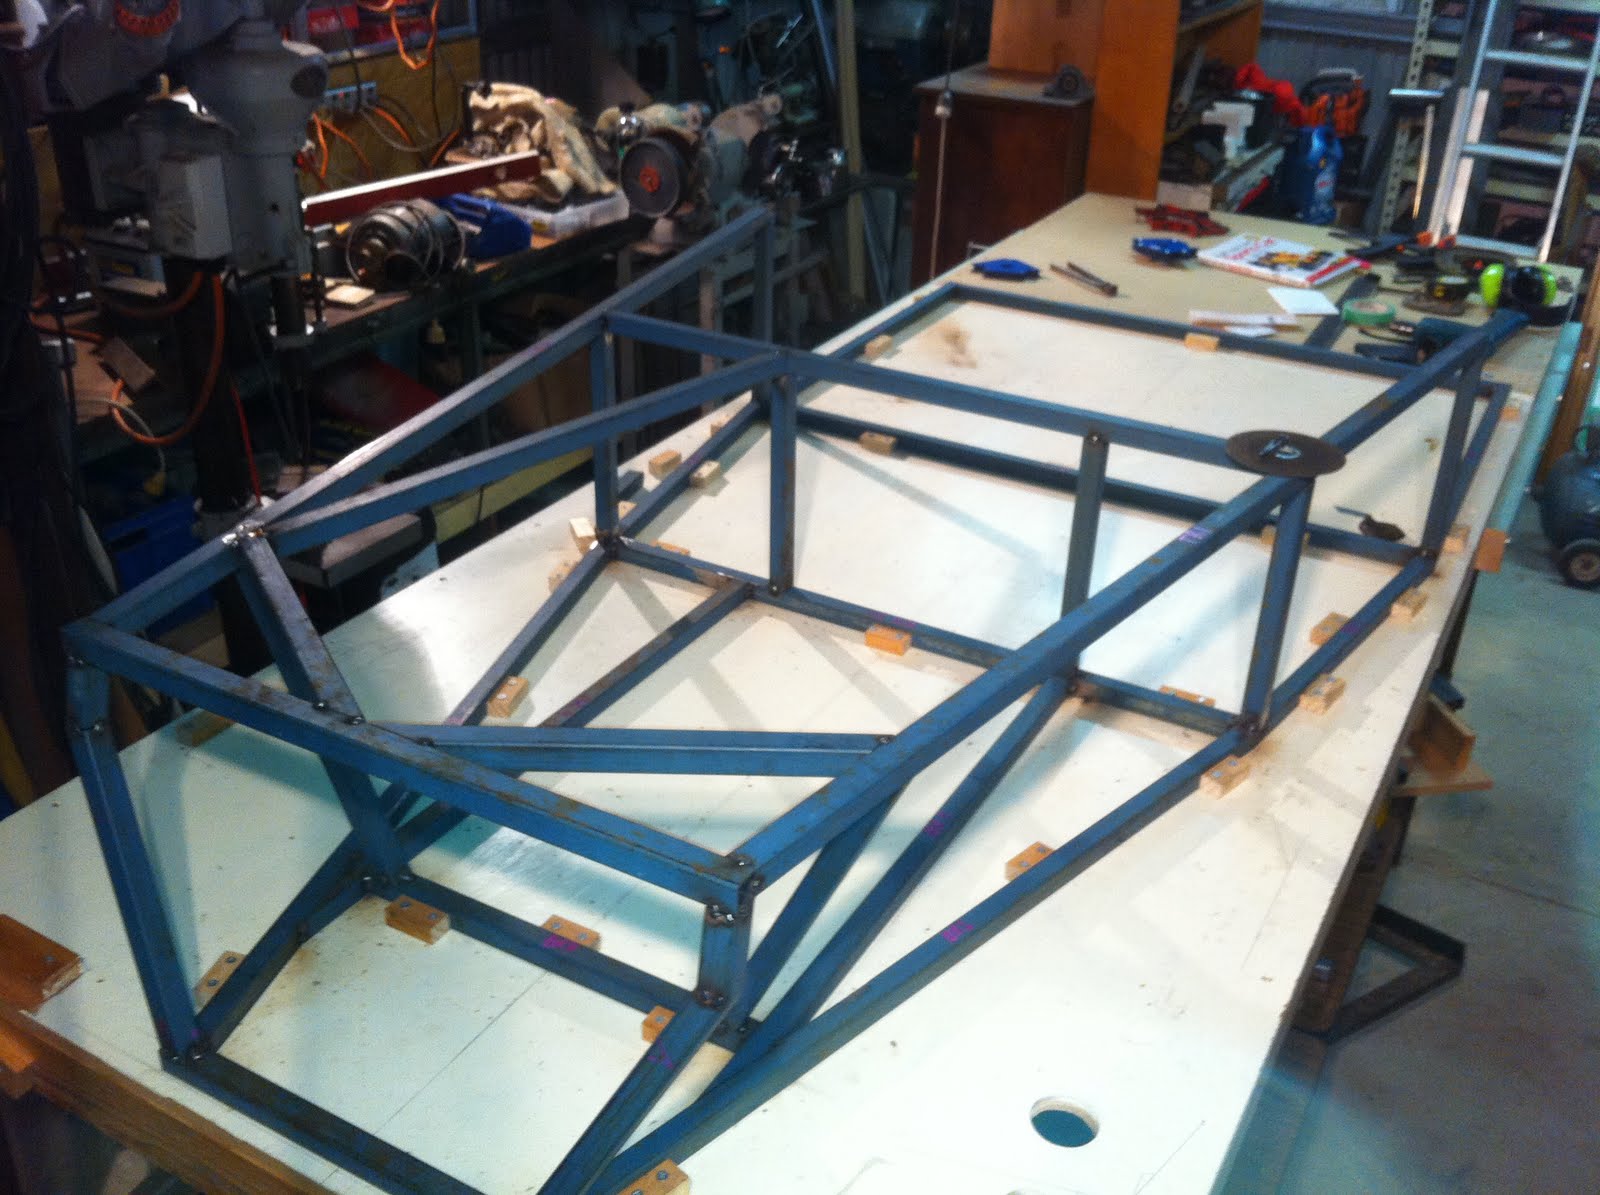 Where i've made it to with the chassis as of Tuesaday evening. 3.5 days of work and i'm to here. I'm pretty happy with the result. Can't wait to get back and continue with the rest of it.
|
|
#3
7th August 2011, 06:01 PM
|
|||
|
|||
|
Thats a cracking start for 3.5 days, so we can expect to see a complete car in about 6 months. No??
Keep up the good work
|
|
#4
9th August 2011, 05:48 AM
|
|||
|
|||
|
Quote:
As a matter of fact, worked on it on Sunday and got all the side diagonals and seat back in place and tacked. Laid out the transmission tunnel and started tacking it. But encountered a problem when one the center bottom rail warped. I now need to refit and properly work out a way to clamp the rails to the build table to prevent the warping. I'm off on a work trip next week, so progress will be slow. But when i get back it will be ready for the full welding so i can lift it off the board and move it forward to work on the diff area.
|
|
#5
9th August 2011, 12:50 PM
|
||||
|
||||
|
good start there. would strongly recommend that you clean up the ends of the tube where you want to weld them as having paint/crap in the weld pool will significantly reduce the strength of the weld/chassis. other than that good effort
__________________
My Roadster Is Finished NerNer....... Pigs can fly, you just have to carry them onto the plane. My Pictures http://s707.photobucket.com/user/ashgardiner/profile/
|
|
#6
13th October 2011, 03:36 AM
|
|||
|
|||
|
So after a hiatus from the shed due to work commitments, i'm back. As of this morning i have 3 more members to cut and tack into place on the main part of the chassis. A mate who is a ticketed structural welder will be around in two weeks time to start the proper welding of the frame.
The rear diff carrier i haven't started yet as i would like to lift the frame and shift it forward. Oh well, good things come to those who wait. Also need to wait till the funds accumulate so i can buy the front whichbones and wishbone mounting brackets. It's the freight which is the killer getting the parts to Australia. I removed the front seat from the MX5 and put it in for a test fit, and unfortunately it doesn't fit properly. Misses out by an inch and makes it too tight to mount properly and safely. I do have an ear out for a set of Recaro seats from a Mitsubishi RVR (EVO wagon type thing) which should fit nicely. But here's the loon builder having a drive. Gotta love the vroom vroom moments as the frame takes shape properly.  
|
 |
| Thread Tools | |
| Display Modes | |
|
|


 Hybrid Mode
