 |
|
#1
|
||||
|
||||
|
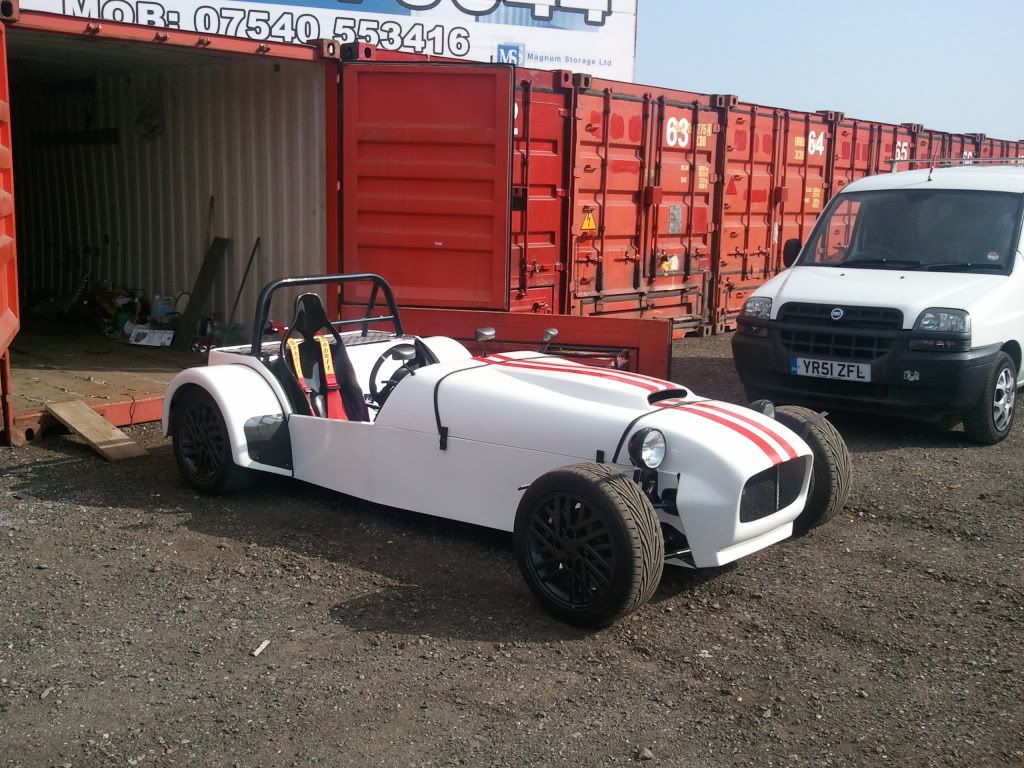
Was a lovely day today and had a day off for the first time in a while. So managed to get a bit done on the roadster.
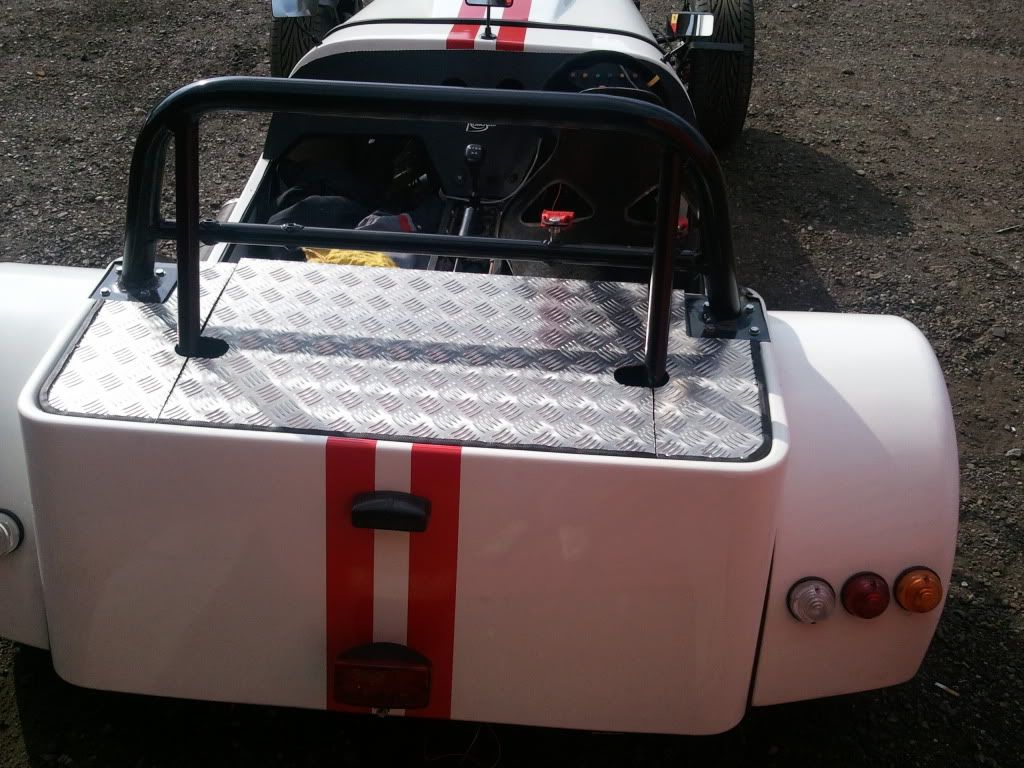
First up, I've made the tub lid from aluminium chequer plate, I've made it so that the middle section between the roll bar is removable. I've got a 4mm or 5mm gap between each section, any ideas what i could fill it with? Edge trim doesnt work all that well because of the chequers. Next up, has anyone got a wiring diagram for the brake warning light (handbrake switch and master cylinder). Finally. Anyone know or a have a pic of how the speedo cable connects to the gearbox (type 9). Mine doesn't spin and I can't seem to get it off. Cheers guys. Here's some pics...  
__________________
~ My Build Diary - http://davesroadster.blogspot.com/ *updated 7/6/11* Best bit so far: Getting it running Worst bit so far: Cutting steel for wishbones and engine mounts. Most annoying bit so far: Generator packing up half way through welding. |
|
#2
|
||||
|
||||
|
Man that is lookin' serweeeet! Sorry I can't help you with your questions as I'm nowhere near that far into my build yet
 D.
__________________
visit my website at www.cossie.davenewell.co.uk |
|
#3
|
||||
|
||||
|
Quote:
__________________
Website http://www.talonmotorfabrication.co.uk/ Direct email phil@talonmotorfabrication.co.uk talonmotorfabrication@gmail.com Mobile office hours 07514098334 |
|
#4
|
|||
|
|||
|
The reinforced edge trim with the metal herring bone back should fix to that with no problems with a little tap from a soft faced hammer
The speedo cable is fixed in place with a circlip at the gearbox end, not easy to access when in the car though Cant remember how i wired the m/c/handbrake warning light off the top of my head but its simple enough, im sure someone will have the answer shortly |
|
#5
|
||||
|
||||
|
Looking good there mate. Got my bodywork on order at the moment. Can't wait until it arrives.
Wiring for the M/C and switch as follows. If cap is installed in M/C which is full of oil get your multimeter and test to see which of the 3 pins are connected all the time. It will an outer and the middle one. If middle is no. 2 it is permenently connected to pin no. 1. The other outer will be no. 3. Switched +ve feed to warning light. Warning light to outer pin 1 on M/C connector. Center pin 2 on M/C to handbrake switch. Outer Pin 3 direct to earth. This will give you the test function as it would have in the Sierra. This is assuming you are using the Ford M/C switch. Hope that helps. Dave
__________________
http://s831.photobucket.com/user/dav...ter%20Pictures OTR 01/05/14 - 1.6 CVH, Type 9, Bike Carbs, Megajolt |
|
#6
|
||||
|
||||
|
That's great. Cheers for the help.
Just the speedo cable now then. 
__________________
~ My Build Diary - http://davesroadster.blogspot.com/ *updated 7/6/11* Best bit so far: Getting it running Worst bit so far: Cutting steel for wishbones and engine mounts. Most annoying bit so far: Generator packing up half way through welding. |
|
#7
|
||||
|
||||
|
i must say that looks great in white with the red stripes and that bonnet looks that part.
good effort All the Best Dean
__________________
My Blog: deannoshaynesroadster.wordpress.com (under construction) Being overtaken is a sign of weakness. South Wales Kit Car Club www.southwaleskitcarclub.co.uk WWW.HELPFORHEROES.ORG.UK XBox Gamer tag: D34NNO |
 |
| Thread Tools | |
| Display Modes | |
|
|