
 |
|
#1
|
|||
|
|||
|
OK, so after many months of not doing anything I finally got some spare time and cash to get cracking again. I had decided to give the rear arches and running boards a go, some of you may remember my questions about fibre glassing. In the end I found a very interesting item on the web about building boats out of thin ply and then covering them in fibre glass. I bought a book from one of the suppliers of plans and decided that using the methods in the book to build my arches was definitely the way to go. Fortune smiled upon me at a car boot sale when I bought 12 sheets of 8mm thick ply for a tenner. Bang on. Anyways I built the formers out of ply, the edges that need rounding over had 3 thicknesses of ply to give me enough meat to get a resonable curve to the edge of the arches. The formers were covered in 3mm thick hardboard, cos that''s what I had on hand, ply may have been better.
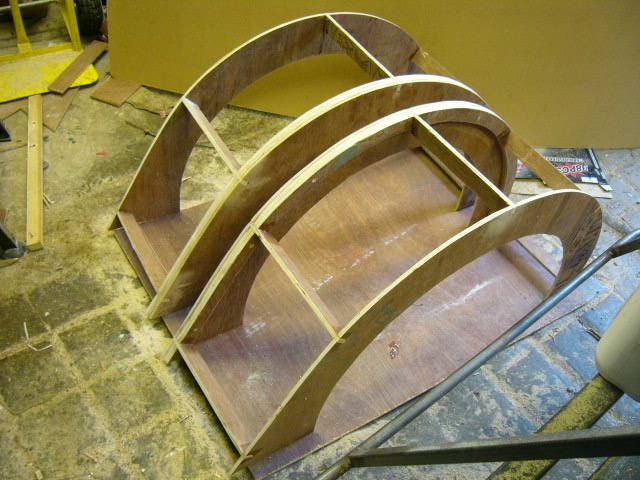 Here are the two bare arches side by side 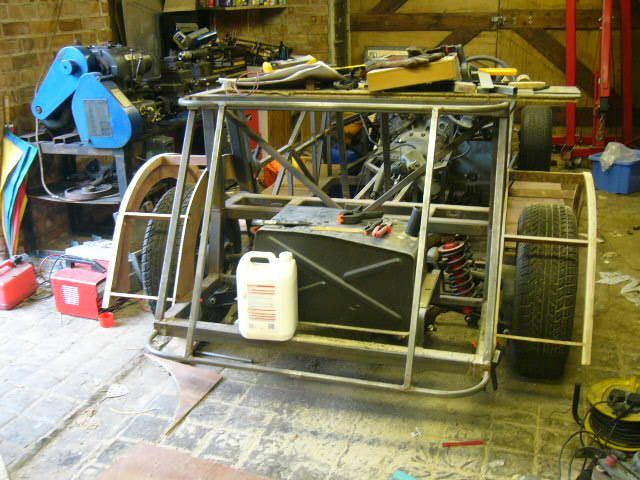 Here are the 2 arches temporarily fitted to make sure they fit - they do  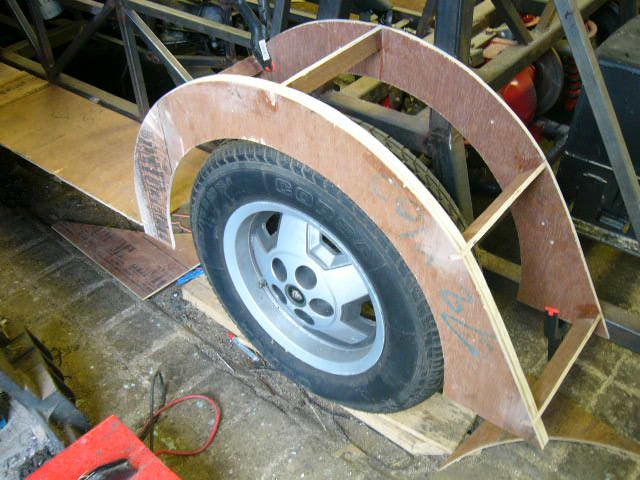 Since these photos I have rounded the outer edges and tidied them up a bit. Next job is to round the outer edge of the running boards and then to make the front arches. Watch this space, as they say. Dave. Last edited by Enoch : 1st June 2014 at 07:41 AM. Reason: typo |
|
#2
|
|||
|
|||
|
Done a bit more today, got the rear arches skinned and rounded off, also started finishing one of the running boards.
Here are some shots of the arches now, they are basically ready for having some fibre glass applying to them. 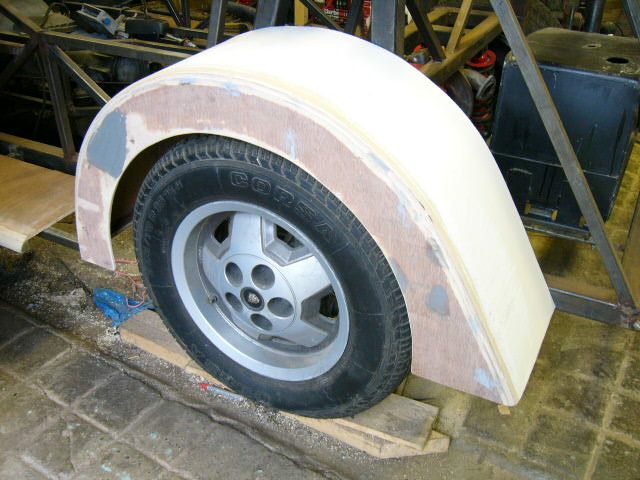 Here is the view from the rear. The fuel tank was a car boot bargain. It's brand new from a Land Rover, it cost £3!! I was selling at a boot fair and I bought an engine off the guy next door for £3. I then sold it 10 minutes later for £18, which is what the guy that had the tank wanted for it. Happy days indeed. Dead easy to fit and it has all the holes I need for a return pipe, filler, gauge and feed. I will fit a separate reservoir to act as a swirl pot. 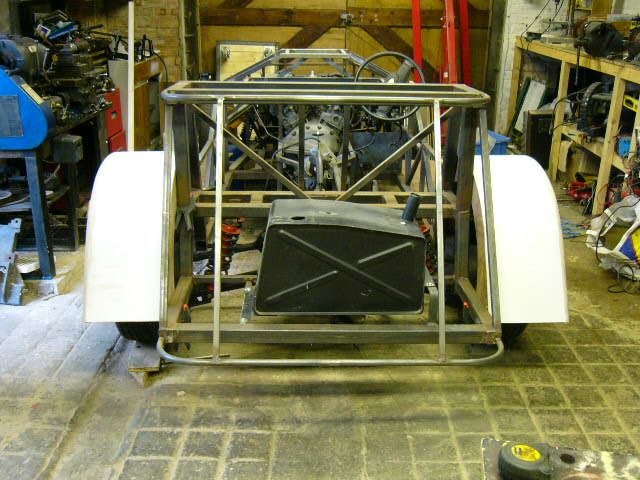 Another view of the offside. It's a big old beast  Can't wait to get that V12 out and taken apart, more to the point I can't wait to get it running again. Can't wait to get that V12 out and taken apart, more to the point I can't wait to get it running again.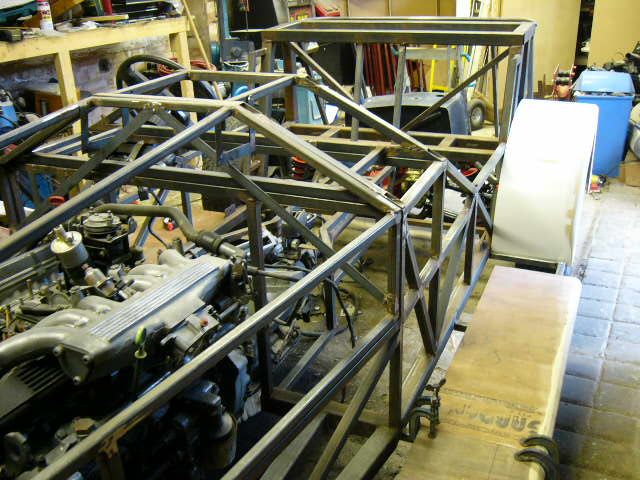 I need to get some more ply tomorrow so I can do the front wings, they will be a lot more complicated than the rears, I will most likely have to use some foam to give them shape and compound curvature. Well chuffed with the progress of the last few days, hope to continue it for a while. Dave. |
|
#3
|
|||
|
|||
|
Lots of good work going on there. Have you any idea of what it will look like when finished ? I can't help thinking it'll look a bit like a beaufort or whatever they're called.
ATB. |
|
#4
|
|||
|
|||
|
It will look a little bit Beauford like but my inspiration came mainly from an old Singer that I saw at a car show once. Not even sure of the name of the model but I liked the styling of the running boards and arches. Looking at the front it will look a bit like a 1920's Rolls Royce. It will most certainly confuse people as it will be unique and it will be much quicker than it's appearance would suggest
 It has been designed to allow the fitting of twin turbos if I discover that the 300 standard BHP is simply not enough. I intend the interior to look quite plush with a polished wood dash housing the original Jaguar instruments. |
|
#5
|
|||
|
|||
|
Land Rover fuel tank! Ingenious!
My dad has a land rover, I wonder if he'd notice... Also, love the idea of making your own arches, I'm waiting on the right mood before I cut-and-shut the locost nosecone I have. |
|
#6
|
|||
|
|||
|
Have just been in the garage making the front wheel arches. I had done one version but they looked orrible so I have scrapped them and have started a second pair. I wanted to cover the front suspension with wheel arch to get around IVA issues of external projections but I just could not get it to look right. I am now getting round the projections by making the front wheel arch support and headlight support bracket so that the 100mm test sphere can not contact the upper wishbone mounts etc. That'll do it
 Oscar, I don't think your Dad will notice that you have nicked his fuel tank if you hide the rest of the car. If you have a Brother you may like to blame him, that's what I used to do with mine. I actually came up with the idea by pure accident, while trying to save a few quid. Saw it at a car boot sale and thought it would work. Don't think the V12 will take long to go through the 10 gallons the tank holds though. some piccies: 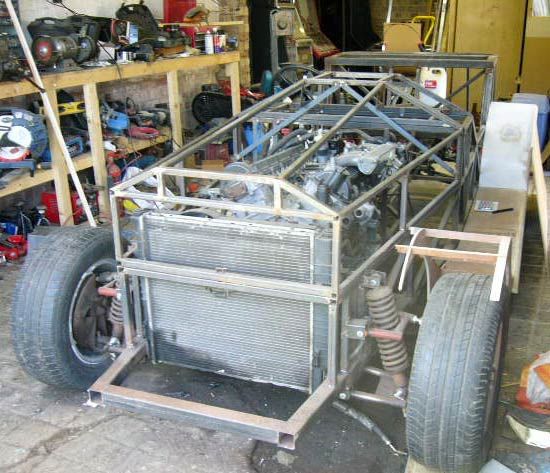 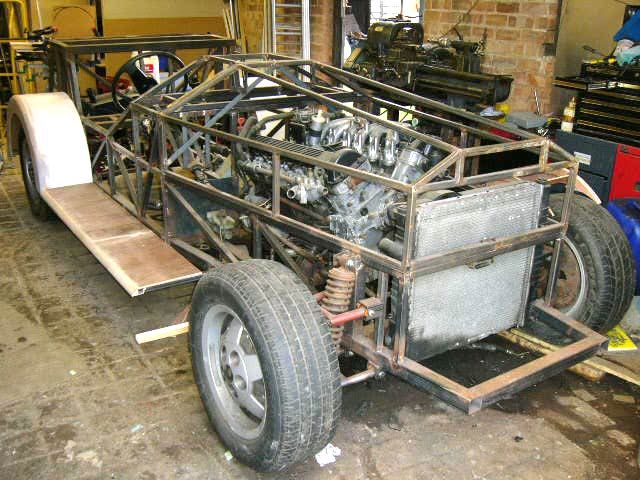 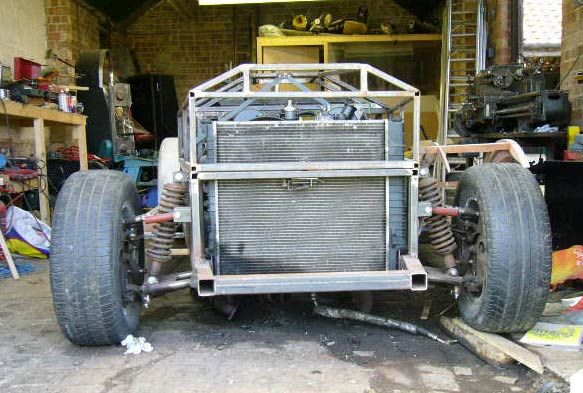 Hopefully from those you can start to get an idea of what the finished article will look like. Dave. |
|
#7
|
|||
|
|||
|
Oh man ! That thing is mental. It looks a bit like that old fashioned car built in Devon called Brutus that was on top gear. Definatley won't loose that baby in Tesco car park ! Lol. Excellent work Enoch, it's nice to be able to put a picture to the project.
 |
 |
| Thread Tools | |
| Display Modes | |
|
|