 |
|
#11
|
||||
|
||||
|
Looked yellow to me in the first pic on first look...
TT
__________________
You only get a woosh with a dump valve Build Thread Man Cave Mantiques Cecil Street Auto Repairs Garage Carlisle Build Cost £4181.65 - Last - Wheel Cylinders |
|
#12
|
|||
|
|||
|
Quote:
 awesome job mate, keep it up ! awesome job mate, keep it up ! |
|
#13
|
||||
|
||||
|
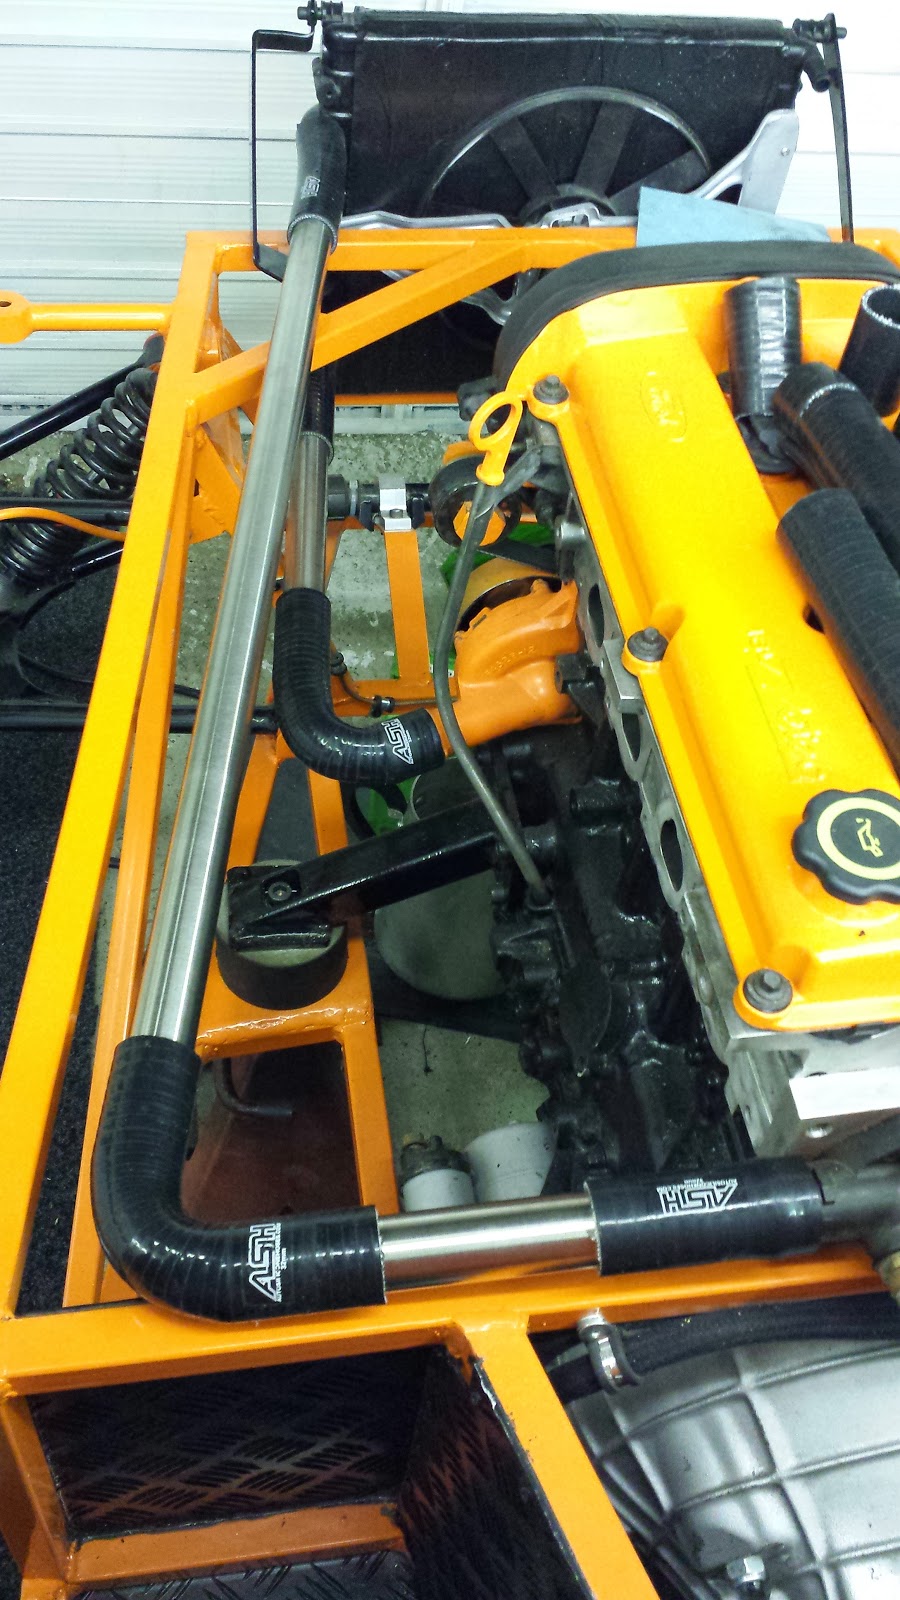
It looks a different colour on every picture and different again in real life! Its RAL2009 if that helps.
We managed to start the water plumbing last night as we finally received the silicon hose.   Need to make some kind of supports for the pipes yet and get the header tank plumbed in too. |
|
#14
|
|||
|
|||
|
Fantastic looking build!
Also, very impressive progress for only 2 posts  Looks likle the 2 of you are storming ahead with consistent progress, I will be keeping an interested eye on this. |
|
#15
|
|||
|
|||
|
Yeronge !
 Make sure the pipes have sort of flange on them or they blow off under pressure.
__________________
Cost : Little as possible. Thanks : To those who by their generosity my build has progressed. Its a handmade sports car not a flaming kit car !!! If at first you dont succeed,avoid skydiving... No parachute require to freefall,only if you want to do it twice. |
|
#16
|
||||
|
||||
|
Very nice looking build Tom
 congratulations, and I'm looking forward to see what is coming. congratulations, and I'm looking forward to see what is coming. Did you make sure to use special silicone sleeves to connect your carbs to the manifold? They look to be the same kind as the hose you use for water to me. If it is so, they will not resist the fuel vapors. You need special silicone hoses, fuel resistant, which have a spacial inside layer (fluorine kind of component if I remember correctly).
__________________
Sylvain Pictures of my completed Roadster https://www.flickr.com/photos/994983...7646799525542/ Build blog: http://vouchtroadster.blogspot.se/ https://cafrazx550.blogspot.com/ |
|
#17
|
||||
|
||||
|
Looking good and your making great progress.
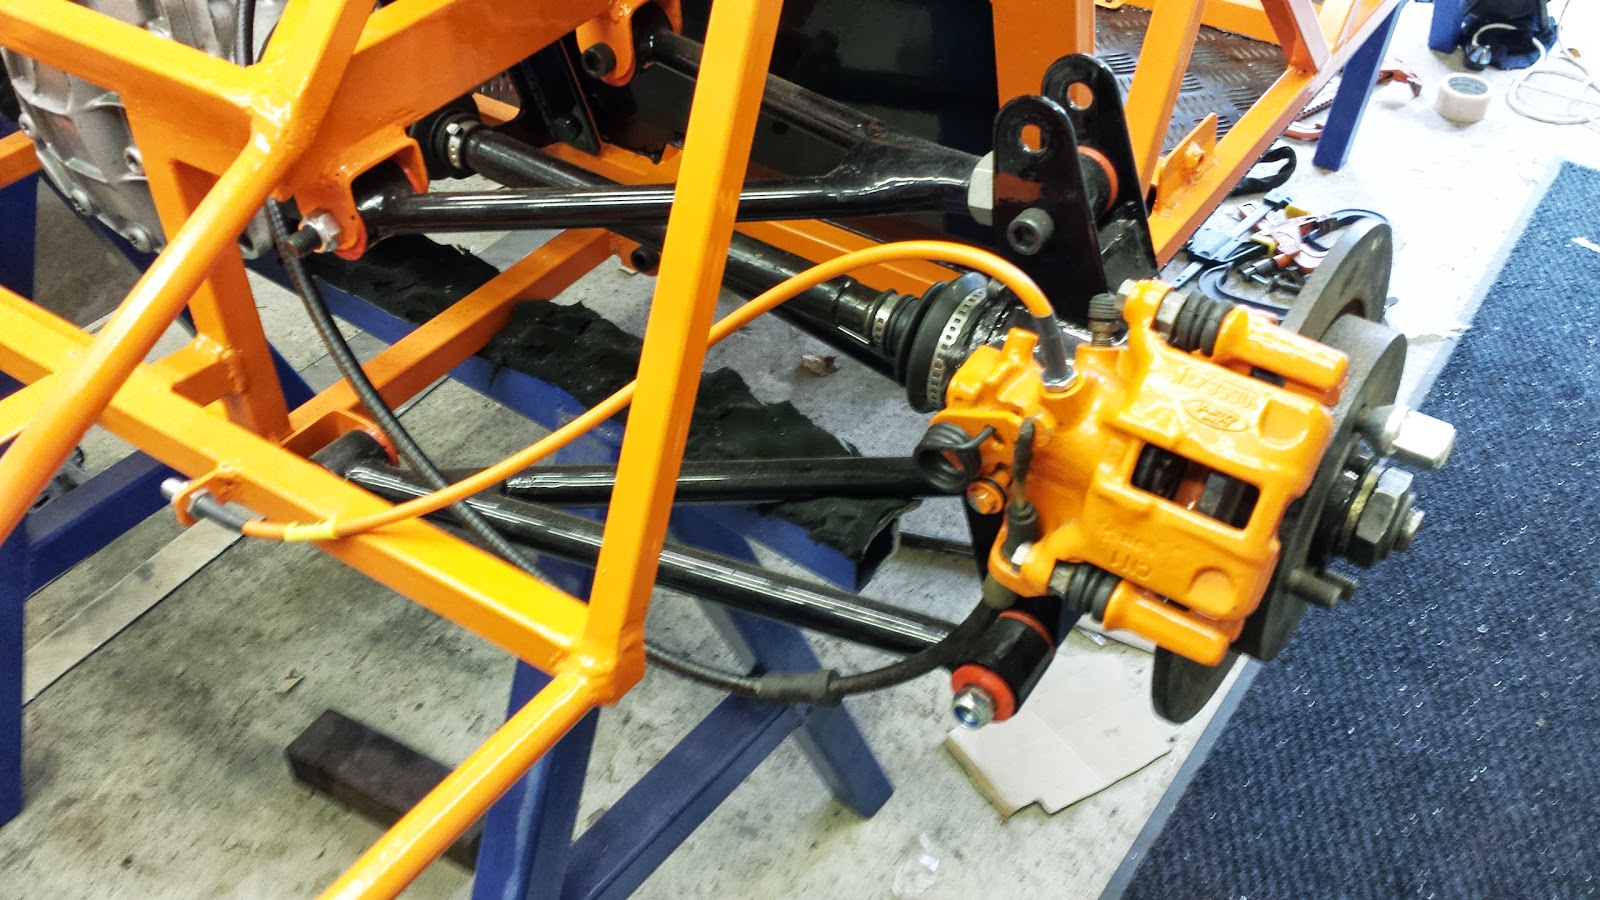
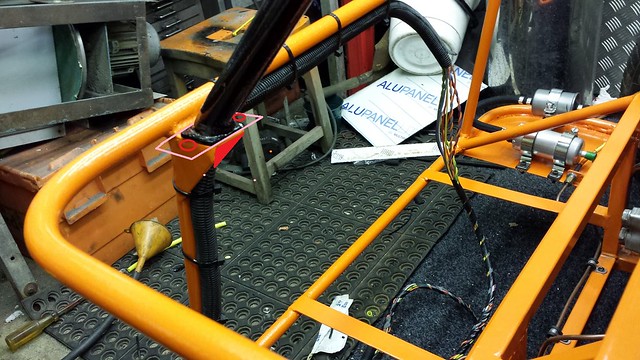
One thing I noticed is your single fixing for your roll bar stays. This was a iva fail early on for AshG so you may want to consider changing that. Also the rear brake lines are fowling the chassis, I don't know if that has been sorted since this pic.  Last edited by SeriesLandy : 6th February 2014 at 12:17 PM. |
|
#18
|
||||
|
||||
|
Quote:
Quote:
Any ideas for how to do the roll bar stays didn't realise they had to have more than one fixing we just followed the book  |
|
#19
|
||||
|
||||
|
These were Ash's fails
You could do something like this, a second bit of triangulation the other side of the upright. A wider plate at the bottom of the stay and on the tub frame to take 2 bolts. Wouldn't require that much cutting/welding and would make sure there were no problems at iva. It may have been a 1 off but I would hate to take that chance.  20131130_155954_Wilfreds Grove by Series1Landy, on Flickr Last edited by SeriesLandy : 6th February 2014 at 07:02 PM. |
|
#20
|
|||
|
|||
|
My rear stays have only one captive bolt fixing and no comment on it at IVA. It may be one of those things which is the personal preference of the tester.
|
 |
| Thread Tools | |
| Display Modes | |
|
|