
 |
|
#11
|
||||
|
||||
|
Quote:
I made a sketch that illustrates my problem. Chassis is in black, GRP panel outline in red.  SidePanelGaps par Voucht71, sur Flickr The only wrong thing on the sketch is the lower front part. On the sketch, it looks like the GRP lower edge does not touch the bottom rail after the floor stops. In reality, it does. It is quite loose, but it touches the bottom rail, certainly due to the "flexibility" of the GRP on such a length. I will try to slide a 3mm aluminium strip between BR1/BR2 and the lower edge of the GRP panel to see if it can pulls down the panel. Again, identifying where my problem lies is not my first concern, because where ever it does, I'm not going to change the chassis, and I really want to use these GRP panels as I had them done with a personalized colour, I don't have the budget, material and facility to make aluminium panels and paint them. So I need to find a way to attach them to the chassis. Thank you very much.
__________________
Sylvain Pictures of my completed Roadster https://www.flickr.com/photos/994983...7646799525542/ Build blog: http://vouchtroadster.blogspot.se/ https://cafrazx550.blogspot.com/ |
|
#12
|
|||
|
|||
|
Hi Sylvain,
please don't think that I was belittling your build, i was only suggesting a form of communication with your vendor, I didn't even know it was equinox. i must agree with you that Ben does seem to promote equinox passionately and i have often wondered if there was any form of business connection As you know i follow your build regular as i like a lot of alterations that you have made to the better, i.e. peddle box and steering rack support kindest regards Arfon |
|
#13
|
||||
|
||||
|
Absolutely no problem Arfon, what I said in my post from yesterday was absolutely not destined to you.
Thanks for the advice and the kind words 
__________________
Sylvain Pictures of my completed Roadster https://www.flickr.com/photos/994983...7646799525542/ Build blog: http://vouchtroadster.blogspot.se/ https://cafrazx550.blogspot.com/ |
|
#14
|
||||
|
||||
|
Hi Sylvain.
I wasn't belittling your project I'm sure it'll look awesome when you have finished and will be the highest of standard. The only reason I suggested the chassis could be out is the side panels come from a mould and they have fitted so well on mine. I would of made the same suggestion whether it was equinox or gilham or anyone else's bodywork. You mention 10mm gap that you have to raise the nosecone? Suggesting the panel is 10mm out at the front! This is a little more than error in the thickness of the fibreglass. Hence the suggestion that there could be an issue with the chassis. I don't know who made the chassis as I haven't read you build reports. So no need to get defensive. I haven't mentioned equinox in quite some time and this is the first in a while. Except for Robos the other day who had posted about how good the bodywork is. As I suggested you have a chat with Dave about this as he would be my first port of call before posting pictures and asking for help. Good luck with you car, sure it will all turn out fine in the end.
__________________
http://www.facebook.com/EquinoxProducts http://www.haynes.co.uk/forums/showthread.php?t=13110 - Z20LET into a Roadster http://s775.photobucket.com/user/ben...?sort=6&page=1 |
|
#15
|
||||
|
||||
|
There are a lot of contradictions in this answer Ben. I will not answer point by point, I already spent to much time on that (and you can't imagine how uneasy it is for me to answer to this kind of things and making myself clear in English which is not my mother tongue).
Just one thing : the nose cone is lying on the side panel top edges, which are, at that place, 4mm thick. So the gap is actually only 6mm, not 10mm. Which can be a fibreglass problem, but again, I never said so. If my chassis was out of 10mm at the front, I'd rather plant carrots than building a car. The measurements between the lower face of BR1/BR2 and the top face of TR1/TR2 is exactly 355mm, so there is no problem with my chassis here. 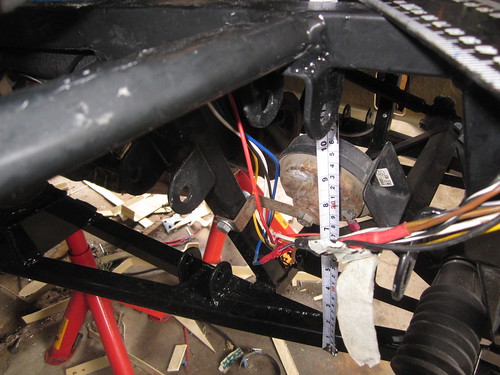 2014-06-29_09-49-12 par Voucht71, sur Flickr 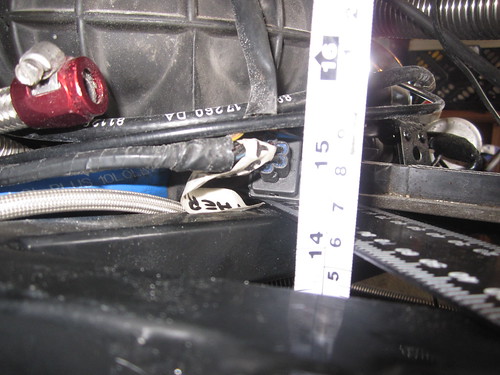 2014-06-29_09-49-27 par Voucht71, sur Flickr I checked again the measurements at the rear, and it is the same, everything is Ok on the chassis side. I have pictures of these measurements too if you want. Now that I'm proven innocent, I want to make another statement: I measured the vertical dimension of the inside of the side panel, from top edge to bottom edge. The measurements of Equinox's side panels are spot on too, nothing to say about that. So, why these gaps if my chassis is spot on, and so are the side panels? I think it is because of the shape the panel is taking when it is forced under the 3mm floor. The panel get a slight inwards curve, and I guess that's what gives these gaps.  2014-06-29_15-45-10 par Voucht71, sur Flickr So no one is to be blamed, and everyone is making a wonderful job: me, Equinox, you, the Pope and and the Queen of Denmark. And as Voltaire said: "All's for the best in the best of all possible worlds"  ... nevertheless, I still have gaps to fill!
__________________
Sylvain Pictures of my completed Roadster https://www.flickr.com/photos/994983...7646799525542/ Build blog: http://vouchtroadster.blogspot.se/ https://cafrazx550.blogspot.com/ |
|
#16
|
||||
|
||||
|
Quote:
So, unless someone sees another solution, I think that raising the nose cone of about 10mm is the only way to sort out my problem. The lower edge of the nose, under the radiator, will be solid mounted on FF1 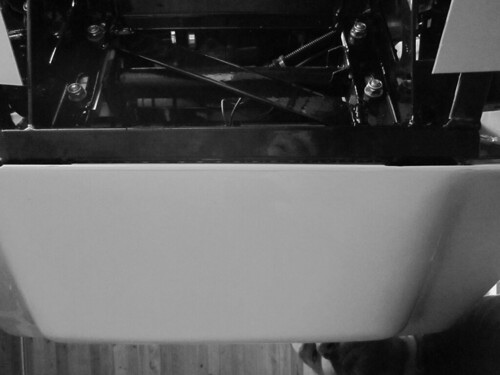 2014-06-29_18-02-42 par Voucht71, sur Flickr The front ends of the side edges are lying on the top edges of the side panels. To fill the gap between TR1/TR2 and the nose cone side edges, I plan to use a 25x10mm rubber strip. With rivnuts in TR1/TR2, the bolts will cross this rubber strip.  2014-06-29_18-03-52 par Voucht71, sur Flickr 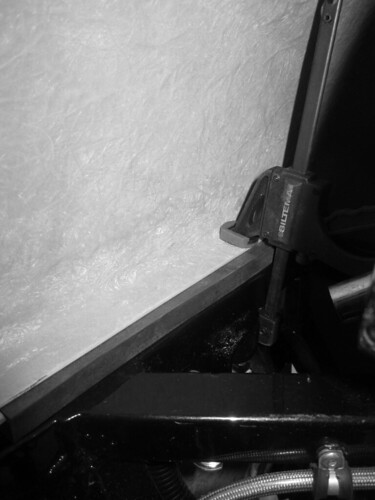 2014-06-29_15-31-51 par Voucht71, sur Flickr 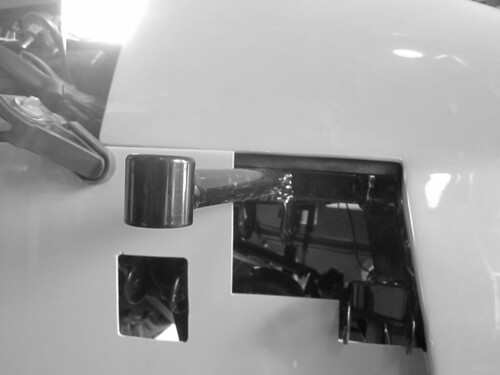 2014-06-29_15-32-18 par Voucht71, sur Flickr Will this be acceptable?
__________________
Sylvain Pictures of my completed Roadster https://www.flickr.com/photos/994983...7646799525542/ Build blog: http://vouchtroadster.blogspot.se/ https://cafrazx550.blogspot.com/ |
|
#17
|
||||
|
||||
|
New post because more the 4 pictures
To fill the gap between the top edges of the side panels, and TR1/TR2, I plan to insert 25mm strips of GRP (leftovers from timing the side panels), so, unlike the rubber strip, this will be solid. As the gap increases from 0mm at the bulkhead level, to 6mm in the font, I can put one bolt just in front of the bulkhead, one in the middle with about 4-5mm on packing material, and one at the front, under back end of the nose cone, with 6mm of packing. 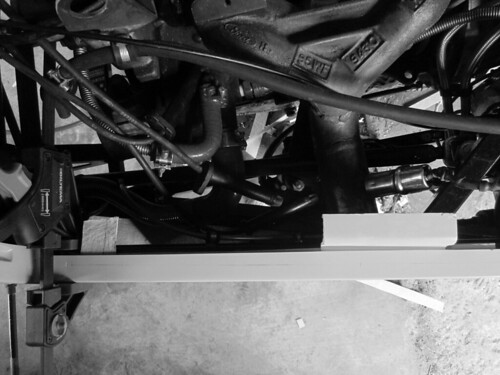 2014-06-29_16-05-34 par Voucht71, sur Flickr This makes 1 bolt every 300mm. So I can run a 25mm GRP strip on the 40 first front cm, then on top of it, another strip on the 25-30 first front cm Again, will this be acceptable? Simulating all that with rubber strips, pieces of GRP and clamps, it give something, in my opinion, looking not too bad, and everything finally fits together. But the main question: will this be strong enough? 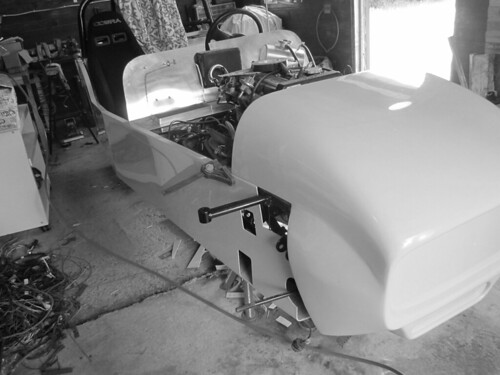 2014-06-29_15-32-45 par Voucht71, sur Flickr 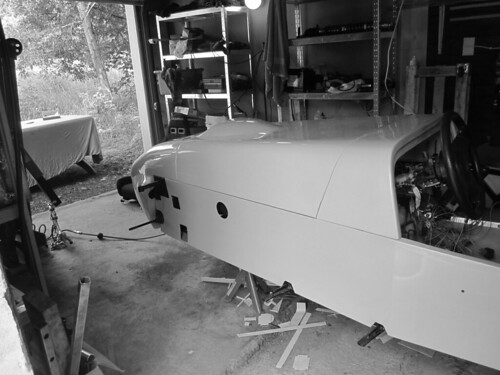 2014-06-29_16-14-54 par Voucht71, sur Flickr The lower return edges of the side panels are flush with the floor, and the front end begin very long and wide, it becomes flush with BR1/BR2 very close to the front end of the floor. I will have no problem to solidly attach these lower edges of the side panels to the chassis.  2014-06-29_17-59-44 par Voucht71, sur Flickr I'd like to have your opinion about this before going further (drilling, etc.). So, again, every comment, idea, opinion about my plan is very welcome. Thanks a lot.
__________________
Sylvain Pictures of my completed Roadster https://www.flickr.com/photos/994983...7646799525542/ Build blog: http://vouchtroadster.blogspot.se/ https://cafrazx550.blogspot.com/ |
|
#18
|
||||
|
||||
|
You seem very defensive yourself when you really don't need to be and seemed to have taken a suggestion to hurt, even tho I wasn't the only one to mention it. I'm glad both the chassis and the bodywork are fine dimension size, I was just picking up on dimensions you mentioned.
I'm also glad you seem to be finding good solutions to your issue. Think that's all that needs to be said. Good luck with the rest of your build and hope we see plenty more pictures!
__________________
http://www.facebook.com/EquinoxProducts http://www.haynes.co.uk/forums/showthread.php?t=13110 - Z20LET into a Roadster http://s775.photobucket.com/user/ben...?sort=6&page=1 |
|
#19
|
||||
|
||||
|
build looking good sylvian glad you found solutions to the issues
you saying about not being able to make yourself clear as english as not your first language made me smile a bit cause you then went on to use all the comma's and full stops in all the right places putting all the english lot to shame lol enjoying keeping up with your build Dave |
|
#20
|
|||
|
|||
|
I think your solution will work fine. The bodywork actually looks really good, world's ahead of the stuff I bought off another supplier !
|
 |
| Thread Tools | |
| Display Modes | |
|
|