 |
|
#1
|
|||
|
|||
|
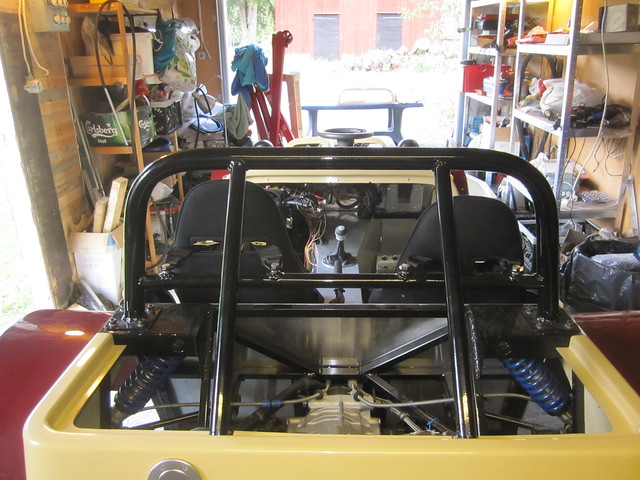
Do the seat belt anchorage tubes have to be that imperial thread or is a metric size suitable
Thanks Stephen
__________________
Slowly tipping over the edge into madness |
|
#2
|
|||
|
|||
|
7/16 unf is normal seat belt thread,use what you want as long as they go through the belt,fold bracket to make it stronger and weld plenty on to chassis
__________________
Cost : Little as possible. Thanks : To those who by their generosity my build has progressed. Its a handmade sports car not a flaming kit car !!! If at first you dont succeed,avoid skydiving... No parachute require to freefall,only if you want to do it twice. |
|
#3
|
|||
|
|||
|
Wha do u mean bend the bracket i was gonna make the u type bracket like the book
__________________
Slowly tipping over the edge into madness |
|
#4
|
|||
|
|||
|
I think he means like this so you're welding around the foot of an L-shaped tab... Although I decided to cut it from 5mm box section.
 Last edited by JasonL : 19th November 2015 at 08:39 PM. |
|
#5
|
|||
|
|||
|
I see well i was gonna get the 25 mm long threaded tubes and weld it to the bar then a 5 mm plate over it and weld all around that if that makes sense
Thanks
__________________
Slowly tipping over the edge into madness |
|
#6
|
|||
|
|||
|
What I did was make the actual bracket longer than book and fold the ends over in a long u shape and just weld a nut on instead of tubes.
__________________
Cost : Little as possible. Thanks : To those who by their generosity my build has progressed. Its a handmade sports car not a flaming kit car !!! If at first you dont succeed,avoid skydiving... No parachute require to freefall,only if you want to do it twice. |
|
#7
|
|||
|
|||
|
What he is trying to say is the bracket is much stronger if can spread the load along the edge of the box section and across the top face of it as well, you then weld effectively all six sides of the bracket. Just go on ebay buy some 7/16 UNF nuts drill an 11mm hole and weld it in place, a little tip grind the plating off the faces of the nuts first.
His brackets and mine look like this....  and I promised myself I was'nt going to post any thing today.
__________________
Unofficially rated No.1 supplier of fabricated Haynes Roadster parts by the workshop rat population. Direct email talonmotorfabrication@gmail.com Last edited by TalonMotorFabrication : 20th November 2015 at 08:05 AM. |
|
#8
|
|||
|
|||
|
Thanks guys
__________________
Slowly tipping over the edge into madness |
|
#9
|
||||
|
||||
|
Quote:
 2014-08-23_15-51-08 by Sylvain ROIG, sur Flickr 2014-08-23_15-51-08 by Sylvain ROIG, sur FlickrHope this will help 
__________________
Sylvain Pictures of my completed Roadster https://www.flickr.com/photos/994983...7646799525542/ Build blog: http://vouchtroadster.blogspot.se/ https://cafrazx550.blogspot.com/ Last edited by voucht : 20th November 2015 at 09:09 AM. |
|
#10
|
|||
|
|||
|
That is exactly what "He" meant,Ta.
And put the bolt through plate and nut to center it before welding it.....
__________________
Cost : Little as possible. Thanks : To those who by their generosity my build has progressed. Its a handmade sports car not a flaming kit car !!! If at first you dont succeed,avoid skydiving... No parachute require to freefall,only if you want to do it twice. |
 |
| Thread Tools | |
| Display Modes | |
|
|