 |
|
#1
|
|||
|
|||
|
Ok I know I am ways away yet but trying to plan ahead I am going to use a steel floor
I was thinking 1 mm thick reason is mostly cost. 2mm Ali is nearly £100 a sheet here I don't want to weld as I am worried about it looking like the ocean waves when finished , so I was thinking about riveting it that way I could use galvanized steel . Would I require any special rivets ?
__________________
My build diary is at http://thailoz.wordpress.com/ |
|
#2
|
||||
|
||||
|
I just used normal rivets with my Ali floor.
But I would recommend using something like Sikaflex or Tigerseal. It would probably do the job on it's own! TT
__________________
You only get a woosh with a dump valve Build Thread Man Cave Mantiques Cecil Street Auto Repairs Garage Carlisle Build Cost £4181.65 - Last - Wheel Cylinders |
|
#3
|
||||
|
||||
|
I would not use 1mm for the floor as by the time you have stepped on the section in front of the seats a few times you will end up with a nice bowl shape. I would go with 1.6mm and make it a one piece job with a cut out for the bellhousing as it's the only thing that ties one side of the chassis to the other.
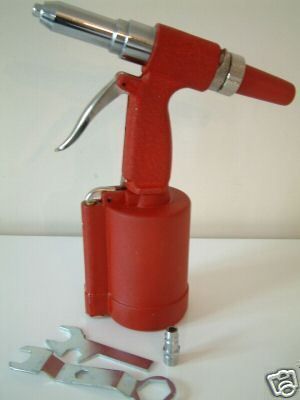
Remember to use stainless 4mm or 5mm rivets with mild steel every 50mm -75mm, if you use ali rivets they will react with the mild when they get wet, and theres no such thing as using too much stickerflex/tigerseal. If you can stretch to it these will make short work of of it to...  
__________________
Website http://www.talonmotorfabrication.co.uk/ Direct email phil@talonmotorfabrication.co.uk talonmotorfabrication@gmail.com Mobile office hours 07514098334 |
|
#4
|
||||
|
||||
|
I used a Lazy riviter and it was easy work.
TT
__________________
You only get a woosh with a dump valve Build Thread Man Cave Mantiques Cecil Street Auto Repairs Garage Carlisle Build Cost £4181.65 - Last - Wheel Cylinders |
|
#5
|
|||
|
|||
|
I went 2mm steel floor and welded it all around in sections. It has a slight ripple but nothing too bad. Tbh i prefer to have the extra strength
 you can see how it dips in a little. you can see how it dips in a little.  |
|
#6
|
|||
|
|||
|
Thanks guys good advise
Phil with regards to the Front frame am I correct in saying you cut ff2 at 13 degrees then weld together once in the jig to keep the faces at 90 degrees
__________________
My build diary is at http://thailoz.wordpress.com/ |
|
#7
|
||||
|
||||
|
Yes the angles are 13' at the top of FF2 and FF3 with the outer sides 90' to the base of your jig. If you screw/weld two perfect 90' cubes to your jig then clamp FF2 + FF3 to them this will help later when you come to fit your top suspension brackets.
__________________
Website http://www.talonmotorfabrication.co.uk/ Direct email phil@talonmotorfabrication.co.uk talonmotorfabrication@gmail.com Mobile office hours 07514098334 |
|
#8
|
|||
|
|||
|
thanks again I will give the a try
__________________
My build diary is at http://thailoz.wordpress.com/ |
|
#9
|
||||
|
||||
|
You may also consider using sealed rivets as these don't let water into the box section
__________________
17.07.10 "Now i know the meaning of life" My Build pics http://www.flickr.com/photos/67605695@N04/ http://www.flickr.com/photos/97412063@N08/ |
 |
| Thread Tools | |
| Display Modes | |
|
|