
|
|
|
|
#1
 19th April 2011, 01:25 PM
|
||||
|
||||
|
Yo peeps....just a wee update....finally can say my Wishbones are complete and will be put to one side now while I try to get back to fitting some cp components to the chassis and try to head towards the fully welding stage.
here are the finished items   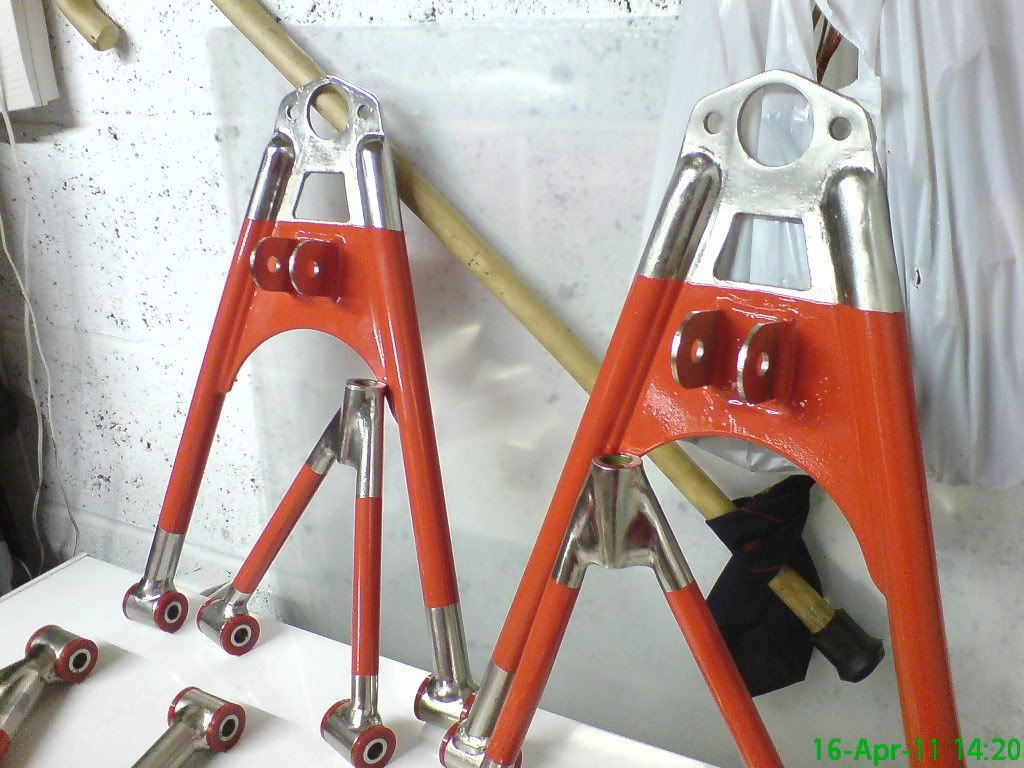 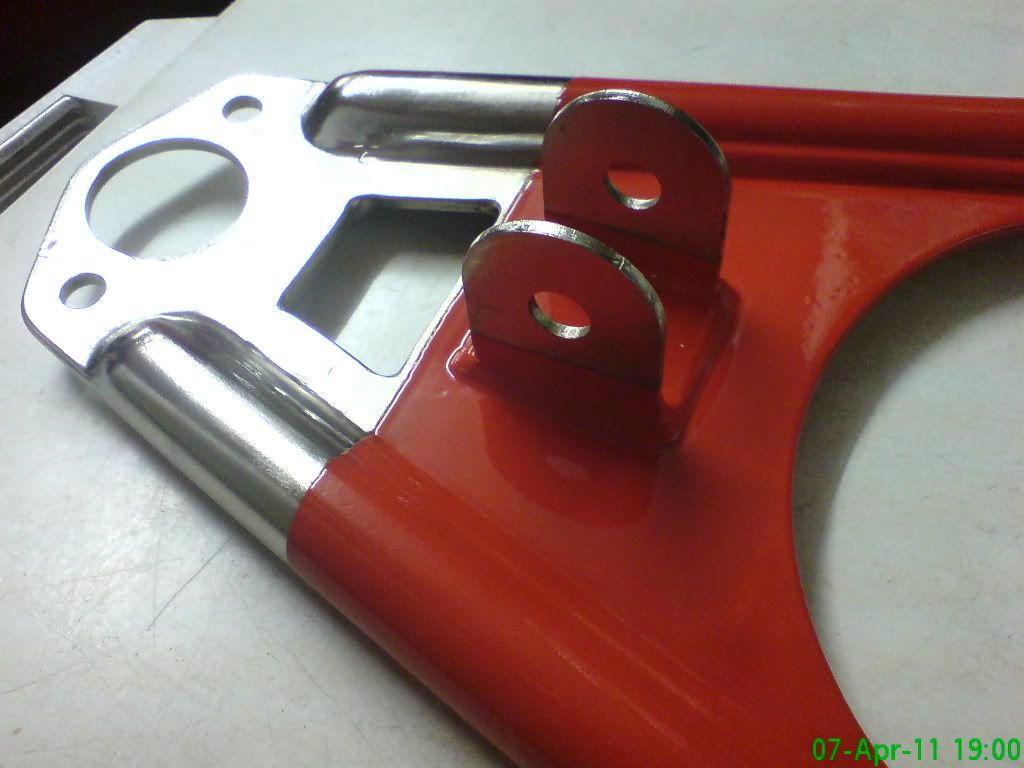 
|
|
#2
19th April 2011, 02:26 PM
|
|||
|
|||
|
Those are stunning! Amazing work. Sooooo the big question is are you going to do the same kind of thing with the chassis? heh
|
|
#3
19th April 2011, 03:02 PM
|
||||
|
||||
|
Not quite
 ......however I do have a few ideas in general that will probably raise a few eyebrows tacky things like a clear cover for the cam sprocket cover along with a nice set of red verniers..... I do believe there was one on driftworks that would have fitted your RB I'll have to make mine as I don't think they did the CA18DET I do have a very interesting side pipe dating from the seventies and the exhaust will be unusual as well ......however I do have a few ideas in general that will probably raise a few eyebrows tacky things like a clear cover for the cam sprocket cover along with a nice set of red verniers..... I do believe there was one on driftworks that would have fitted your RB I'll have to make mine as I don't think they did the CA18DET I do have a very interesting side pipe dating from the seventies and the exhaust will be unusual as well")
|
|
#4
19th April 2011, 03:17 PM
|
|||
|
|||
|
Cool i know the ones.
Nice to see another Driftworks guy here. Been on that forum for ages now think i first started posting in 2006 lol then did a username change as my car changed.
|
|
#5
10th May 2011, 01:45 PM
|
||||
|
||||
|
Reached an important milestone yesterday.....after fully welding everything that was weldable while the chassis was clamped to the table. The big moment came ......releasing the clamps....would it twang, bong, jump, jiggle
.......big fat NOWT.....not a bluddy thing....bit of an anti climax....but a nice one, so I now have a nice straight chassis just a few cp plates to go yet and welding up the suspension brackets ....nearly forgot Handy.....I still have not done the air steering yet.....will sort it out just for you mate
|
|
#6
15th July 2011, 02:16 AM
|
||||
|
||||
|
Been a bit of a go slow lately.....this time of year I have to dabble with my other passion....my garden, but just recently I decided it was time to start getting some of the refurb work done, so I started with the hubs (easiest thing to get off the sierra first.
So we start with this   Having checked for ANY play in the bearings both on and off the car, I concluded that the bearings were fine and would leave alone, so the dust cap stayed in place until the de-rust was complete. I had bought some washing soda to do the electrolysis doofa .....but on having a good inspection of the hubs the rust was in its first stages of flaking so I decided to go at it with a hammer and old screwdriver and it came off very easily....about an hour saw the heavy stuff, off now out came the 3 dremels with different grindstones in them to get in all the nooks and crannies, another hour later and it looks something like this 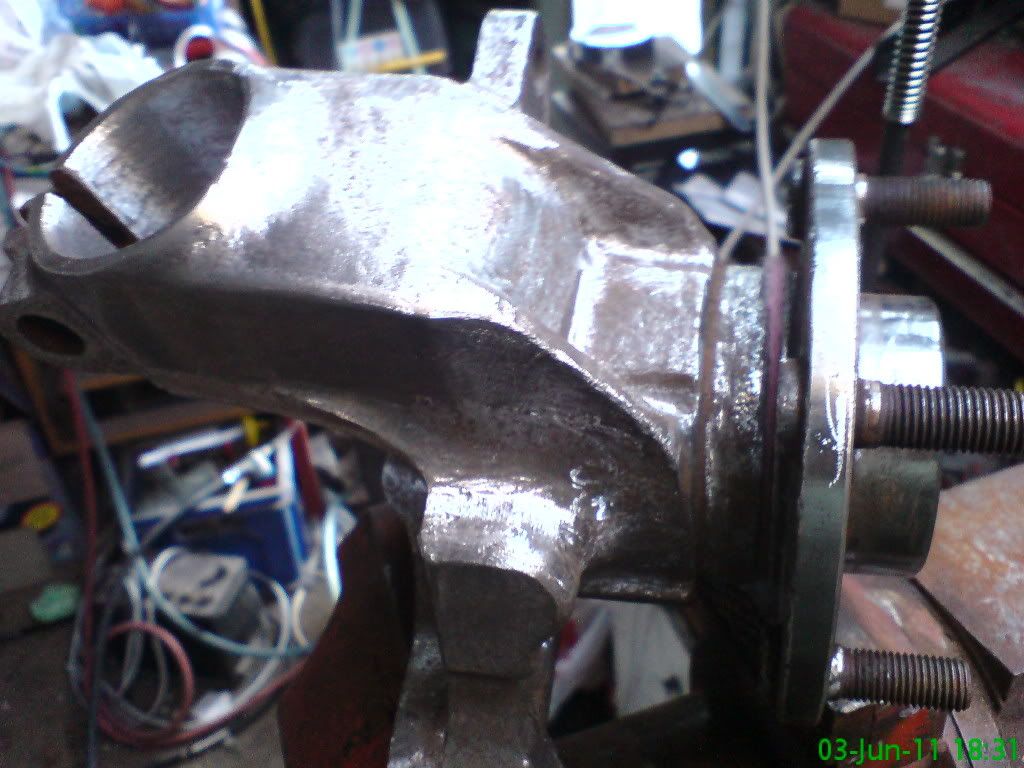 Prising the dust cap off the insides look as new as the first day they were made, the dust caps were totally fubard so I made my own replacements (see thread in another article for that) 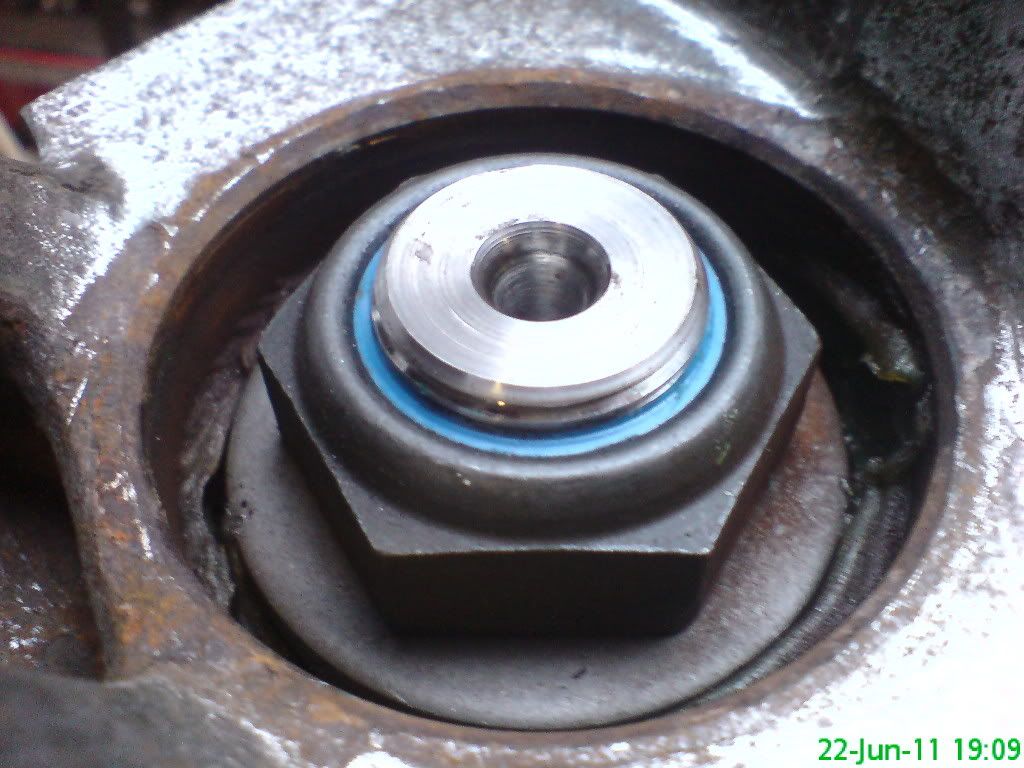
|
|
#7
15th July 2011, 02:34 AM
|
||||
|
||||
|
(This hub refurb starts on page 9)
So now the hubs were ready for a lick of hammerite smooth in silver more on those later. Now turned my attention to the discs, they werre well within the wear limit indicated by two flats(vented discs) on the outside edge of the discs job for the lathe I deem so here is the before 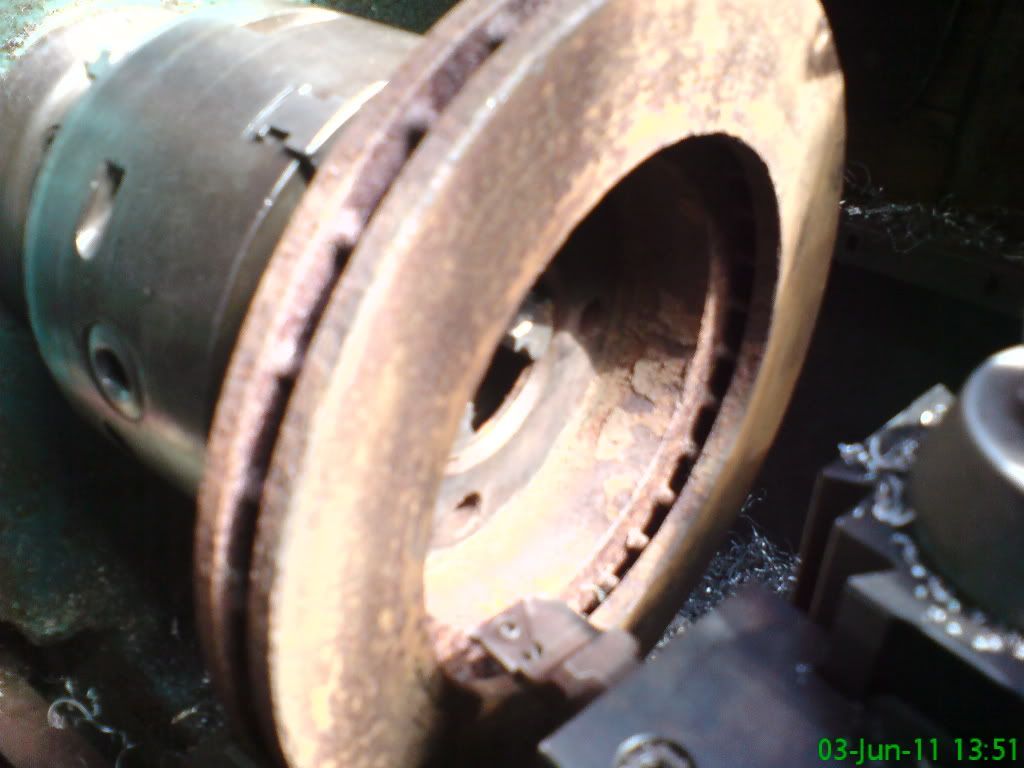  This time the rust was not so deep so all I need to do was to to skim them, got a good reading with the dti then proceeded to shave them just back to good metal...now apart from the edge which will be blasted they look as good as new 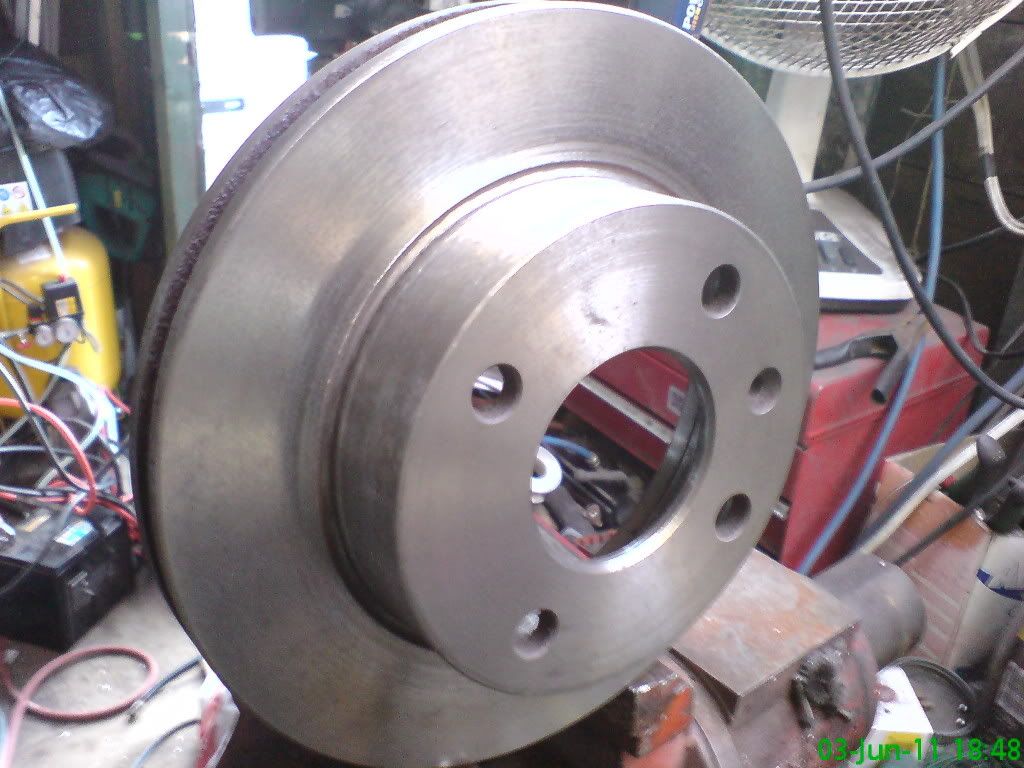 Going back to the hub carrier I mixed up 50/50 hammerite smooth with celly thinners and gave it a good 4-5 thickish coats(old dust caps lightly pressed in to keep the paint out) I will be giving them a coat of clear lacquer when all back together .....so now here is the before and after shot 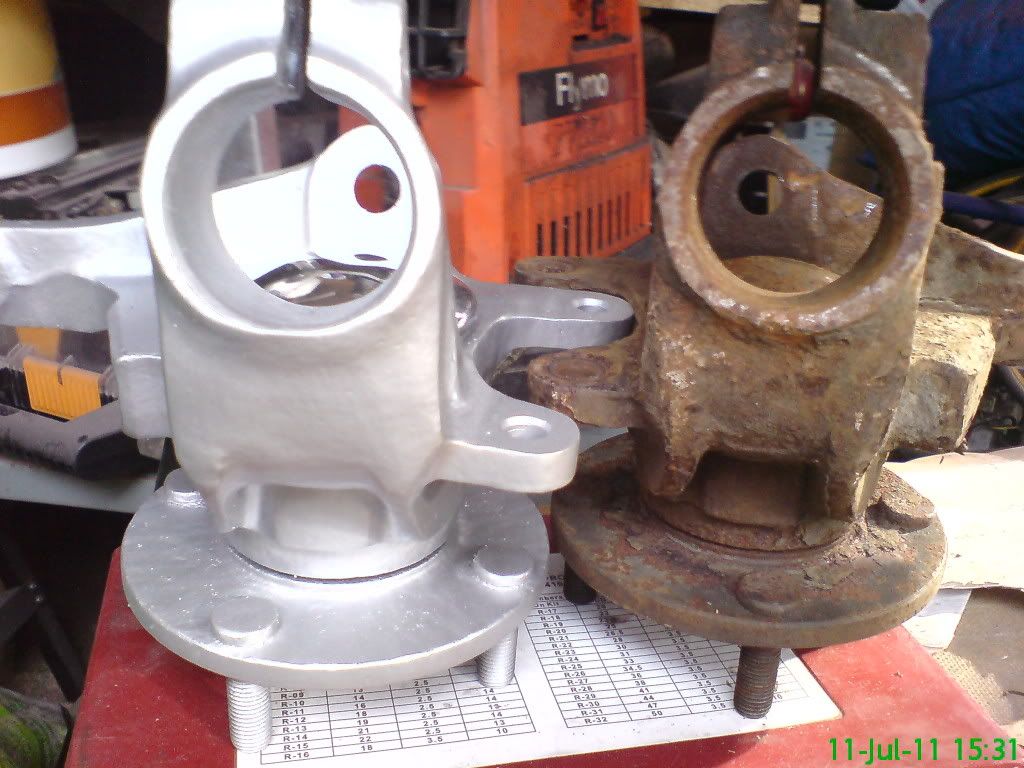 Last edited by K4KEV : 15th July 2011 at 03:05 AM.
|
 |
| Thread Tools | |
| Display Modes | |
|
|


 Hybrid Mode
