
|
|
|
|
#1
 20th July 2011, 01:06 AM
|
||||
|
||||
|
I'm using a 25 amp boost charger at the mo and it is a little overkill on the small parts I am doing, however a 50 minute session gets a good depth of ano....your average 4-6 amp charger will do it in 4-6 hrs .....easiest way to do it is trial and error,,,,although if you needed some No's just ask...and I know red does it for you Ronnie
 
|
|
#3
20th July 2011, 10:25 AM
|
||||
|
||||
|
Hi Ricky....all details on how I did the nickel plating here
http://www.haynes.co.uk/forums/showt...nickel+plating
|
|
#6
20th July 2011, 01:17 PM
|
||||
|
||||
|
Hi Rick....Anodising is a lot easier... Sulphuric Acid is your electrolyte AAA always add acid to de-ionised or distilled water I used battery acid at around 15-20 percent with water ....start with lower value.... battery acid is already diluted as is
the aluminium is your anode and lead sheeting (same or more surface area as anode) as the cathode. use a largish container as your bath...I use around 2litres.... aluminium rods and wire are my hangers/conductors if it is new aluminium make sure it is very very clean (polished or not ) I use acetone as a final clean before anodising ....when finished, it will look slightly dull ...take out and clean with de ionised or distilled water then put in a dye bath (I use commercially available dye)... leave in for however long you want or whatever depth of colour you want which is a trial and error thing.... then you put in a pan of hot water on the simmer to seal the anodised layer again it is down to preference but I often use a small steam cleaner to seal. by the way you must not let the anodising bath get too hot because that will self seal before colouring stage I would say less than hand hot.... less than 50 C'. If it is an already anodised part then you have to suspend item in a bath of caustic soda (which is fun to watch as it is vigorous and quick) to remove the original anodised layer then prep as above.....think I have covered everthing there ... google DIY anodising ....there are lots of informative sites.
|
|
#8
27th July 2011, 01:16 PM
|
||||
|
||||
|
fancied doing something different to keep up my interest so I'm embarking on the task of making my own ally fuel tank.
I have always thought the book tank was way to small so at the expense of "boot" space I have decided to make my tank in a shape that utilises the area above the diff as well.....I have also decided on 3mm aluminium which might seem overkill but I believe that in a rear end collision it is far more likely to deform rather than rupture and that in its self should create a kind of crumple zone which adds further peace of mind it will have two internal baffles to keep "slosh" down to a minimum and either a sump or swirl pot in the base to cater for fuel injection, capacity is 57.5 litres might yet add a little more to the top to bring it up to 60 not sure yet Going to do this in my usual methodical way which to to make a cardboard mock up and when I am satisfied with that I will make a template then a sheet metal folder to initiate the construction proper....so for now here is the mock up in cardboard ...it needs a wee bit of fettling yet if any one is interested I might be making some more but they wont be cheap due to the amount of work involved and the fact that they are 3mm thick 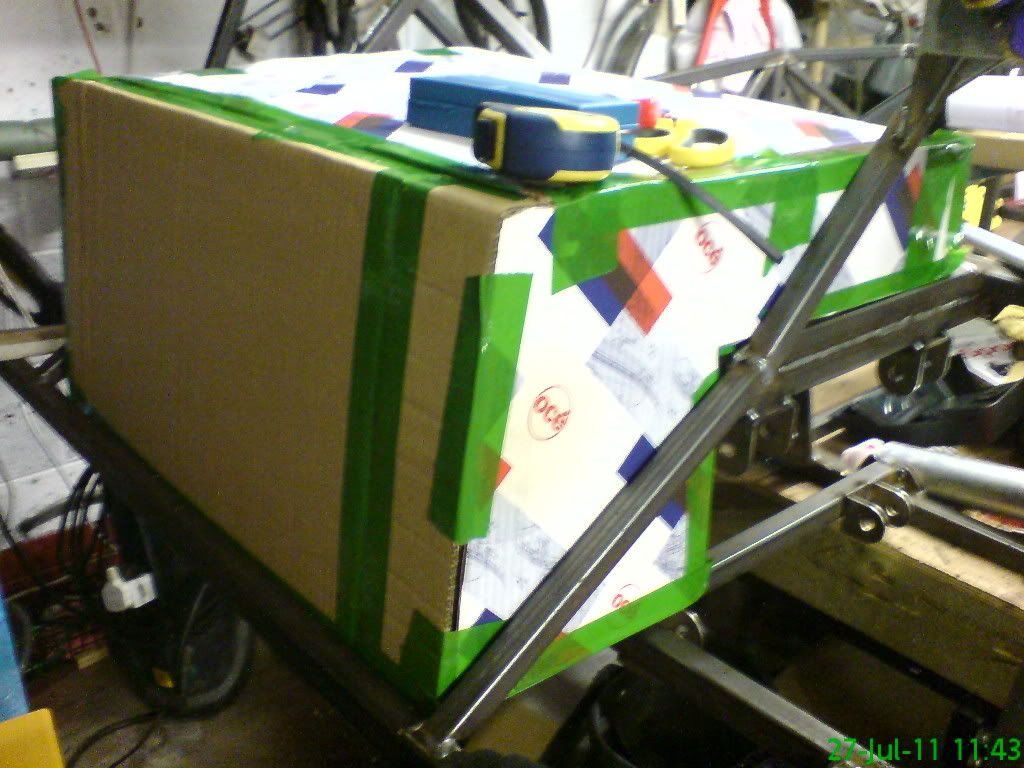 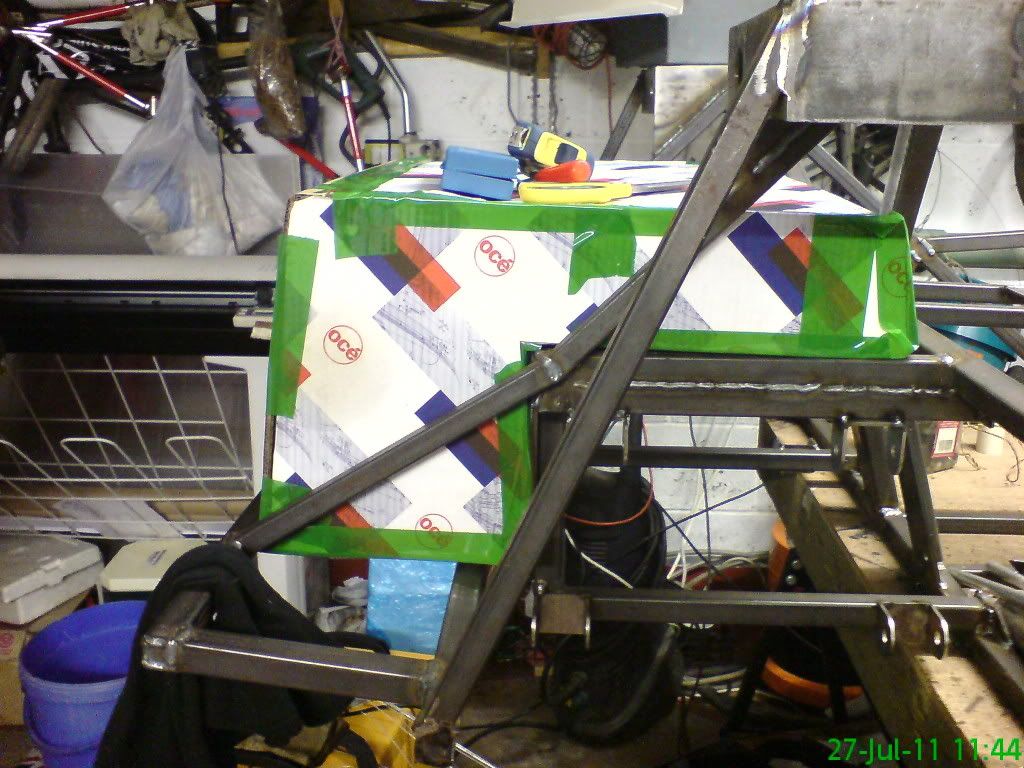 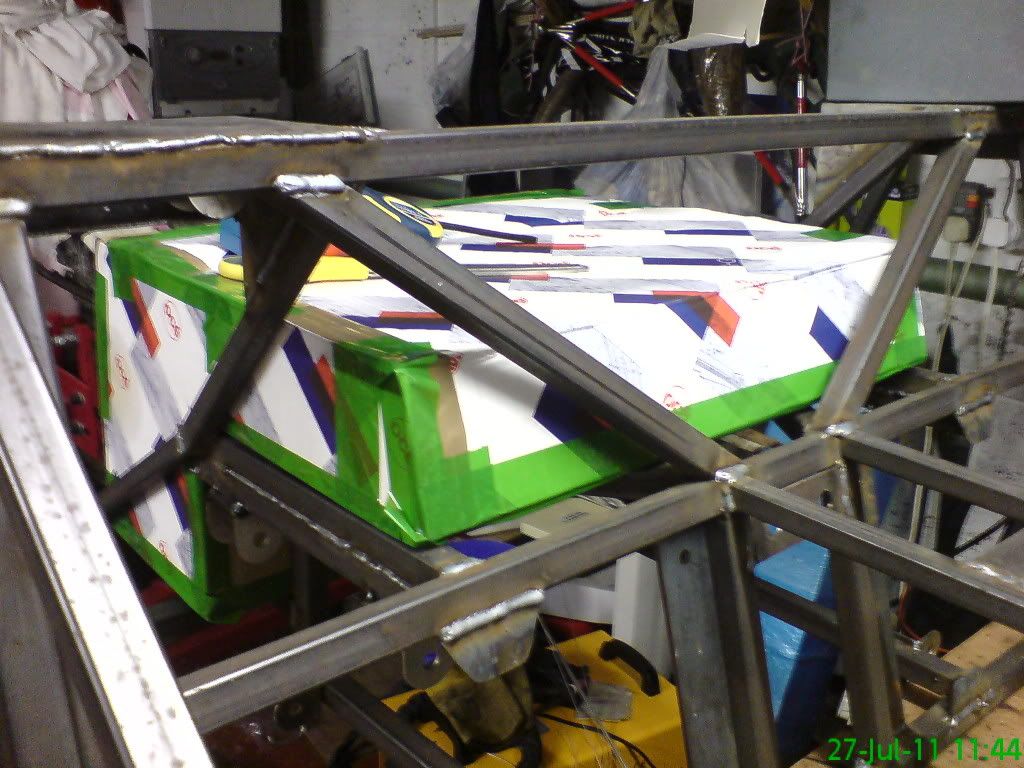
|
|
#9
27th July 2011, 01:46 PM
|
|||
|
|||
|
Would the extra weight of the fuel change the handling dynamics of the car?
__________________
Building an MX5 based Haynes Roadster using a free donor! Build Cost - £10.79 (the 'Book') Build Sales - £170.78 (unwanted donor parts on ebay)
|
|
#10
28th July 2012, 07:14 PM
|
|||
|
|||
|
Quote:
Bob
__________________
When The Results Disagree With The Theory: Believe The Results And Invent A New Theory If I had two brains I,d still be a halfwit The cave http://s1116.photobucket.com/user/my...deshow/mancave The build http://www.haynes.co.uk/forums/showthread.php?t=12669
|
 |
| Thread Tools | |
| Display Modes | |
|
|


 Hybrid Mode
