
|
|
|
|
#1
 4th February 2013, 09:30 PM
|
||||
|
||||
|
Thanks guys appreciate the support...
 I guess some of us go through a bad patch at some point...
__________________
Any intelligent fool can make things bigger and more complex... It takes a touch of genius - and a lot of courage to move in the opposite direction. Albert Einstein http://s1199.photobucket.com/albums/aa472/JohnoSS1/ Johno 
|
|
#2
5th February 2013, 05:17 PM
|
|||
|
|||
|
Great to see you back at it !! Missed my morning read
Cheers Nigel
|
|
#3
10th February 2013, 07:05 PM
|
||||
|
||||
|
Hi all,
Well I've got going on the car again at last and decided to finish a few things off before starting new stuff. 1, Managed to finish installing my Aero catches at last, just needs fine tuning when I rebuild the car after mock up. 2, Nosecone bolted in place. 3, Steering column/brake pedal cover finished. I redisgned my dashboard after some head scratching. I removed the the lower part of my dash where it meets the transmission tunnel and welded it to the underside cover panel instead. I've also moved it forward to give the dash a more broken up feel. 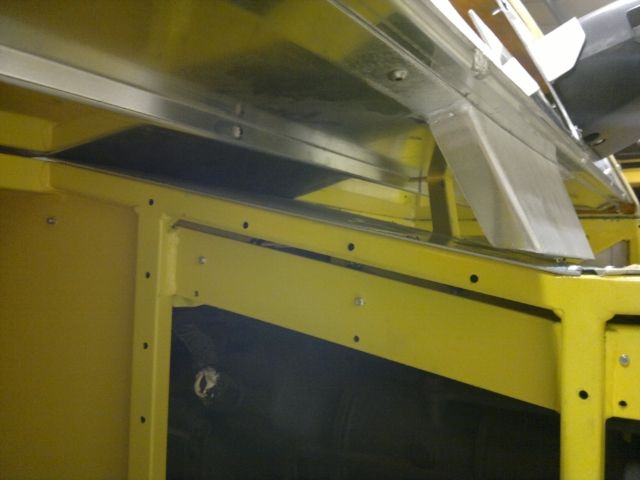 I also made an ally cover to go over my steering column bezel as there is a gap between the dash and the top plastic cover. 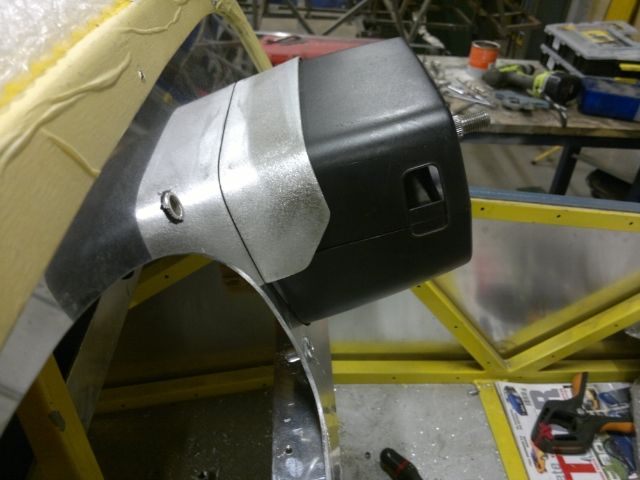 The ally panel which goes into the engine bay and under the scuttle will be a platform for me to mount most of my electical relays and ecu etc... Brackets off of this will support the various electrical items I require to be hidden up. Hopefully I will be able to remove the lower dash cover panel and scuttle to sort out any electrical problems that may arise without too much hassle. 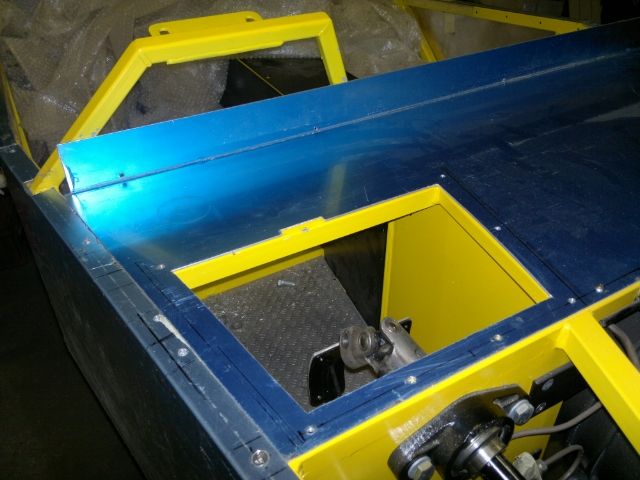 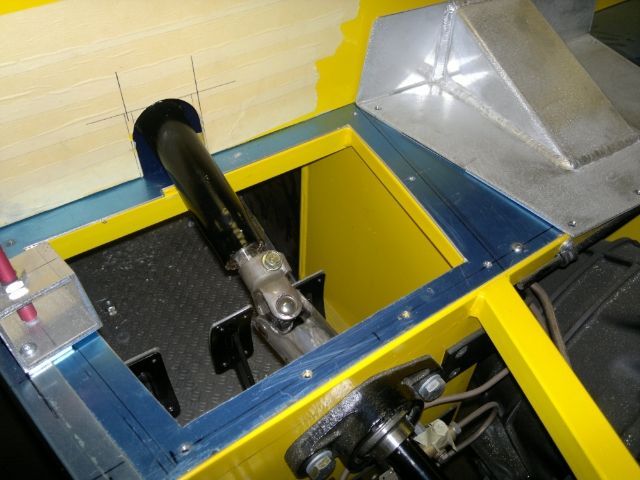 The dash I'm going to pad with foam and cover in vinyl or leatherette. Other parts will be powder coated. Next item on the list will be seat mounting and rear panel mounting.....
__________________
Any intelligent fool can make things bigger and more complex... It takes a touch of genius - and a lot of courage to move in the opposite direction. Albert Einstein http://s1199.photobucket.com/albums/aa472/JohnoSS1/ Johno
|
|
#4
10th February 2013, 07:12 PM
|
||||
|
||||
|
Quote:
Well I'm back up and running..... Glad to see people ouside the UK are interested...  I've got the bug again now so more posts on the way soon.
__________________
Any intelligent fool can make things bigger and more complex... It takes a touch of genius - and a lot of courage to move in the opposite direction. Albert Einstein http://s1199.photobucket.com/albums/aa472/JohnoSS1/ Johno
|
|
#5
17th February 2013, 08:07 PM
|
||||
|
||||
|
Hi all,
Spent some time today working out how to make my wheel arch backing plates along side the seats. I've made them out of ally and they are also removable so I can get them powder coated. I'm quite happy with how they turned out..... 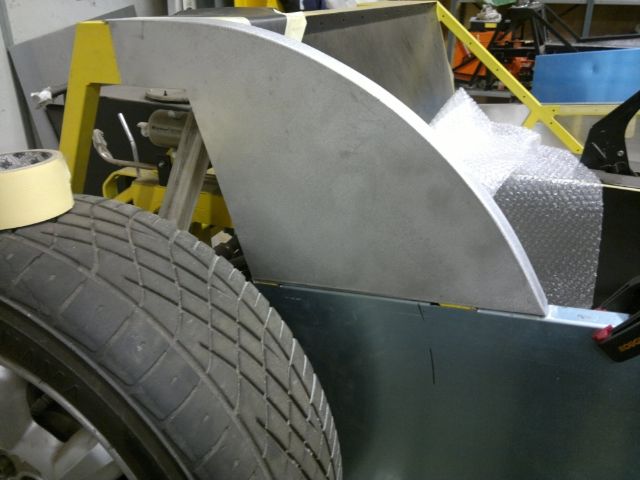 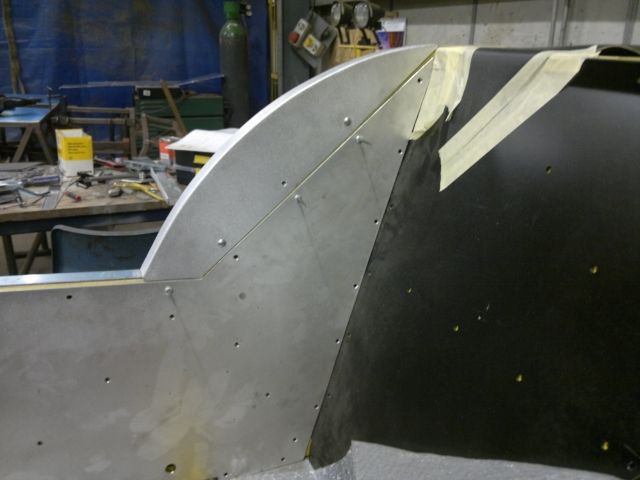 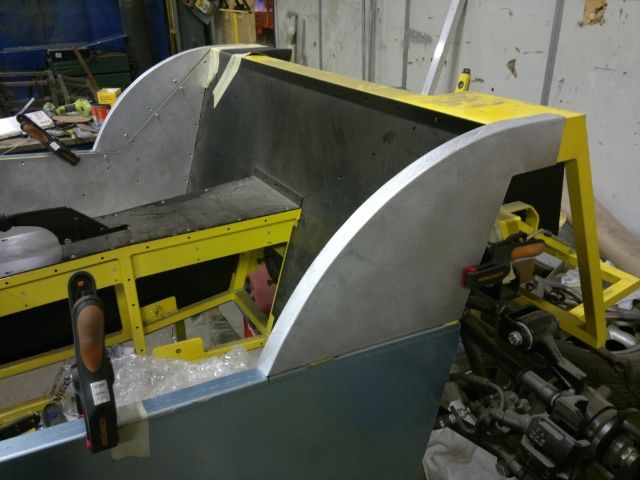 I'm hoping to fit my rear tub tomorrow night so I can see where to join the ally arches upto the fibre glass rear panel. On the AGM kit the joint is on view so it needs to be a good fit.. I also drilled holes in my lower dash for the hazard and fog light switches. Now I have moved the switches into the lower dash panel I had to make a cover to encase the back of the switches.. 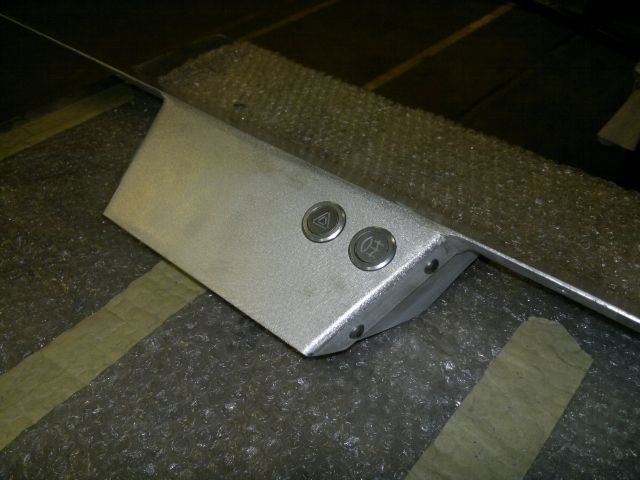 Well my goals this week are to fit rear panel, fit the seat and fit the harness. ps... I made a template of the dash cut out David and will send it this week...Ok
__________________
Any intelligent fool can make things bigger and more complex... It takes a touch of genius - and a lot of courage to move in the opposite direction. Albert Einstein http://s1199.photobucket.com/albums/aa472/JohnoSS1/ Johno
|
|
#6
17th February 2013, 11:47 PM
|
||||
|
||||
|
Your build thread always depresses me Johno, it always looks far too perfect and professional!
How on earth did you fabricate those wheel arch panels  
|
|
#7
18th February 2013, 08:11 PM
|
||||
|
||||
|
Quote:
Sorry I don't mean to depress anyone...  Trust me John it's far from perfect (I only post the good bits...). Once I figured out what to do the wheel arch panels weren't too bad to do. I jig sawed the two sides plates and fitted a spacer to keep the distance correct and then tack welded a 3mm strip to the radius on the car. The awkward part was to stop them distorting when welding, for this I made some thick steel radius plates and clamped them inbetween the two ally sides and left them in place until they cooled down a bit. I still may bugger them up yet when I try to match them to my rear panel....
__________________
Any intelligent fool can make things bigger and more complex... It takes a touch of genius - and a lot of courage to move in the opposite direction. Albert Einstein http://s1199.photobucket.com/albums/aa472/JohnoSS1/ Johno
|
|
#8
10th March 2013, 09:34 AM
|
|||
|
|||
|
Johno,
Have you thought about where you will source you aero screen from ? David
__________________
Click to see my build photos on Flikr http://www.flickr.com/photos/67112582@N03/ Saturn MX5 Based Chassis, Limited Slip Diff & 2.4 Quick Rack. Build cost.... seems to be spending more on tools than car bits at the moment! (they will be handy in the future though). Car iva'd and passed 15/08/2014. Finished weight 572kg.
|
 |
| Thread Tools | |
| Display Modes | |
|
|


 Hybrid Mode
