
|
|
#241
 15th June 2013, 06:54 PM
|
||||
|
||||
|
very nice work.
Well done
__________________
You only get a woosh with a dump valve Build Thread Man Cave Mantiques Cecil Street Auto Repairs Garage Carlisle Build Cost £4181.65 - Last - Wheel Cylinders 
|
|
#242
15th June 2013, 07:20 PM
|
||||
|
||||
|
Very cool. Love the TIG work.
I was considering my rear uppers recently too but from another angle. My handbrake cables are really close to the seat-back framework. I thought that on the roadster with MX5 uprights it would be better to mount the uprights on opposite sides so that the brakes are to the back and the handbrake cables mount at the rear. A flip of the upper wishbones with repositioned shock mounts would work but I already have my shock mounts welded in so it is in hindsight but I would look at it if I were doing them again. Cheers Stot
__________________
1.6 Mazda B6 : Garrett TBO339 : 420cc WRX Injectors : FMIC : Microsquirt V3 : LC-2 Wideband : Toyota COP : 1.8 ATB LSD Build Started Jan 2013 : OTR Aug 2014 : Still OTR June 2024
|
|
#243
16th June 2013, 12:42 PM
|
||||
|
||||
|
Thanks guys,
I thought the same about turning the uprights round at one point but like you Stot my upper shock mounts were already welded in place. The upper wishbone would have to be a strange design to accommodate the offset of the upright when turned around with the original upper shock mounting point. I made my grill for my bonnet scoop this morning.....  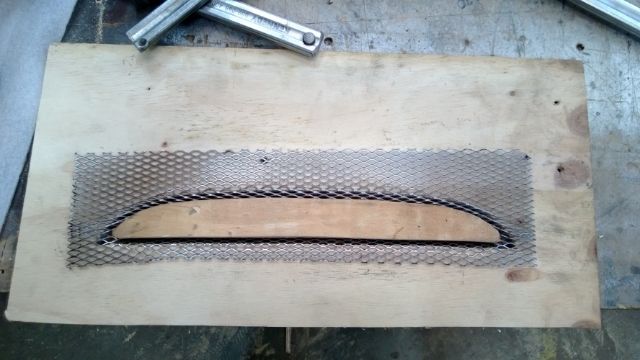 The formers were made from 12mm ply with a 5mm gap between the two. Placed the mesh in place and then clamped down with a bit of support from a bit of box. 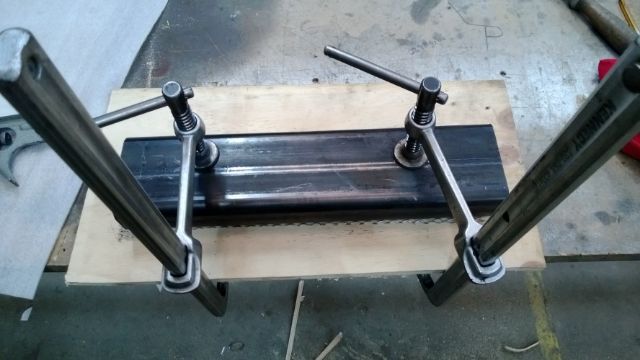 This how it tuned out, just needs trimming and a coat of paint ready for bonding in place... 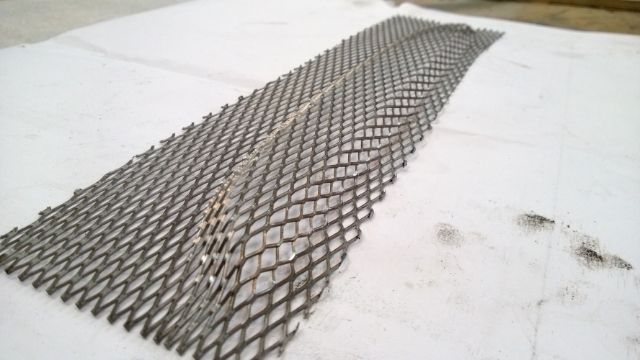
__________________
Any intelligent fool can make things bigger and more complex... It takes a touch of genius - and a lot of courage to move in the opposite direction. Albert Einstein http://s1199.photobucket.com/albums/aa472/JohnoSS1/ Johno
|
|
#245
22nd June 2013, 02:39 PM
|
|||
|
|||
|
Hats off Johno, your build is amazing ! Lol. Most of us are more than chuffed to get to the stage of a functioning roadster, but yours is better than factory quality. By the way, I love the rose joints on your wishbones, they are really trick. How do you think they are going to compare to poly bushes ?
|
|
#246
22nd June 2013, 09:55 PM
|
||||
|
||||
|
Hi all,
Well unfortunately I wasn't around when Porkchop turned up last night so didn't have the chance to have a good old chat...  I've been taking the car to bits so it looks like I'm going backwards with my build and it's covered in dust (surprising that in an engineering workshop) I really would have liked to try the aeroscreen Dave as I plan on getting one from the same place.Hi Jason, Thanks for your kind words. I'm hoping it will look a bit more complete soon if people send me the parts and other stuff back. With regards to the rose joints I believe they will be more precise to setting up the car for handling but less durable and a harsher ride. I guess time will tell.....  I plan to rubber boot the joints so I guess this will help with the durability. Well if anybody is out this way they are more than welcome to pop in and have a chat and a cuppa......
__________________
Any intelligent fool can make things bigger and more complex... It takes a touch of genius - and a lot of courage to move in the opposite direction. Albert Einstein http://s1199.photobucket.com/albums/aa472/JohnoSS1/ Johno
|
|
#247
14th July 2013, 03:15 PM
|
||||
|
||||
|
Well at last I've got some stuff done and parts delivered.
I've been spending the last few weeks collecting stuff ready to crack on with it. Just couldn't resist seeing what it looks like with the side panels rear wings on. 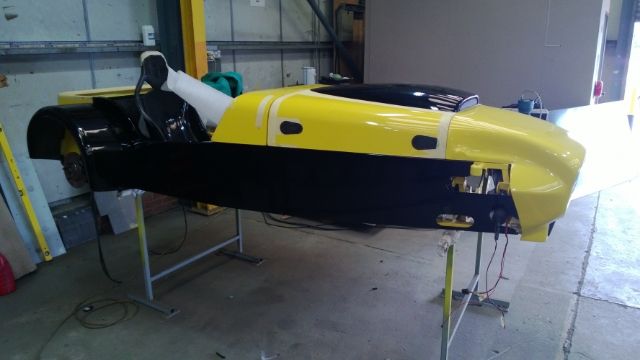 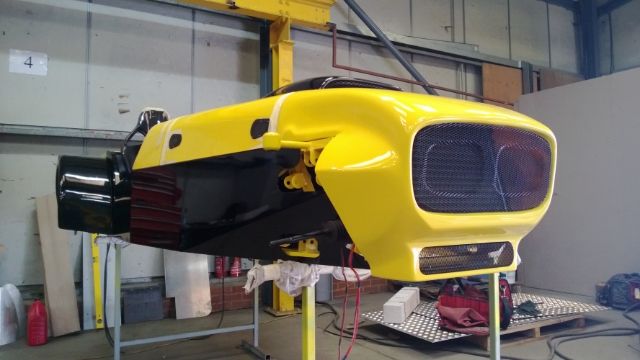 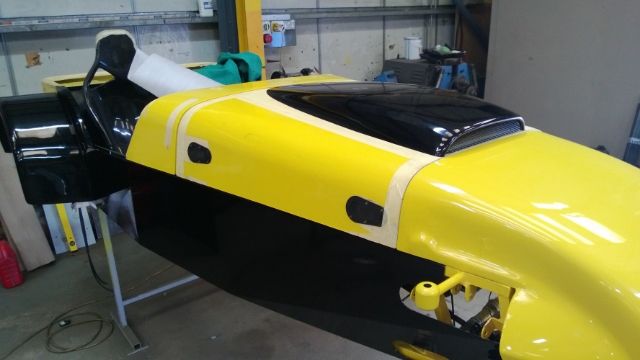 So now got loads to get on with..
__________________
Any intelligent fool can make things bigger and more complex... It takes a touch of genius - and a lot of courage to move in the opposite direction. Albert Einstein http://s1199.photobucket.com/albums/aa472/JohnoSS1/ Johno
|
|
#248
14th July 2013, 03:43 PM
|
|||
|
|||
|
Looks really nice. Where did you get your side panels from or are they powder coated alloy?
__________________
Click to see my build photos on Flikr http://www.flickr.com/photos/67112582@N03/ Saturn MX5 Based Chassis, Limited Slip Diff & 2.4 Quick Rack. Build cost.... seems to be spending more on tools than car bits at the moment! (they will be handy in the future though). Car iva'd and passed 15/08/2014. Finished weight 572kg.
|
|
#250
20th July 2013, 07:49 PM
|
||||
|
||||
|
Hi Porkchop,
Good to meet you face to face at last.... I thought I was going to be in trouble with the missus for being late back.... (she bought herself some flowers with my money of course).Hi David, yes they are powder coated. I'm close to a local powder coating firm and the price I paid for the powder coating I couldn't even buy the paint for if I was going to spray them.  I did think about carbon wrapping at one point so that's still an option for the future if the powder coat doesn't hold up.
__________________
Any intelligent fool can make things bigger and more complex... It takes a touch of genius - and a lot of courage to move in the opposite direction. Albert Einstein http://s1199.photobucket.com/albums/aa472/JohnoSS1/ Johno
|
 |
| Thread Tools | |
| Display Modes | |
|
|


 Linear Mode

